Installing Sanding Belts
5. Use the T-handle hook to pull the platen out
towards you removing it completely. There
is a hole in the end of the platen to
accommodate the hook. Turn belt tension
switch to “TIGHT” position and replace the
spacer and locking handle.
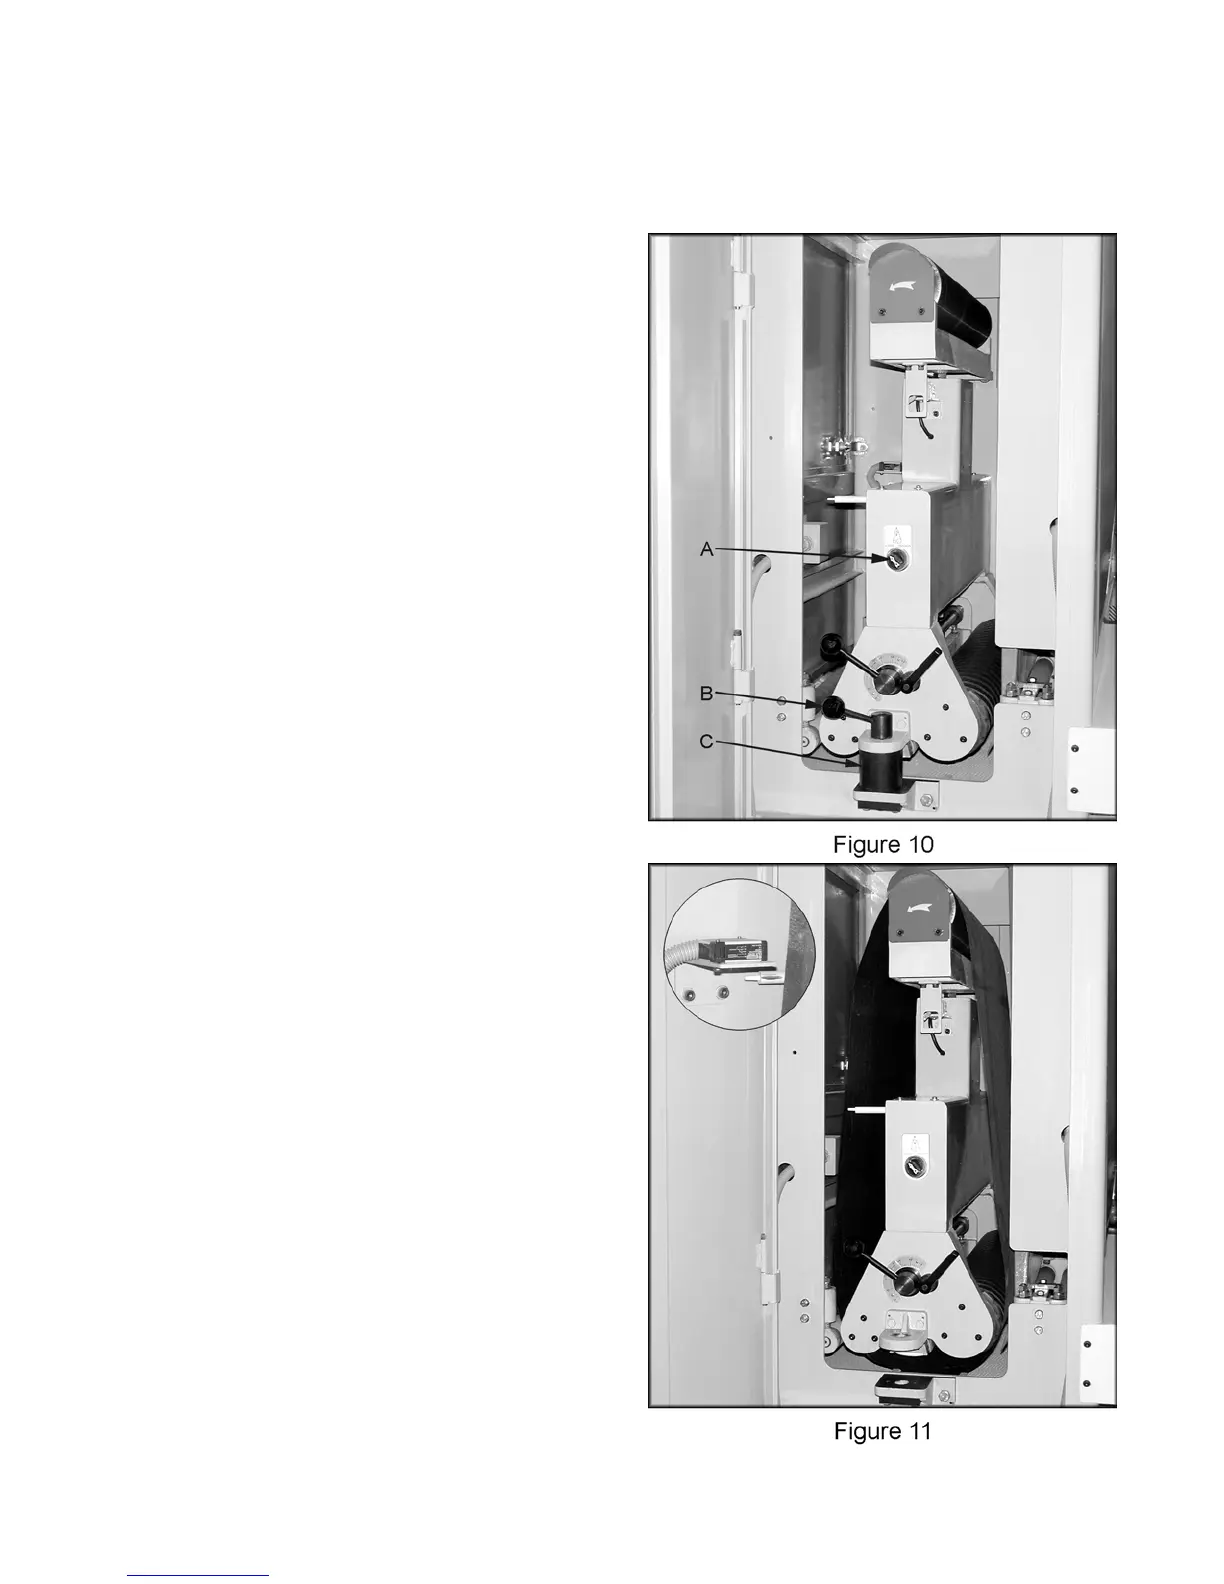
1. Disconnect sander from power source.
2. Open access door to the sandpaper and
turn the belt tension switch (A, Figure 10) to
the “LOOSE” position. Note: you will need
to have the machine connected to air.
3. Turn the locking handle (B, Figure 10)
counter-clockwise and pull straight up to
remove. You may need to jiggle the handle
back and forth to free.
4. Remove the spacer (C, Figure 10).
5. Install the sanding belt as shown in Figure
11. Note: check the backside of the belt for
any direction arrows and install accordingly.
Also, make sure belt is installed in front of
photoelectric sensor as shown in Figure 11.
6. Turn belt tension switch to “TIGHT” position
and replace the spacer and locking handle.
7. Close and secure all doors.
Adjusting Platen Position
The platen can be adjusted up, or down. It can
also be removed. You can achieve different
results by experimenting with different positions.
1. Disconnect sander from power source.
2. Open access door to the platen and loosen
the platen locking handle (D, Figure 11).
3. Rotate platen adjustment handle (E, Figure
11) until the desired position is achieved.
4. Re-tighten the locking handle.
If you want to sand on the drum surface rather
then the platen:
1. Disconnect sander from power source.
2. Open access door to the sandpaper and
turn the belt tension switch (A, Figure 10) to
the “LOOSE” position. Note: you will need
to have the machine connected to air.
3. Turn the locking handle (B, Figure 10)
counter-clockwise and pull straight up to
remove. You may need to jiggle the handle
back and forth to free.
4. Remove the spacer (C, Figure 10).
10