Setting Belt Tracking
! WARNING
Setting belt tracking may require operator to
have machine hooked to electrical and air
power while having doors open. Use
extreme caution! Failure to comply may
cause serious injury!
The tracking has been set at the factory and
should not need adjusting. If you are
experiencing a tracking problem follow the steps
listed below.
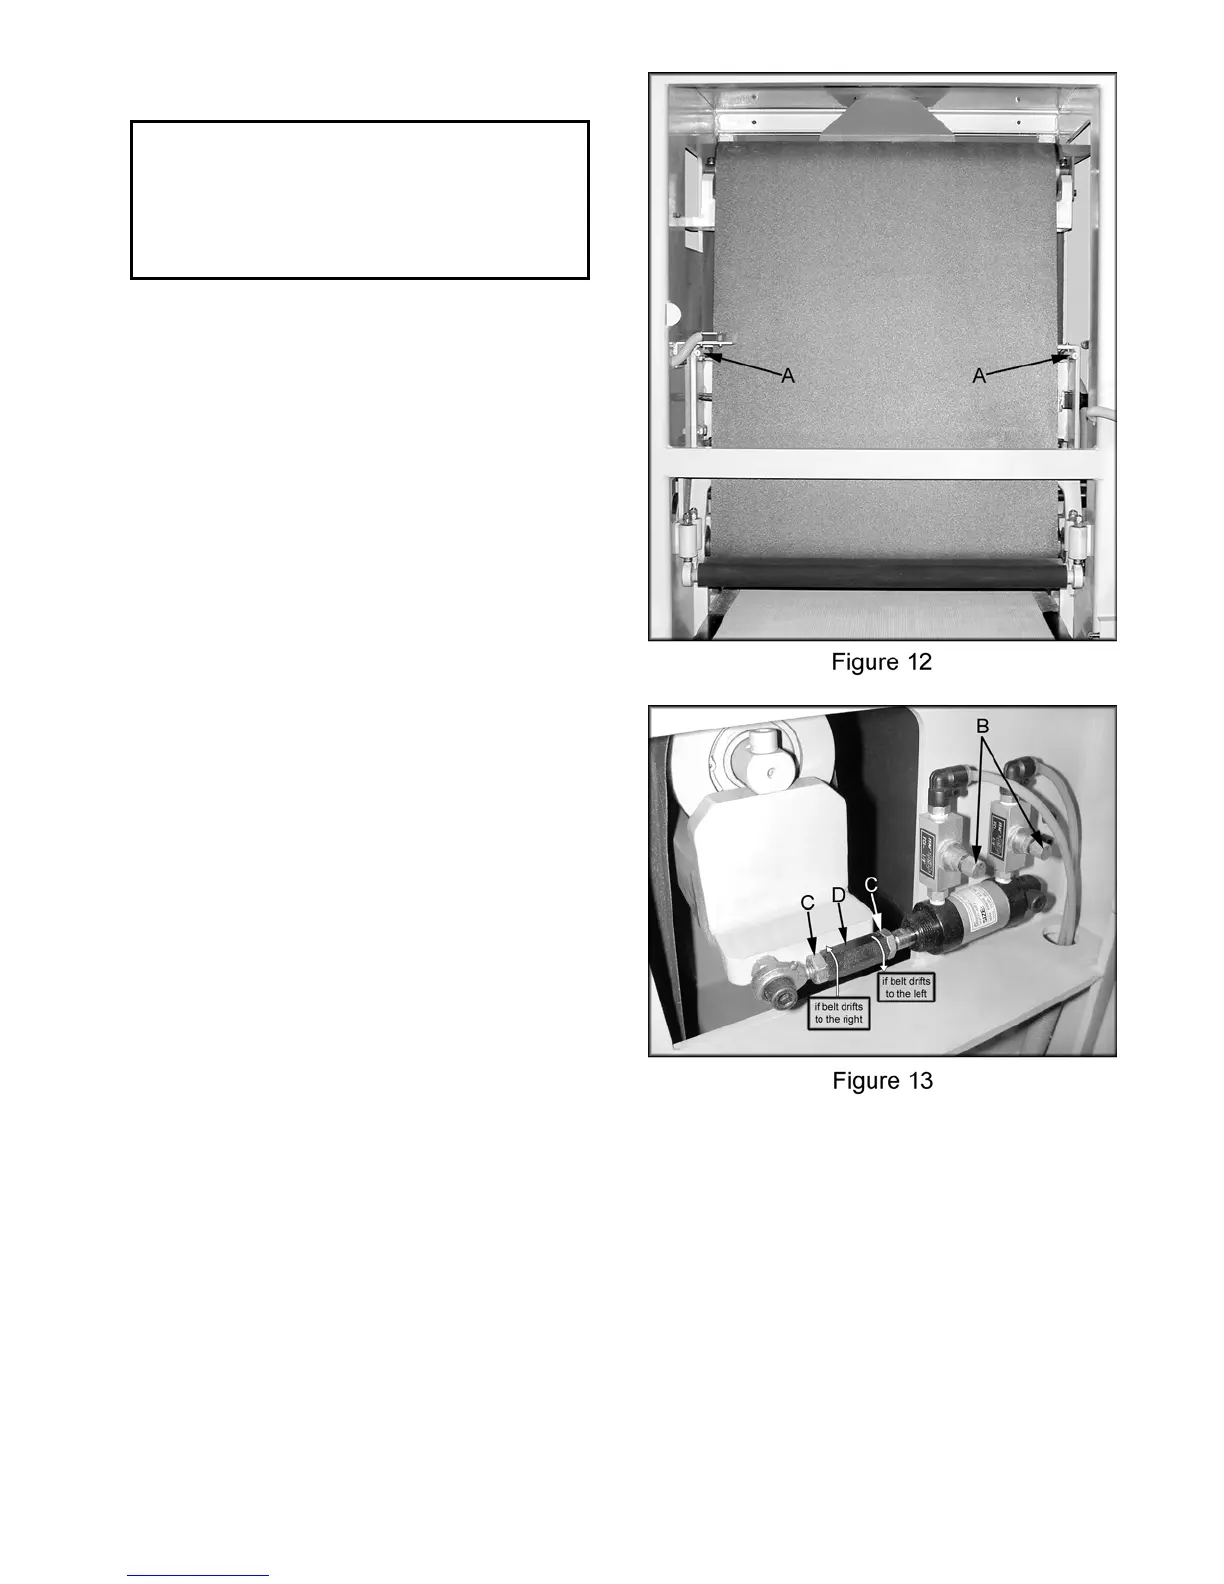
The abrasive belt must track between the two
limit switches (A, Figure 12). The machine
functions will stop if the belt activates one of the
limit switches.
The air pressure should be approximately 80
psi, see “Connecting to Air,” page 7.
1. Start by turning both valves (B, Figure 13)
clockwise to close completely. This will turn
off the oscillation.
2. Loosen belt tension and position sanding
belt in the center of the idle roller.
3. Turn the sander main power switch to the
“ON” position. Jog the main motor by
pressing the spindle “ON” button quickly
followed by the spindle “OFF” button.
4. Once you have determined which way the
belt is drifting loosen the two hex nuts (C,
Fig. 13).
5. If belt is running too far to the left (viewed
from back of sander) rotate the top of the
turnbuckle (D, Figure 13) toward the user.
6. If belt is running to far to the right (viewed
from back of sander) adjust the top of the
turnbuckle (D, Figure 13) away from the
user.
7. Once the belt is tracking approximately in
the center of the idle roller press the spindle
“OFF” button.
8. Hold the turnbuckle in place while tightening
the lock nuts.
9. Press the spindle “ON” button and recheck
the tracking.
11