Setting Belt Oscillation
! WARNING
Setting belt oscillation may require operator
to have machine hooked to electrical and air
power while having doors open. Use
extreme caution! Failure to comply may
cause serious injury!
Now that the belt is tracking properly it is time to
set the oscillation. Follow the steps listed below.
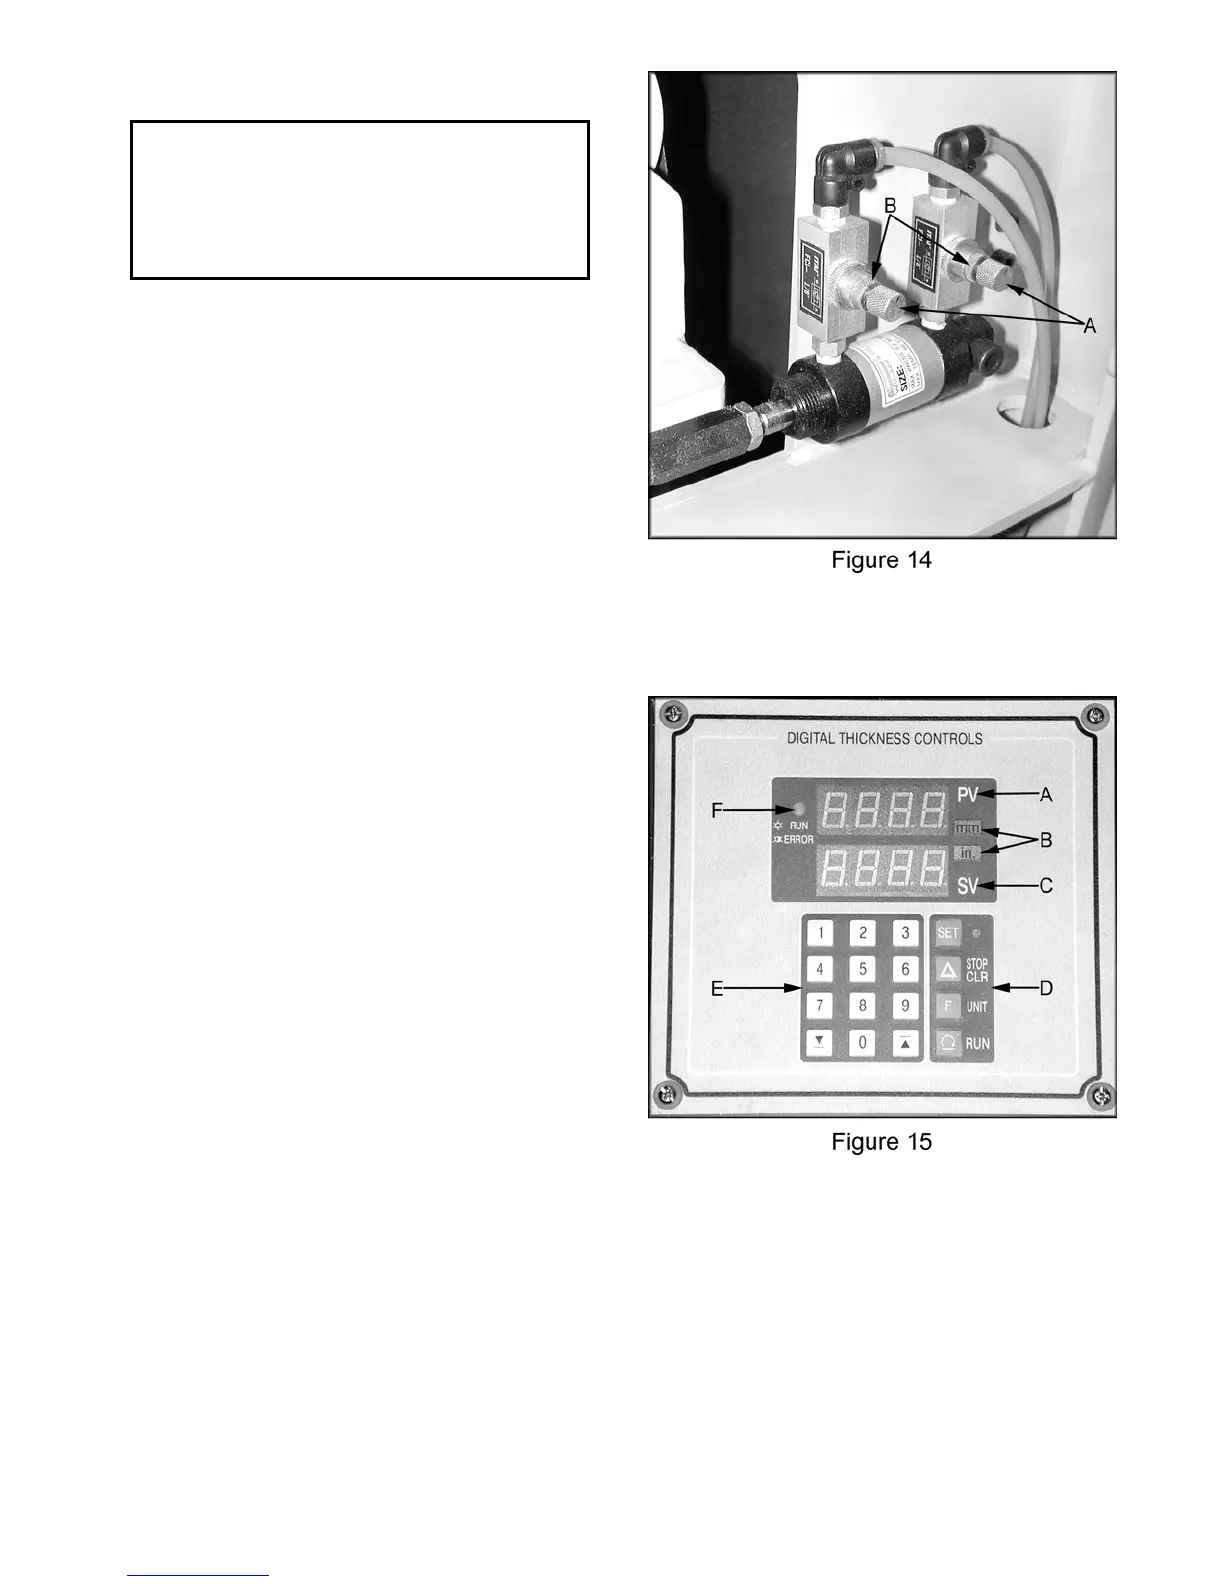
1. Start by opening both valves (A, Figure 14)
approximately a 1/4 turn.
2. If the belt is oscillating too quickly, close
each valve by approximately 1/16 turn. If
the belt is oscillating too slowly, open each
valve by approximately 1/16 turn.
3. Once the belt is oscillating with the correct
speed (about one complete cycle every
second), lock the valves in place with the
lock rings (B, Figure 14).
Digital Controller
A. This LED readout displays the current
thickness setting of the machine.
B. The digital thickness controls are capable of
operating and displaying in either inches, or
millimeters.
C. This LED readout displays the value input by
the operator on the keypad.
D. Four function buttons are available to the
user: SET, STOP/CLEAR, UNITS, and
RUN. The use of these buttons is detailed
in the following sections.
E. The keypad is used to input set values (the
operator’s desired thickness setting). The
up and down arrows can be used to move
the table up or down without keying in an
exact numerical thickness value.
F. This indicator light will illuminate a steady
yellow when the table is moving up or down.
This light will blink if there is an error of any
sort.
12