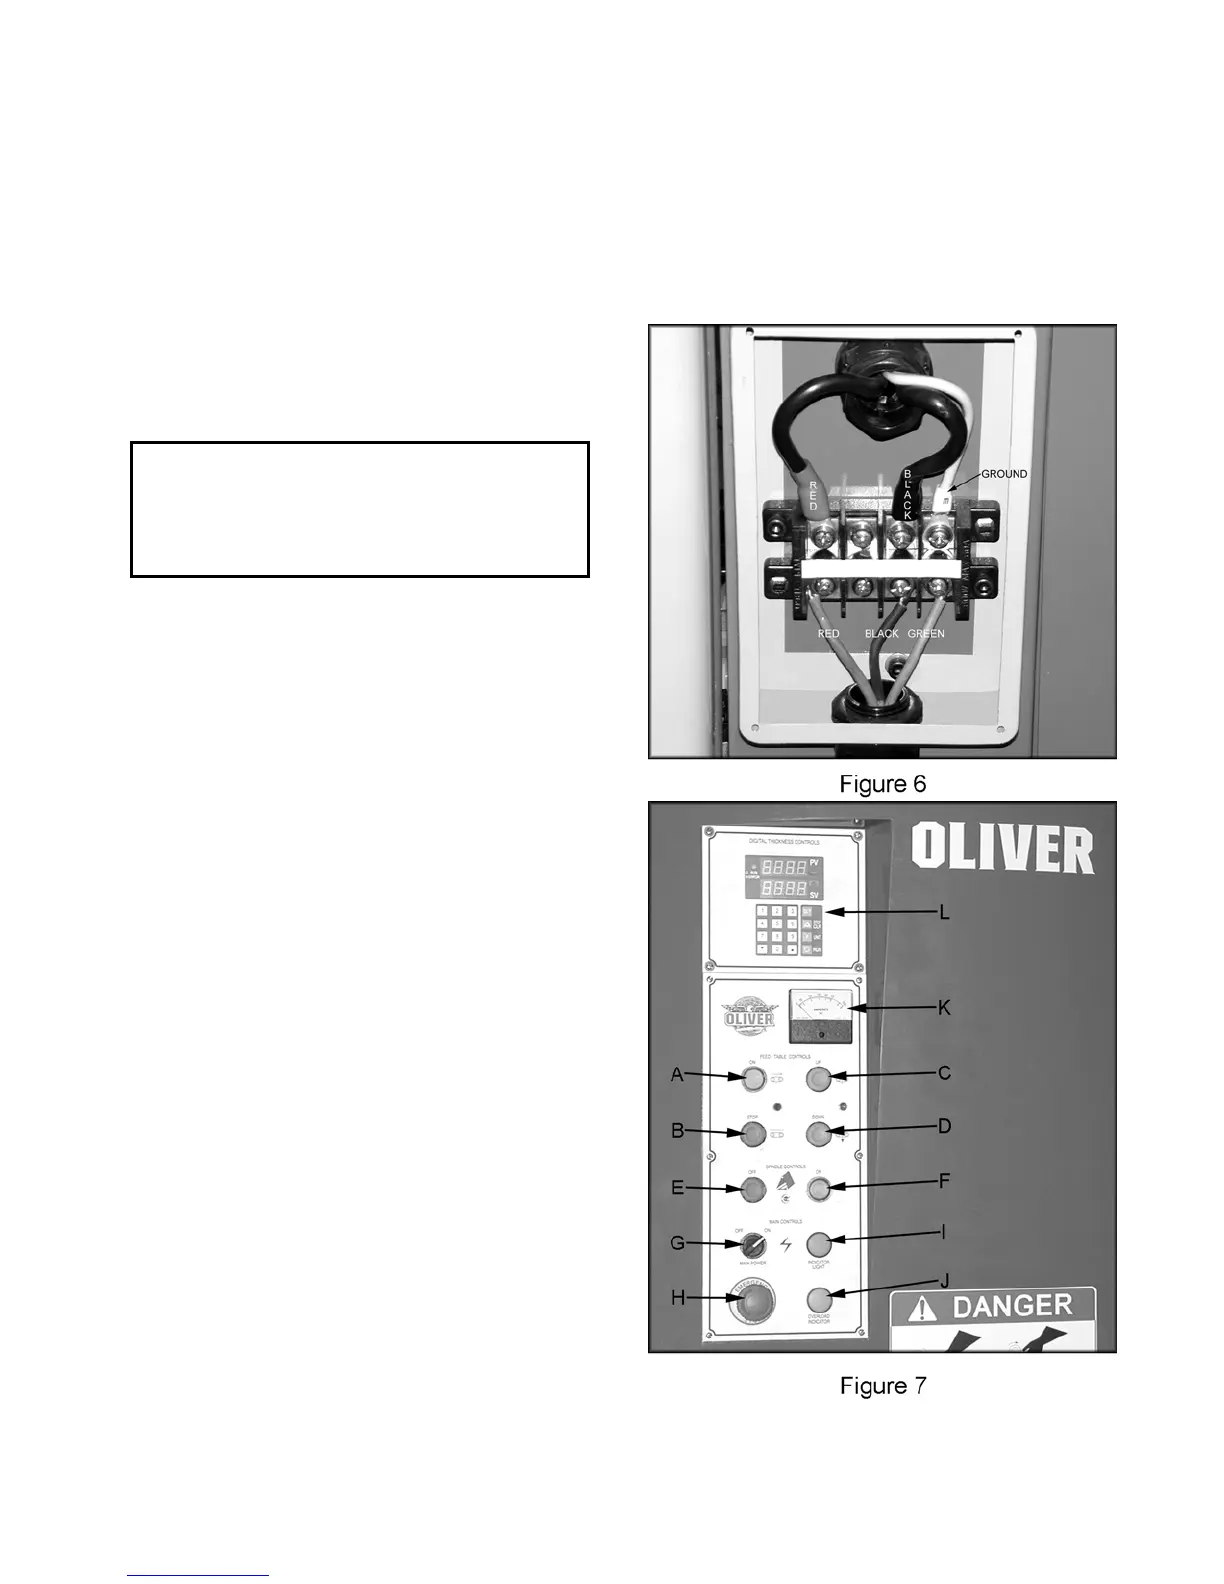
I. Power Indicator: Lights up when sander
has power and main power switch is in the
“ON” position.
4. Re-install the connection box cover. Note:
turn machine on and press the raise
conveyor table button. If conveyor table
lowers disconnect the machine from power
source and switch two of the three power
source wires.
J. Overload Indicator: Lights up when the
machine is overloaded.
K. Amp Meter: Displays amp reading.
• Electrical Connections for a 1-Phase Unit
L. Digital Control: Controls table height.
This wide belt sander has been wired to accept
1-Phase, 220V power only. Maximum current
draw is approximately 52 amps. Oliver
Machinery recommends the use of a 3
conductor, 6 gauge electrical cable hard wired to
a designated circuit.
! WARNING
Electrical connections and wiring must be
done by a qualified electrician. The machine
must be properly grounded. Failure to
comply may cause serious injury!
1. Disconnect machine from power source!
2. Remove four screws that secure the cover
of faceplate to the connection box.
3. Insert the power cable through strain relief,
and attach the wires to the terminals, as
shown in Figure 6.
4. Re-install the connection box cover.
Control Panel
A. Feed On: Starts conveyor when main
power switch is in the “ON” position.
B. Feed Stop: Stops the conveyor.
C. Table Up: Raises conveyor table when
main power switch is in the “ON” position.
D. Table Down: Lowers conveyor table when
main power switch is in the “ON” position.
E. Spindle Off: Stops the sanding belt.
F. Spindle On: Starts sanding belt when main
power switch is in the “ON” position.
G. Main Power On/Off: Turns main power to
the machine “ON or OFF.”
H. Emergency Stop: Stops all functions of
machine, but the sander still has power. To
reset rotate switch clockwise until the button
pops out.
8