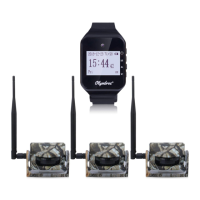
The Olymbros Model Z3 Trail Monitor is a wireless infrared sensing system designed for various security and monitoring applications, including hunting alarms, camping security, burglar alarms, and general home, ranch, warehouse, yard, or driveway security. The system consists of wireless infrared sensors and a wristwatch receiver, providing real-time alerts for detected movement.
Function Description:
The Z3 system utilizes wireless infrared sensors to detect movement within a 60-foot (20-meter) range. These sensors have a wide detecting angle of 120 degrees both vertically and horizontally, ensuring comprehensive coverage. Upon detecting movement, the sensors transmit an alert signal to the wristwatch receiver, which can be located up to 650 feet (200 meters) away. The wristwatch receiver is designed to provide timely alerts, preparing the user before a target comes within range. The alert signal is highly customizable, allowing users to program it to be audible (beep), visual (LED flash), vibrate, or any combination of these modes. The system supports extensive connectivity, enabling up to 100 sensors to be connected to a single receiver watch, thereby covering a large area. Conversely, multiple receiver watches can be connected to several sensors, allowing groups of people to monitor the same area simultaneously.
Important Technical Specifications:
- Detecting Angle: 120 degrees vertical and horizontal.
- Detecting Range: 65 feet (20 meters) between sensors and the target.
- Communication Range: 650 feet (200 meters) between sensors and the receiver watch.
- Alarm Modes: Adjustable Vibrate, Sound (beep), and LED Flash (displaying the calling sensor number).
- Battery Life:
- Sensors: 4-6 months.
- Watches: 4-5 days standby time.
- Connection: Supports 1 to 99 sensors and up to 99 receiver watches to 1 sensor.
- Waterproof Standard: IP54.
- Warranty: One-year after-sale manufacturer's warranty.
- Sensor Power: One 9V battery (NOT included).
- FCC ID: 2AKO4-Z3.
Usage Features:
Sensors Battery Installation and Mounting:
The Olymbros Z3 sensor is powered by a 9V battery. To install, open the battery cover with a flat-blade screwdriver and insert a 9V carbon battery. It is crucial to ensure the sensors are turned off when installing or removing the battery. After battery installation, slide the power switch to the ON position. The LED indicator will flash red briefly, then disappear, indicating the sensors are powered up. For optimal performance, sensors should be placed on a tree approximately 3-9 feet high at a slight downward angle. The antenna should always be positioned on the LEFT side when mounting. The sensors can also be placed outside homes, campsites, yards, garages, or driveways to detect movement from humans, cars, and animals, enhancing safety. After the sensor starts working, the red LED light will flash after each trigger within one minute but will cease flashing after one minute.
Watch Handling and Operation:
The wristwatch receiver features an LCD display interface with buttons for navigation and control: ESC (ON/OFF), MENU, UP, and DOWN.
- Main Interface: When the watch is in the main interface mode, only the "MENU" button is active.
- Menu Navigation: Press "MENU" to open the main Settings menu. Use "UP" and "DOWN" to scroll through menu options. Press "ESC" to return to the main or previous menu.
- Shortcut Menu: Long-press "ESC" for 2 seconds to access the Shortcut Menu, which includes options for:
- Receiving Switch (ON/OFF): To connect or disconnect sensors.
- Shutdown: To power off the watch.
- Reboot: To restart the watch.
Main Setting Menu:
Accessed by pressing the "MENU" button, this menu offers several options:
- Pairing:
- Add Pairing: Allows pairing new sensors. Users can assign a unique CurZone number (0-99) to each sensor for easy identification. The watch displays a 6-digit code upon successful connection.
- Del Pairing: Deletes the pairing of a specific sensor.
- Del All Pairing: Deletes all paired sensors.
- QueryLog (Track Records):
- QueryLog: Displays records of sensor triggers, including the sensor number (Mark) and the date/time of the record. Up to 9 records per sensor can be stored.
- Del AreaLog: Deletes pairing records for a selected sensor number.
- Del All Log: Deletes all pairing records.
- DevNo.Setting: Sets the number of the receiver watch (0-99).
- PromptSetting: Configures the alarm mode (Light, Sound, Vibrate) for the watch. Users can select or cancel options using the "MENU" button and scroll through options with "UP" and "DOWN".
- ReceiveSwitch: Toggles the sensor receiving function ON or OFF.
- Date&Time: Allows setting the current date and time on the watch.
- RemoteStatus: Checks the status of paired sensors, including:
- Mark: Sensor number.
- Online: Indicates if the sensor is online (Yes/No).
- BatVol: Shows battery status (Normal/Low).
- VersionNO: Displays the hardware and software versions of the device.
- Factory Reset: Restores the watch to its default settings.
Quick Setup Guide:
- Ensure the receiver watch is fully charged.
- Install 9V batteries in the sensors.
- Turn on the watch, press "MENU" to open the "Pairing" menu, then select "Add Pairing".
- Turn on the transmitter, press "MENU" on the watch. Use "UP" and "DOWN" to change the sensor number. A 6-digit code will appear on the 3rd line of the "Add Pairing" interface, indicating successful pairing.
- If the code shows x-x-x-x, it means the sensor and watch are not connected. Delete the pairing and try again.
- Once the first sensor is connected, connect subsequent sensors by repeating steps 2 and 3. Assign different numbers to sensors for easy location.
- Mount sensors with supplied straps.
Tips:
- Ensure the receiver watch is fully charged before first use.
- Test sensor connections in the desired area. If the "Quick Setup Guide" steps don't work, check "PromptSetting" and "ReceiveSwitch" settings.
- Sensors can be turned off at any time. They will reconnect automatically when turned back on.
- A fully charged watch battery lasts 4-5 days. When it works as a receiver or an alarm, the battery life will be shorter due to power consumption by alarm sound, vibration, and receiving signals.
- Turning off pairing between the watch and transmitters when not necessary can save battery life.
- Selecting only one alarm option in "Prompt Setting" will save battery life. Default setting enables all three alarm options.
Maintenance Features:
Low Battery Alert of the Sensors:
The 9V batteries in the sensors typically last 4-6 months. The system provides low battery alerts in five modes:
- Watch Alarm: The watch gives an alarm every two hours when a sensor's battery is low, after three consecutive alarms.
- Screen Display: When an alert is given, the watch's screen displays "No.000 low battery".
- Number Display: The digit represents the number of the sensor with low battery.
- Multiple Sensors: If more than one sensor has low battery, the last alarm is displayed.
- Sensor Status: After the watch connects with the sensor, the sensor senses motion, and then triggers the watch to give the first alarm. The status is as follows:
- Vol Normal: Indicates the sensor's battery has a normal voltage.
- Low Battery: Indicates the sensor's battery has a low voltage and needs to be replaced.
- Main Interface Icons: The icon "XX" at the lower right corner indicates a low voltage of a sensor. The "xx" indicates the number of the sensor. If several sensors have low battery alarms at the same time, only the last alarm will be displayed.
- LED Indicator: The LED indicator of the sensors will flash green when the voltage of the battery is below 5V; the LED will keep on if the voltage is below 4.7V.
- RemoteStatus Check: The status of the sensors can be viewed from the watch by pressing the "MENU" button and selecting "RemoteStatus". This interface displays:
- Mark: The number of the sensors (0-99).
- Online: Whether the sensor is online or not (Yes or No).
- BatVol: Whether the battery of the sensor is under normal condition (Normal) or low (Low).
Warning and FCC Caution:
- The device is IP54 standard waterproof.
- The device has electronic parts; do not disassemble the device yourself in case of short circuit or other problems.
- A 1-year after-sales service of warranty is included.
- PIR sensors cannot detect motion occurring behind walls, ceilings, floors, closed doors, glass partitions, or windows.
- Infrared motion detectors operate by sensing changes in temperature. Their effectiveness may be reduced when the ambient temperature is near or above body temperature or if there are intentional or unintentional sources of heat in or near the detection area (e.g., heaters, radiators, stoves, barbecues, fireplaces, sunlight, steam vents, lighting).
- For any questions, contact customer support or retailers.
FCC Caution:
- This device complies with part 15 of the FCC Rules. Operation is subject to two conditions: (1) The device may not cause harmful interference. (2) The device must accept any interference received, including interference that may cause undesired operation.
- Changes or modifications not expressly approved by the party responsible for compliance could void the user's authority to operate the equipment.
- The device has been evaluated to meet general RF exposure requirements and can be used in portable exposure conditions without restriction.