Installation, Base Unit
G
9
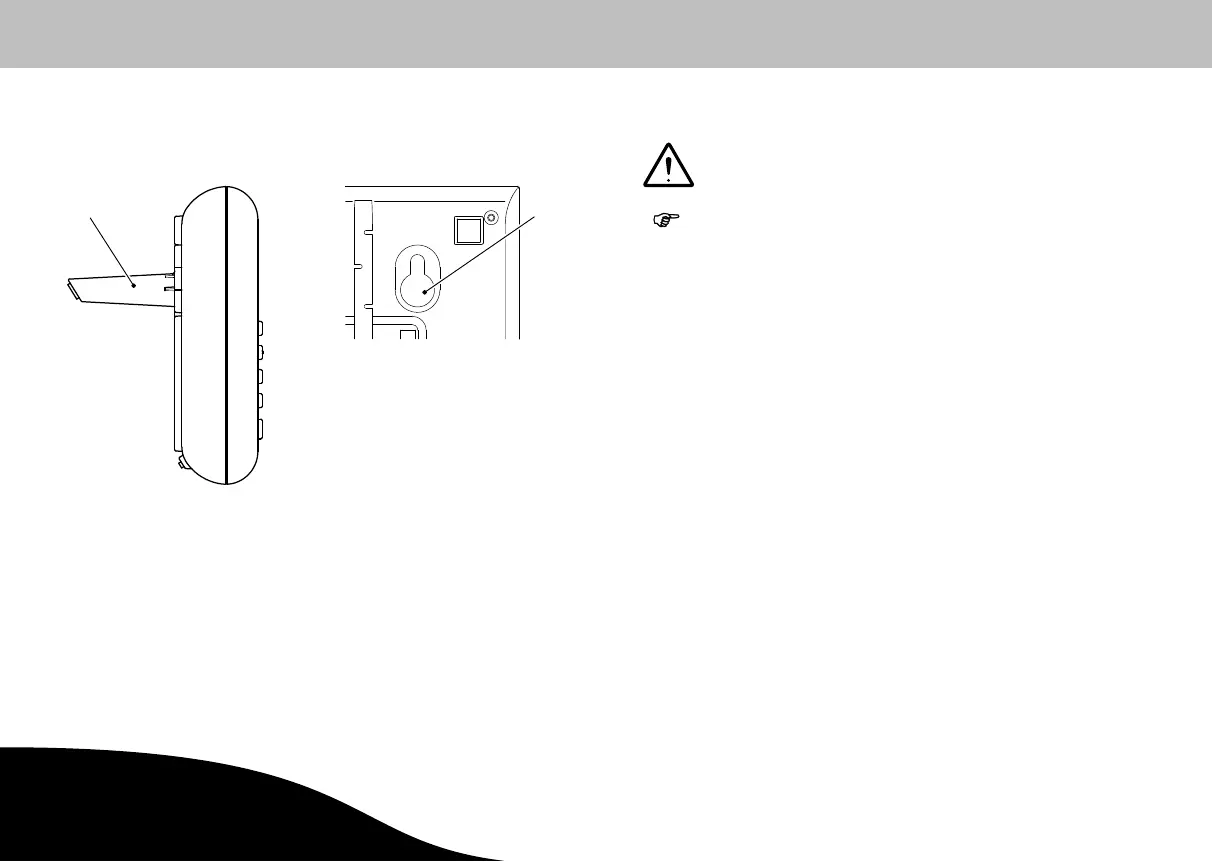
Positioning the Base Unit
It is possible to setup the device in a user-friendly, inclined position on a table or desk. To
do this, insert the two legs (1) supplied in the recesses for the wall installation bracket (2)
on the rear of the base unit.
1
Wall Installation
After having found a suitable location for the base unit, you can begin with the installation.
WARNING: Risk of fatal injury through electric shock or gas explo
sion. Pay attention that you do not damage electric ca
bles or gas pipes.
NOTE: Also pay attention to water pipes.
1. At the installation location, insert two screws in the wall, 100 mm apart and aligned
horizontally. (It may be necessary to drill the holes first and then insert dowels in
which to tighten the screws, depending on the properties of the wall.)
2. Screw the screws in the wall using a screwdriver until there is approx. 3 mm clear
ance from the bottom edge of the screw head to the wall.
3. Hook the base unit over the screws.
4. Plug the TAE connector in the socket labelled N on the telephone connection socket
of your telephone connection.
5. Connect the power adapter plug to a properly installed 230 V / 50 Hz power socket.
The base unit is then ready to use.
2
 Loading...