2-12
OEP-3 V1 (UC)
2-3-16. Replacement of Paper Feed Motor
1. Remove the top cover. (Refer to Section 2-2-1.)
2. Remove the front panel assembly.
(Refer to Section 2-2-2.)
3. Remove the mechanical block.
(Refer to Section 2-3-8.)
4. Remove the PRT-13 board. (Refer to Section 2-3-6.)
5. Remove the cartridge guide. (Refer to Section 2-3-7.)
6. Remove the paper feed assembly.
(Refer to Section 2-3-16.)
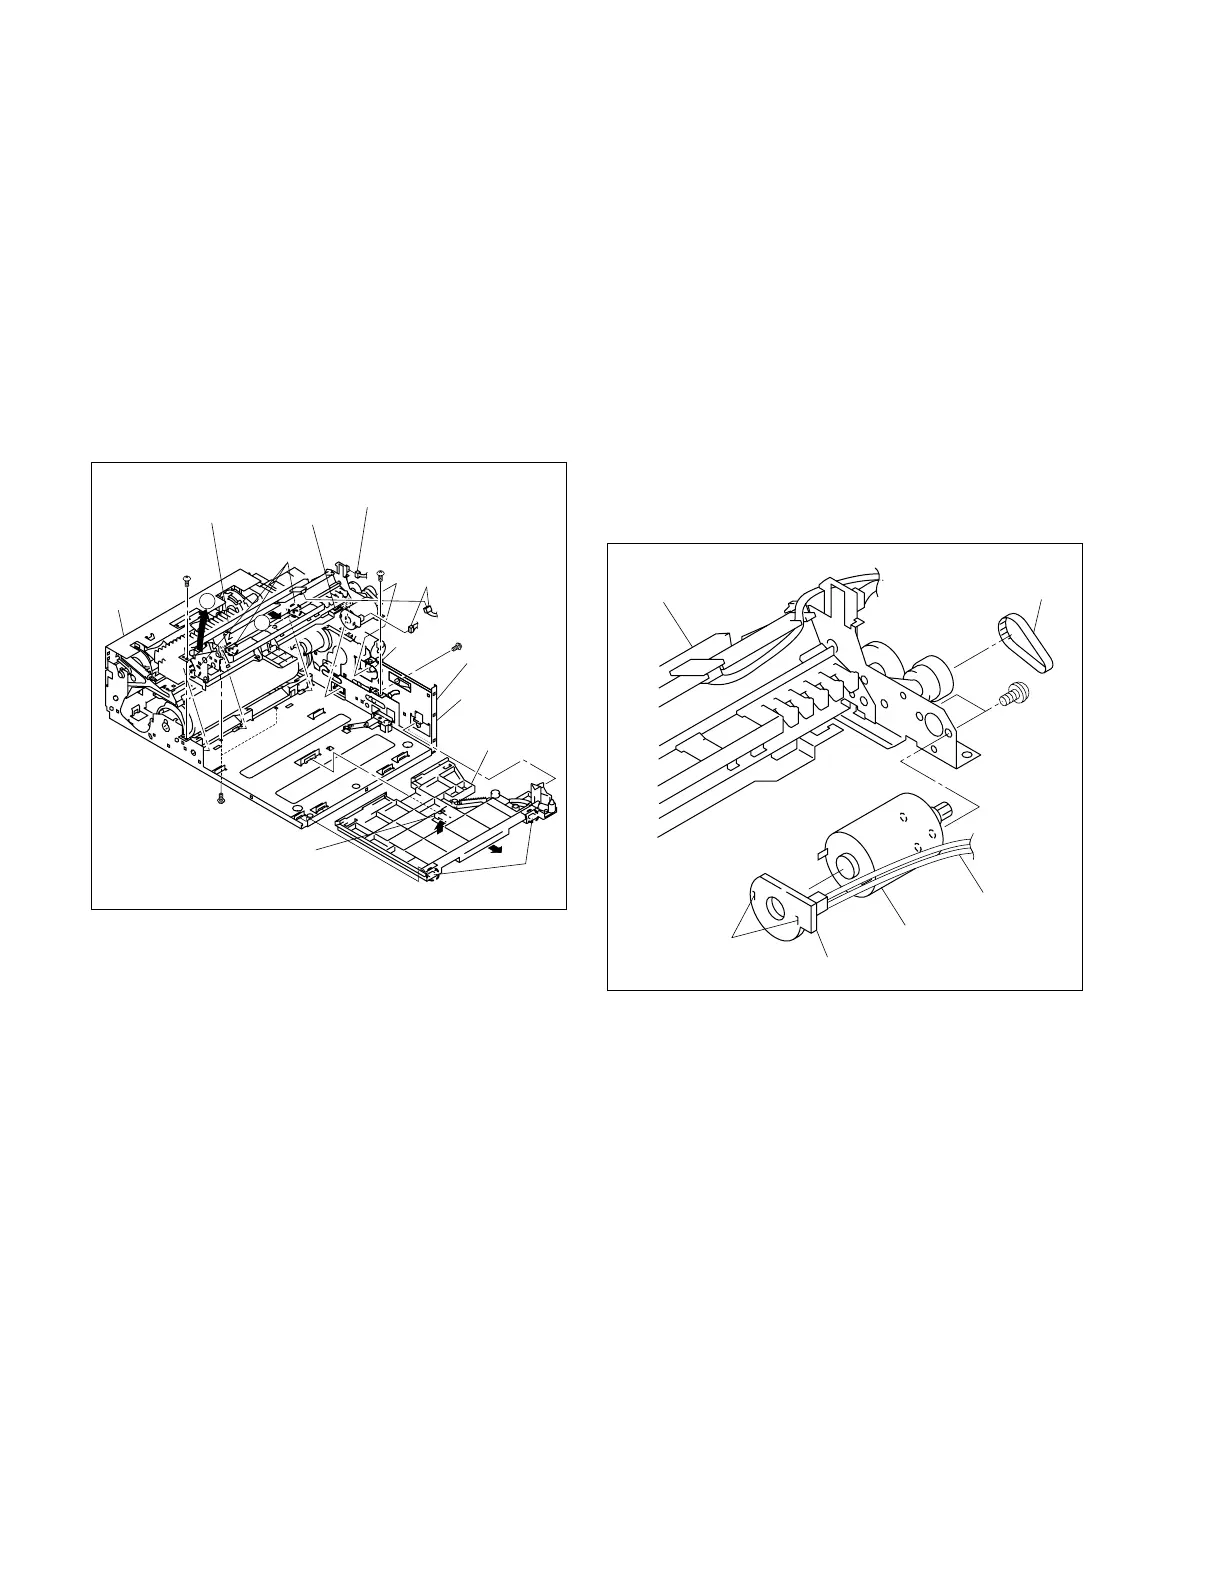
7. Remove the two screws, then remove the paper feed
motor.
8. Remove the two solders on the SU-54 board.
9. Install a new paper feed motor in the reverse order of
steps 1 to 8.
14. Remove one pawl and two hooks, then remove the
paper feed tray guide.
15. Remove the four screws (BVTT 3 x 6) and the three
harness of the paper feed assembly.
16. Shift the paper feed assembly in the direction indicated
by arrow 1 and remove the three hooks.
n
Be sure not to deform or damage the sensor, gear, or
lever.
17. Remove the paper feed assembly while inclining it in
the direction indicated by arrow 2.
18. Install a new paper feed assembly in the reverse order
of steps 1 to 17.
Harnesses
Harness
Lever
Hooks
Paper feed
tray guide
Mechanical
chassis B
Sensor
Hook
Hooks
Sensor
Mechanical
block
BVTT
3x6
BVTT
3x6
BVTT 3x6
BVTT 3x6
Paper feed assembly
2
1
PS2.6x4
SU-54 board
Two solders
Paper feed motor
Harness
Paper feed assembly
Belt 50TN