2. Assemble the Waste Drain Saddle around the drain pipe with the
port pointing toward the RO faucet. Do not install the compres-
sion nut yet. Tighten both clamp screws until they are snug.
3. Drill a 3/8” hole into the sink drain pipe, using the 3/8” port in
the Waste Drain Saddle as a guide for the drill.
4. Trim to length the 3/8” black tube coming from the RO faucet.
NOTICE: The cut tubing should slide into the port on the
Waste Drain Saddle until it seats on the bottom of the
port, without kinks (too short), and without a sag creating
a low spot (too long).
5. Slide the compression nut up the 3/8” black tube from the
faucet until the tube projects out of the nut about 1/2”. Insert
the tube end into the port on the Drain Saddle and tighten the
compression nut firmly until it captures the tube.
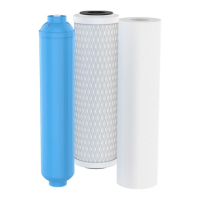
Cold Water Saddle Valve. See Figure 3.
1. Clamp the Cold Water Saddle Valve on the cold water supply line
with the screws supplied. Be sure the location will allow the white
supply tube to reach the RO unit (Step A).
2. Copper Pipe: Firmly tighten the screws on the Saddle Valve evenly
and firmly keeping the halves of the bracket parallel (Step B). Turn
the valve handle clockwise until it stops (Step C).
Galvanized and Plastic Pipe: Firmly tighten the screws on the
Saddle Valve evenly and firmly keeping the halves of the bracket
parallel. Turn the valve handle counterclockwise until needle
comes out of valve. Repeat with the packing nut. Now use the
port as a guide and drill a 1/8” hole in the coldwater pipe.
Reinstall the nut and needle and tighten the needle until it stops
(Step C).
NOTICE: The valve handle will be rather stiff to turn. It is driving
a needle through the wall of the supply line. Do not force it and
do not overtighten.
REVERSE OSMOSIS (RO) UNIT ASSEMBLY
AND INSTALLATION
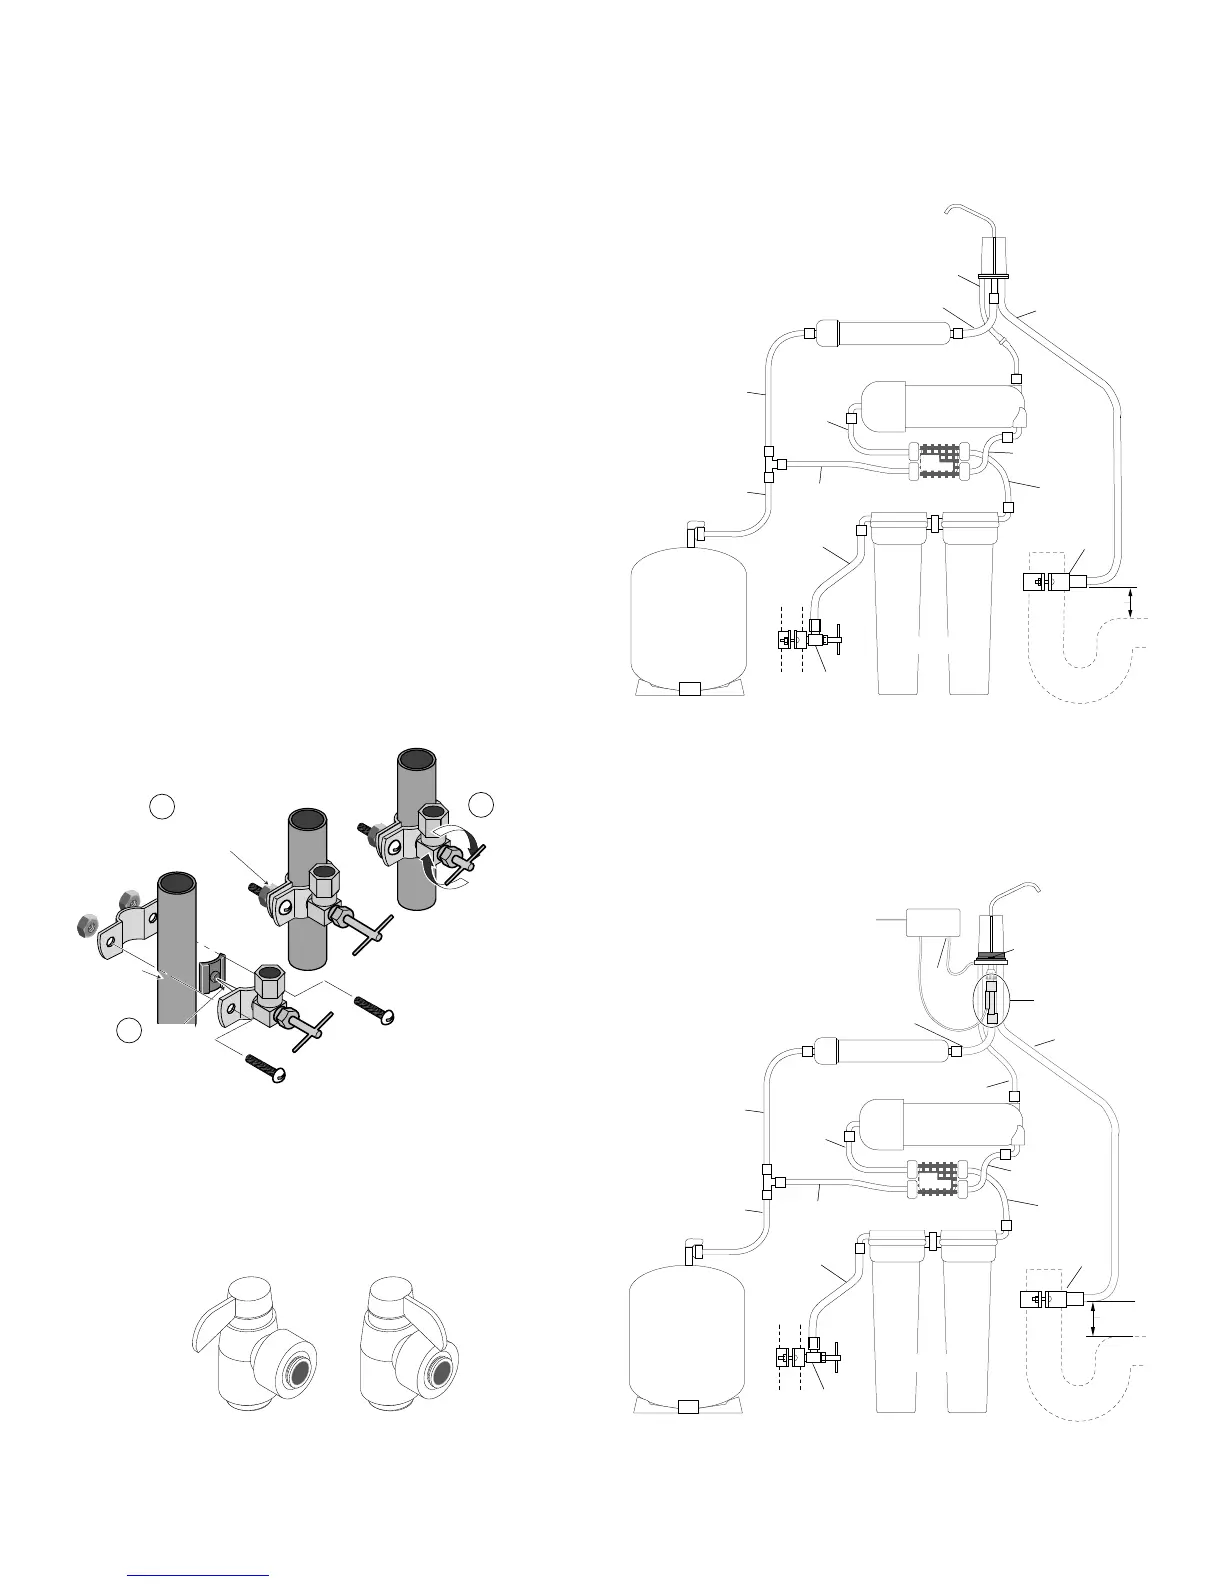
1. Place the storage tank in a convenient location under the sink.
Make sure that the tank valve is OPEN (See Figure 4).
2. Place the RO unit in a shallow pan on the floor in front of the
sink.
3. Connect the free end of the 1/4” black tube out of the faucet to
the compression fitting coming straight out of the RO membrane
housing (see Figure 5).
For Model RO2000, Skip to Step 5.
For Model RO2000-TDS, go to Step 4, below.
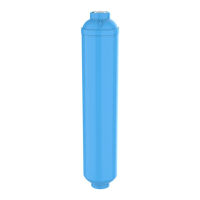
4. Thread the white flow switch onto the end of the faucet (see
Figure 6).
2
nuts and bolts.
piercing needle.