EasyManua.ls Logo

Omnifilter RO2000 User Manual

Omnifilter RO2000
20 pages
To Next Page IconTo Next Page
Page #1 background imageLoading...
Page #1 background image
INSTALLATION
NOTICE: Install this RO system on the cold water line only.
Completely read these instructions before starting installation.
Carefully read and follow all safety instructions in this manual
or on system.
This is the safety alert symbol. When you see this symbol on
your RO system or in this manual, look for one of the follow-
ing signal words and be alert to the potential for personal injury!
DANGER warns about hazards that will cause seri-
ous personal injury, death or major property damage if ignored.
WARNING warns about hazards that can cause seri-
ous personal injury, death or major property damage if ignored.
CAUTION warns about hazards that will or can
cause minor personal injury or property damage if ignored.
The word NOTICE indicates special instructions which are important
but not related to hazards.
The preservatives on the RO membrane can cause
severe digestive disturbance and diarrhea if ingested into the human
body. Flush the membrane housing twice and flush the membrane
itself twice before first using the RO water. See “Flushing the
System”, Page 4.
Tools Needed:
Drill
3/8” bit
1-1/8” bit (optional for hole for faucet)
Wrench
Phillips screwdriver
Pliers
Shallow pan
Bucket (for sanitizing the membrane housing)
9-Volt battery (not included). Purchase separately for
Model RO2000-TDS
Faucet Installation. See Figure 1.
1. Turn off the cold water supply valve.
2. If necessary, drill (or punch) a 1-1/8” hole in the sink top.
3. Remove the nut and spacer from the RO faucet and feed the two
lengths of black tubing (attached to the faucet stem) down
through the hole in the sink top until the faucet is seated on the
sink top. The vertical ridge on the faucet handle should be facing
toward the user.
4. Reach below the sink top and slide the channel washer up the
faucet stem. Install the spacer tube (if needed) and tighten the
stem nut (cone shaped side up) on the channel washer. Tighten
the stem nut just enough to keep the faucet securely in place; do
not overtighten.
NOTICE: Be sure that the channel in the channel washer faces up
and that it completely bridges the hole in the sink top (that is, it
should be tightening against both sides of the hole).
NOTICE: For Model RO2000-TDS, make sure that the grey cable
coming from the faucet base is lying inside the channel washer,
and that the edges of the channel washer don’t pinch the cable.
Waste Drain Saddle Installation
1. Install the Waste Drain Saddle on the sink drain, above the trap
and below the bottom of the RO faucet.
®
2500 165th Street • Hammond, Indiana 46320
1-800-937-6664 • www.omnifilter.com
Reverse Osmosis System
INSTALLATION INSTRUCTIONS
Models RO2000 and RO2000-TDS
IN
OUT
IN
IN
OUT
OUT
IN
IN
OUT
OUT
3639 0100 ASB
©2001, Omnifilter Printed in U.S.A. OM539 (Rev. 7/20/01)
Channel Washer
Stem Nut
Cold Water Shut-off Valve
Cold Water Line
Threaded Stem
of Faucet
Existing Sink
Faucet Sprayer Hole
Vertical ridge of
faucet handle.
Figure 1
Waste
Saddle
1" Minimum
Figure 2:Waste Drain Saddle Installation
Question and Answer IconNeed help?

Do you have a question about the Omnifilter RO2000 and is the answer not in the manual?

Omnifilter RO2000 Specifications

General IconGeneral
TypeReverse Osmosis
Stages5
Membrane TypeThin Film Composite (TFC)
Production RateUp to 50 gallons per day (GPD)
Storage Tank Capacity3.2 gallons
Operating Pressure40-100 psi
Operating Temperature40-100°F
pH Range3-11
Filter Life6-12 months
Dimensions15 x 5 x 15 inches
Weight20 lbs

Summary

Reverse Osmosis System Installation

Faucet Installation

Steps to install the RO faucet onto the sink top.

Waste Drain Saddle Installation

Instructions for attaching the waste drain saddle to the sink drain pipe.

General Installation and Safety

Installation Tools

Lists required tools for system installation.

Safety Alerts

Explains safety signal words (Danger, Warning, Caution) and their implications.

RO Unit Assembly

Cold Water Saddle Valve Installation

Guide for installing the cold water saddle valve on the supply line.

TDS Monitor and Prefilter Flushing

TDS Monitor Setup

Guide for installing and configuring the TDS monitor for the RO2000-TDS model.

System Prefilter Flushing

Instructions for flushing prefilter cartridges before RO membrane installation.

Membrane Installation

RO Membrane Installation Steps

Detailed procedure for correctly inserting and securing the RO membrane into its housing.

System Flushing and Operation

System Flushing Procedure

Steps to flush the entire RO system after installation or maintenance.

TDS Monitor Operation

How to use and interpret the TDS monitor to check water quality.

Filter Maintenance

Pre-Filter Cartridge Replacement

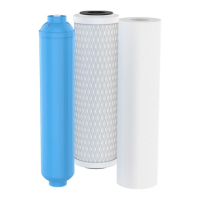
Steps for changing the pre-filter cartridges (TO1 and CB1).

Post Filter Replacement

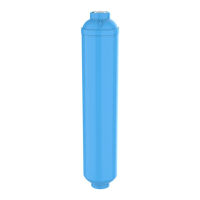
Procedure for replacing the post filter cartridge on the RO system.

Comprehensive Maintenance and Disinfection

RO Membrane and Cartridge Replacement

Guide for replacing RO membrane and filter cartridges, including system disinfection.

Exploded View and Repair Parts

Exploded View

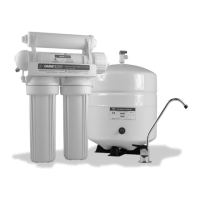
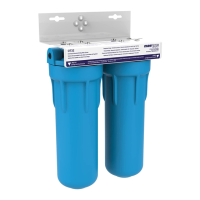
Diagram showing the layout and identification of all system parts.

Repair Parts List

Table listing available replacement parts for RO2000 and RO2000-TDS models.

Related product manuals