Chapter 1. Unpacking
1-1. Checking the contents of the Printer
1-2. Locating the Printer
1-3. Printer Part names
1-4. Operating Control Panel
4
4
4
5
6
3
Table of Contents
Chapter 2. Connection Power
2-1. Connecting the AC adapter to your Printer
2-2. Connecting the battery
2-3. Connecting the belt
7
7
8
8
Chapter 4. Setting the DIP Switches 12
Chapter 5. Running the Self-test 14
Chapter 3. Connecting the Printer to you Computer
3-1. Serial transmission with an interface cable
3-2. Infrared transmission by IrDA
9
9
11
Chapter 6. Code Table 15
Chapter 7. Functions 23
Chapter 8. Control Commands 25
APPENDIX A - Connectors
- Serial Type(OM7212S)
- Parallel Type(OM7212P)
APPENDIX B - Specification
44
44
45
46
Chapter 1. Unpacking
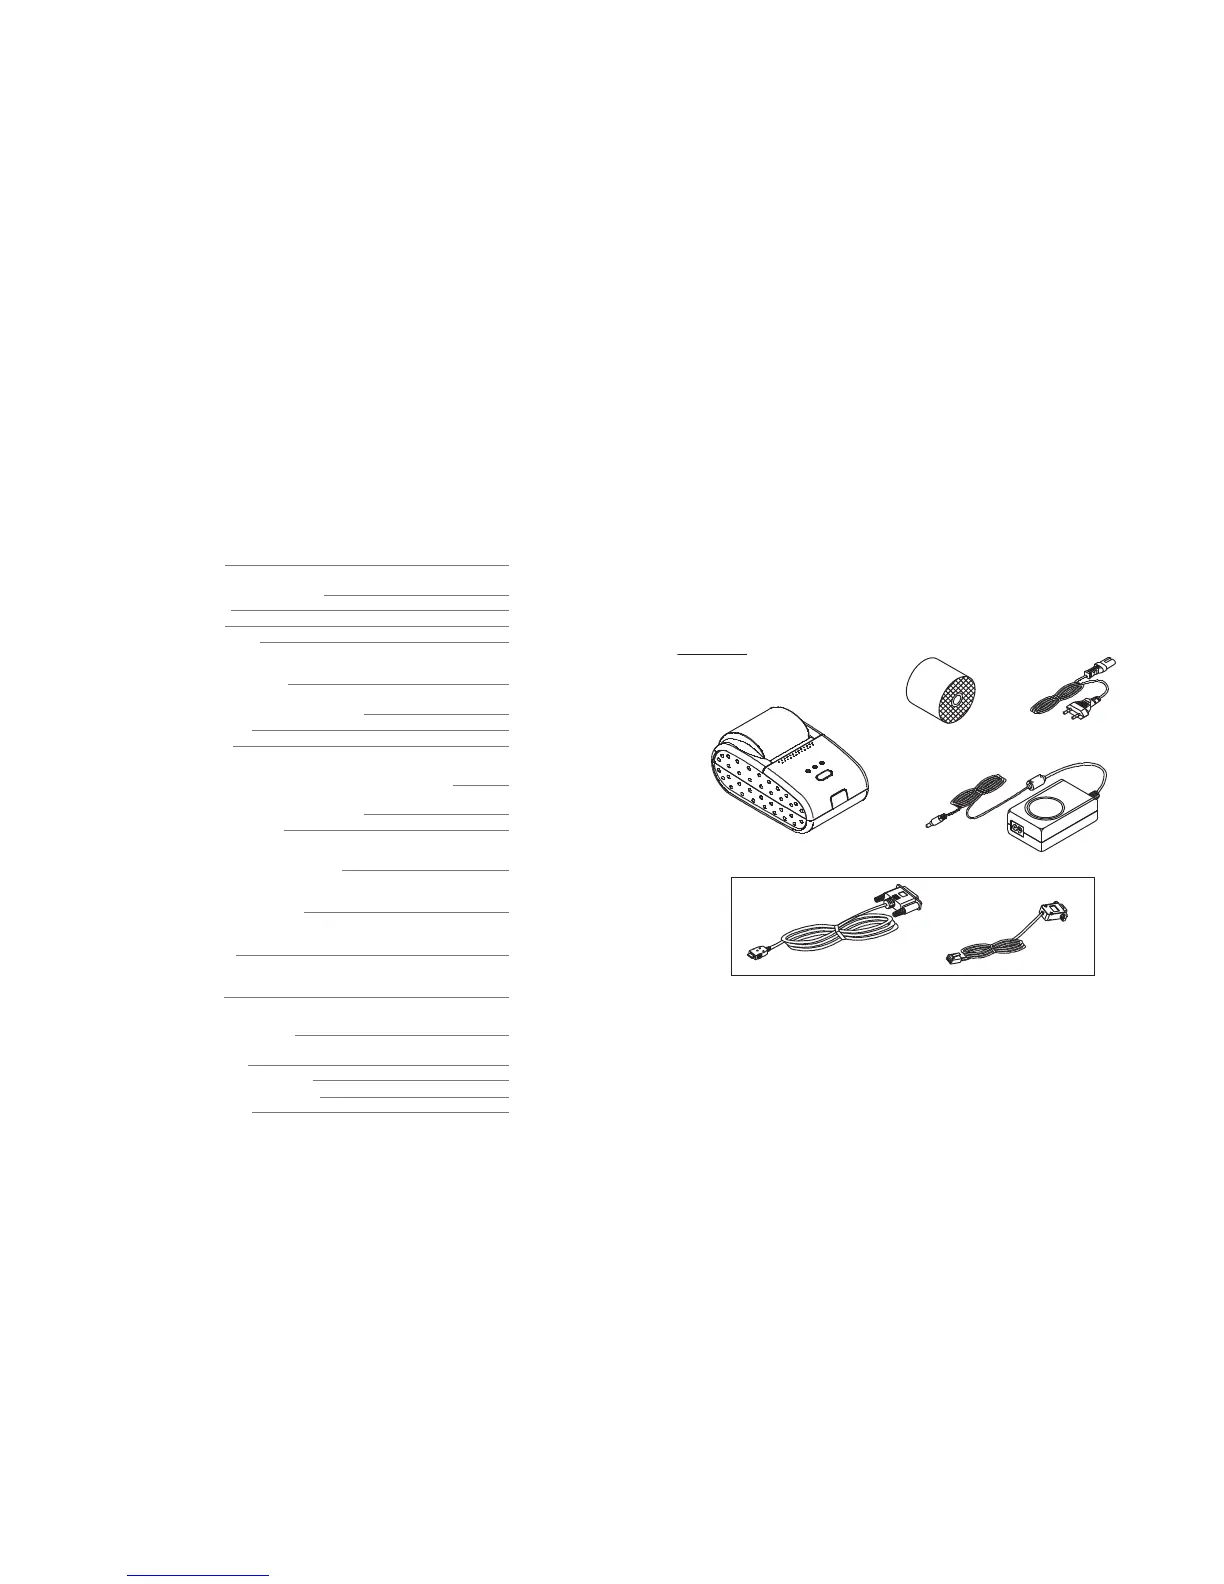
1-1. Checking the contents of the Printer.
The items illustrated below are included with your printer.
If any items are damaged or missing, please contact your
dealer for assistance.
1-2. Locating the Printer.
Avoid location in direct sunlight or excessive heat.
Avoid or storing the printer in the place subject to excessive moisture.
Do not use or store, horizontal surface for the printer. Avoid places subject to
intense vibration or shock.
Make sure that there is enough space around the printer so that it can be used easily.
®
®
®
®
4
Parallel Type
Serial Type
Cable
Printer
Adaptor
Roll Paper
Power Cord
Unpacking