13
NOTE
Be sure to install the paper roll before you run the self test.
Chapter 5. Running the Self-test
Any time that you want to check the performance of your printer you can run the self
test described below. This showers whether your printer is working correctly. It is
independent of any other equipment or software.
14
DIP switch functions
BPS
2400
4800
9600
19200
38400
57600
115200
Level
1
2
3
4
5
6
7
S/W1
ON
OFF
OFF
ON
ON
OFF
ON
S/W2
OFF
ON
OFF
OFF
ON
ON
ON
S/W3
OFF
OFF
ON
ON
OFF
ON
ON
Dip Switch
No.
1
2
3
Function
Density
Handshaking
Protocal
IrDA
Reserved
ON OFF
5
6
7
8
4
Normal
DTR/DSR
Not Used.
Serial/Parallel
-
Dark
Xon/Xoff
Used.
IrDA
-
NOTE
Dip Switch 8 must be always set to OFF condition.
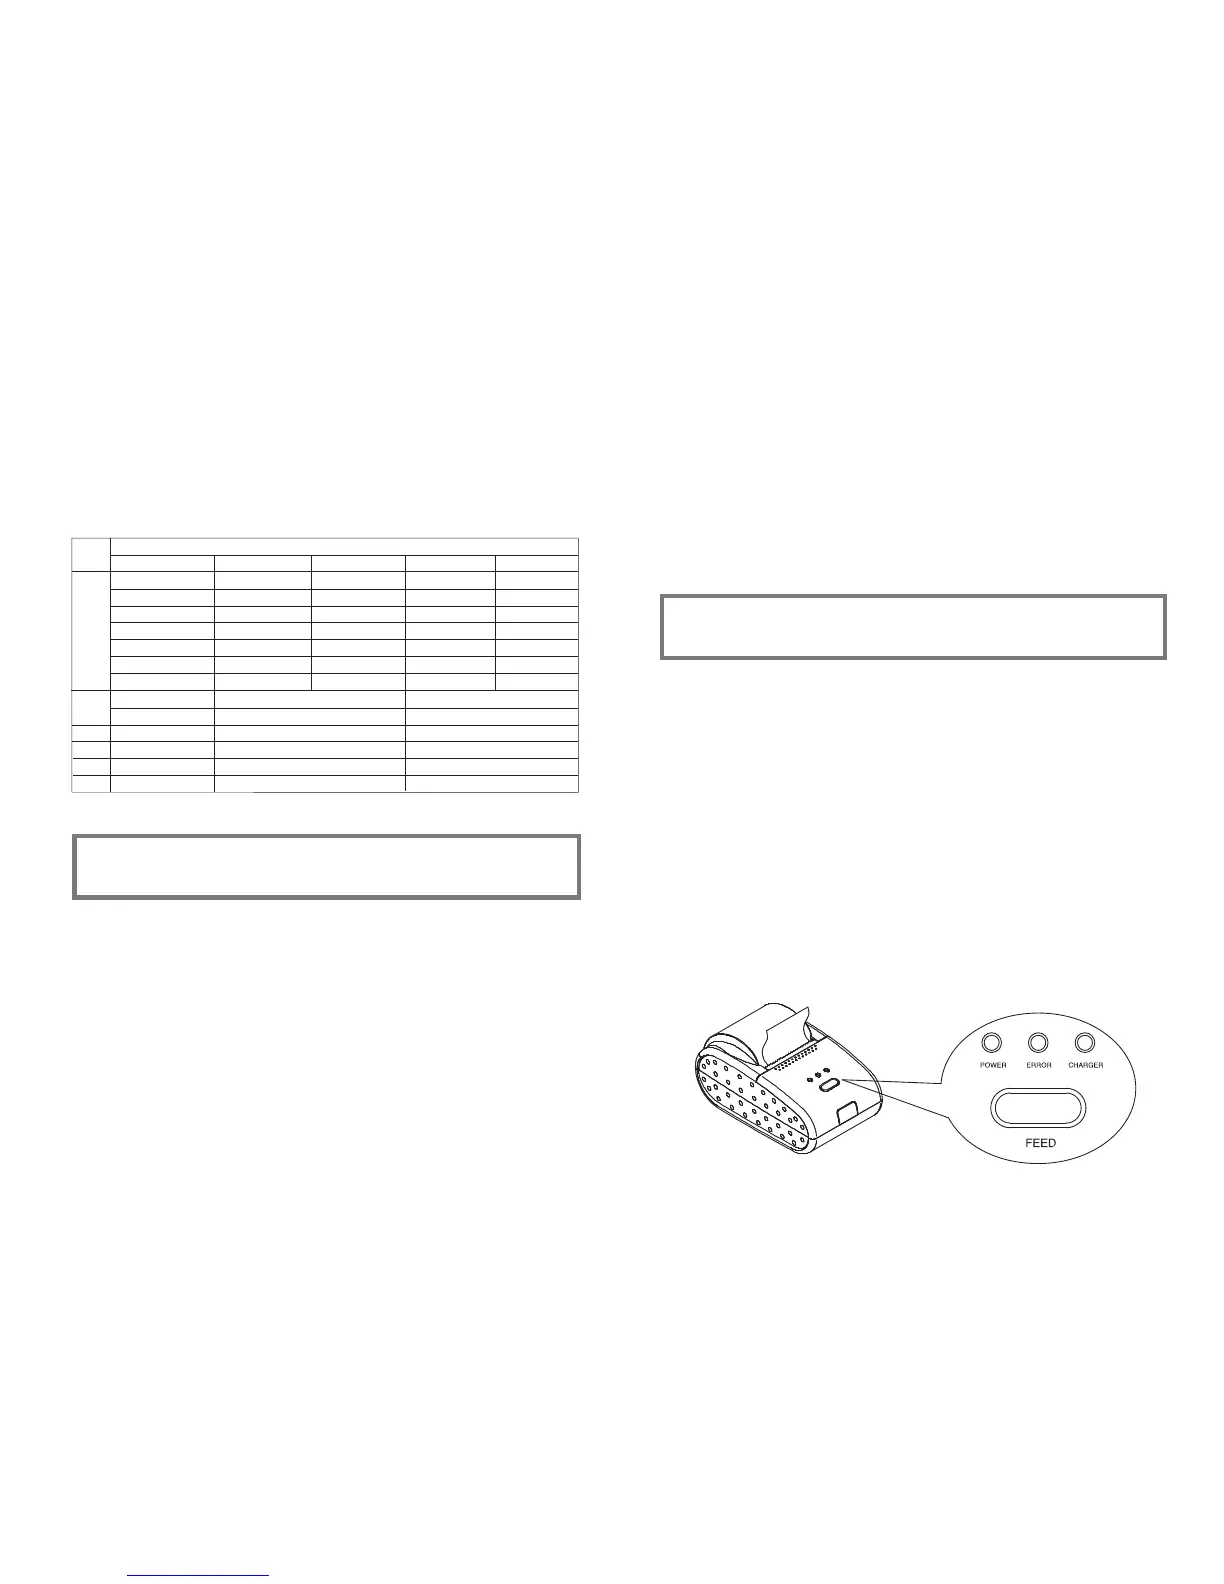
1. Self-test printing
1) Starting the self test
To start printing the self-test on a paper roll, hold down the PAPER FEED
button and turn on the printer with the cover closed. The self-test prints the
current printer settings, which provide the following information :
- control software version
- dip switch state
2) Standby state
After printing the current printer status, the printer prints the message
"Please press the FEED BUTTON.". The LED indicator blinks and the
printer enter the test printing standby state.
Press the FEED BUTTON to start test printing.
2. Ending the self-test
After a number of lines are printed, the printer indicates the end of the
self-test by printing " ** TEST COMPLETED ** ".
If the self-test is completed, then you must reboot your printer.
Followings are the self-test results with OM7212S & OM7212P.