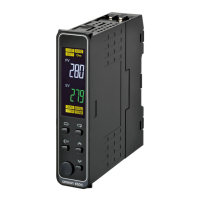
E5DC
42
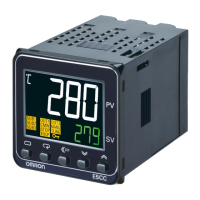
Nomenclature
Dimensions (Unit: mm)
Controllers
Front-panel Setup Tool port
Front panel
Bottom View of E5DC
Operation indicators
PV or specified parameter
SP or specified parameter value
No. 1 display
No.2 display
Use the M Key to change to another
parameter.
Use the U D Keys to
set the parameter.
Press O Key for at least 3
seconds to go to Initial
Setting Level.
Use S Key to change the digit (default setting).
Bottom-
panel Setup
Tool port
Press O Key once to go to
Adjustment Level.
E5DC
22.7
+0.3
0
120 min
Mounted Separately Two-Unit Mounting Group Mounted
92
+0.8
0
45
+0.6
0
92
+0.8
0
92
+0.8
0
(22.5 × number of units)
+1.0
0
96
110 91
(85)
81
35
22.5
22.5
4
4
Mounting Adapter
(Accessory: Sold separately)
E5DC
• Recommended panel thickness is 1 to 8 mm.
• Group mounting is not possible in the vertical direction. (Maintain the specified mounting space between Controllers.)
• When two or more Digital Temperature Controllers are mounted, make sure that the surrounding temperature does
not exceed the allowable operating temperature specified in the specifications.
• To attach the USB-Serial Conversion Cable to the control panel, use a panel thickness of 1 to 2.5 mm.
The Setup Tool port is on the bottom of the Temperature Controller.
It is used to connect the Temperature Controller to the computer to use the Setup Tool.
The E58-CIFQ2 USB-Serial Conversion Cable is required to make the connection.
Refer to the instructions that are provided with the USB-Serial Conversion Cable for the
connection procedure.
Note: Do not leave the USB-Serial Conversion Cable connected when you use
the Digital Temperature Controller.
 Loading...