c-sc 1. 00
c-db 0. 0
chys 1. 0
Input type *2
Scaling upper limit
(only when setting analog input)
Scaling lower limit
(only when setting analog input)
Decimal point
(only when setting analog input)
°C/°F selection
Set point upper limit
Set point lower limit
In ON/OFF control =
In 2-PID control =
Standard control =
stnd
Heating and cooling control =
h-c
(Select standard control or healing
and cooling control as required)
Control period (control output 1)
(Unit: Seconds)
Control period (control output 2)
(Unit: Seconds)
Alarm 1 type: Specified models only
°C=
°F=
(C stands for Celsius, F for Fahrenheit)
Self-tuning ON =
Self-tuning OFF =
In Reverse operation(heat) =
In Direct operation(cool) =
*2
*3
Initial setting level enables users to specify their preferred operating
conditions (input type, alarm type, control method, etc.)
*2: Refer to the adjoining tables for details of input types and alarm types.
• Up and Down keys
Use the keys to change the values displayed on
the No.2 display.
Each press of U key increments or advances
the values displayed on the No.2 display.
Each press of D key decrements or returns the
values displayed on the No.2 display.
●
Connections
(The applicability of the electric terminal varies with the type of machine.)
■Wiring
■Operation menu
●Installation
●Dimensions
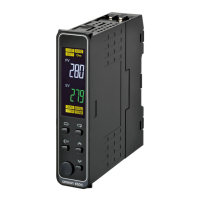
Operation indicators
• CMW:
communications writing enable/disable indicator
Lights when communications writing is “enabled”
and is out when it is “disabled”.
• STOP: control stop indicator
Lights when “Run/Stop” is stopped during opera-
tion.
During control stop, functions other than control
output are valid.
• OUT: Control output 1/Control output 2 indicator
Lights when control outputs 1 and 2 are ON or
either of them is ON.
• °C / °F : temperature unit
The temperature unit is displayed when
the displayed value is a temperature.
When this parameter is
set to “°C”, “°c” is displayed,
and when set to “°F”, “°f” is displayed.
This flashes while ST(Self-Tuning) is
activated.
• AL : Alarm 1 output indicator
Lights when alarm 1 output is ON.
• Since the voltage output (control output) is not electrically insulated from the internal
wiring, one or other of the control output terminals must be left unearthed when using
an earthed thermocouple thermometer. (Connection makes measurements unreliable
due to sneak currents.)
•
Power supply, input, output, and communication terminals (for models with
communications) have basic insulation between them.
When double insulation is required, apply supplemental insulation defined in
IEC 60664 that is suitable for the maximum operating voltage with clearances
or solid insulation.
• Insert the controller through the hole in the panel. Push
the adapter on from the rear and fasten temporarily, re-
moving any gap between the controller, panel and adap-
ter. Finally, secure two fixing screws alternately keeping
the torque to between 0.29 to 0.39 N•m.
Dimensions (mm)
(48 x number of units –2.5)
Individual mounting (mm)
Side-by-side mounting(waterproof not possible) (mm)
●Names of parts on front panel
• No.1 display
Process value or set data symbol
• No.2 display
Set point, set data read-out value or changed
input value
• Mode key
Press this key to change the contents of the
display
* Terminal part can be removed for maintenance without disconnecting the terminal wiring.
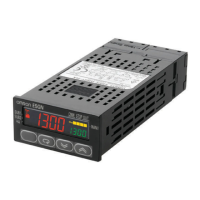
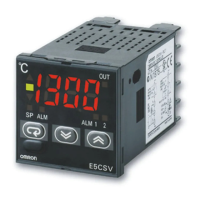
E5GN
Temperature controller
POWER ON
CAUTION
Do not touch terminals when voltage is applied.
Electric shock hazard
Do not allow metal fragments or lead wire scraps to fall inside this product. This may cause electric shock, fire
or malfunction.
Do not use this product where subject to flammable or explosive gas.
Doing so may cause explosion.
Never disassemble, repair or modify the product. This may cause electric shock, fire or
malfunction.
CAUTION - Risk of Electrical Shock
a) Devices are Open Type, Listed Process Control Equipment and must be mounted in an enclosure.
b) More than one disconnect switch may be required to de-energize the equipment before servicing.
c) Signal inputs are SELV, limited energy.
d) Caution - To reduce risk of fire or Electrical shock, Do not interconnect the outputs of different Class 2
circuits.
The life expectancy of the output relay varies considerably according to its the output relay within its rated load
and electrical life expectancy, if the output relay is used beyond its life expectancy, its contacts may become
fused or burned.
Use copper stranded or solid wire only. For terminals 1-6 use 24-14 AWG. For terminals 7-9 use 28-22 AWG.
Tightening torque: Terminals 1-6: 0.24N•m, 2 inch lbs(max), Terminals 7-9: 0.13N•m, 1.2 inch lbs(max)
Loose screws may cause malfunction.
Correctly set the settings on the temperature controller matched to the control target.If the settings are not
compatible with the control target, the product may operate in an unexpected manner, resulting in damage to
the product or an accident.
To maintain safety in the event of malfunction of the temperature controller, we recommend taking safety
measures, for example, installing an excessive temperature rise prevention alarm on a separate line. If
malfunction prevents control, this may result in a major accident.
WARNING: To reduce the risk of electric shock or fire, install in a Pollution Degree 2 environment (a
controlled environment relatively free of contaminants).
(1) Do not use this product in the following places:
• Places directly subject to heat radiated from heating equipment.
• Places subject to splashing liquid or oil atmosphere.
• Places subject to direct sunlight.
• Places subject to dust or corrosive gas (in particular, sulfide gas and
ammonia gas).
• Places subject to intense temperature change.
• Places subject to icing and condensation.
• Places subject to vibration and large shocks.
(2) Use/store within the rated temperature and humidity ranges.
Provide forced-cooling if required.
(3) To allow heat to escape, do not block the area around the product.
Do not block the ventilation holes on the product.
(4) Be sure to wire properly with correct polarity of terminals.
(5) Use AWG24 to AWG14 leads for terminal Nos. 1 to 6 and AWG28 to AWG
22 for terminal Nos. 7 to 9 (with lead cover peel back allowance of 5 or 6
mm).
(6) Do not wire the terminals which are not used.
(7) Allow as much space as possible between the controller and devices that
generate a powerful high-frequency or surge.
Separate the high-voltage or large-current power lines from other lines, and
avoid parallel or common wiring with the power lines when you are wiring to
the terminals.
(8) Use this product within the rated load and power supply.
(9) Make sure that the rated voltage is attained within two seconds of turning the
power ON.
(10) Make sure the controller has 30 minutes or more for warm up.
(11) When executing self-tuning, turn the load and the unit ON simultaneously,
or turn the load ON before you turn the controller ON.
(12) A switch or circuit breaker should be provided close to this unit.
The switch or circuit breaker should be within easy reach of the operator,
and must be marked as a disconnecting means for this unit.
(13) When you have removed the terminal block, never touch nor apply shock to
the terminals and the electronic components inside.
(14) Cleaning: Do not use paint thinner or the equivalent. Use standard grade
alcohol to clean the product.
Precautions for safety use
0682727-0H
●Operation level
●Adjustmentlevel
●Protect level
●Initial setting level
For detailed operating instructions, please refer to
the E5GN User's Manual.
Instruction Manual
Thank you for purchasing the OMRON E5GN tempera-
ture controller. Read this manual carefully before using
the controller and always keep it close at hand while the
controller is in use.
OMRON CORPORATION
©All Rights Reserved
●Alarms
*1: Upper and lower limits can be set for parameters 1, 4 and 5 to provide for
different types of alarm. These are indicated by the letter "L" and "H".
• Default = "2"
Alarm type
1
0
2
3
4
5
6
7
8
9
10
11
Vary with "L", "H" values
Vary with "L", "H" values
Vary with "L", "H" values
No alarm function
Output off
Deviation upper/lower limit
standby sequence ON
Absolute value upper limit
Absolute value lower limit
Absolute value upper limit
standby sequence ON
Absolute value lower limit
standby sequence ON
Deviation lower limit
standby sequence ON
Deviation upper limit
standby sequence ON
Deviation upper/lower range
Deviation upper limit
Deviation upper/lower limit
Deviation lower limit
Alarm output function
Positive alarm value (X)
LH
LH
LH
ON
OFF
SP
Negative alarm value (X)
X
ON
OFF
SP
ON
OFF
SP
X
X
ON
OFF
SP
ON
OFF
SP
ON
OFF
SP
X
X
X
ON
OFF
SP
ON
OFF
SP
ON
OFF
SP
X
X
X
X
ON
OFF
SP
ON
OFF
SP
ON
OFF
0
ON
OFF
X
X
0
ON
OFF
0
ON
OFF
X
X
0
ON
OFF
0
ON
OFF
X
0
ON
OFF
0
ON
OFF
X
0
Setting
*1
*1
*1
■Other functions
In addition to the aforementioned, there are alarm hysteresis,
automatic return of display mode and others in the advanced
setting level.
Refer to "E5GN User's Manual" for details.
For communications details, please refer to "E5AN/EN/CN/GN
communications User's Manual".
In the pack:
• Main unit
• Watertight packing
• Adapter
• Instruction manual
Suitability for Use
OMRON shall not be responsible for conformity with any standards, codes, or regulations that
apply to the combination of the products in the customer's application or use of the product.
Take all necessary steps to determine the suitability of the product for the systems, machines,
and equipment with which it will be used.
Know and observe all prohibitions of use applicable to this product.
NEVER USE THE PRODUCTS FOR AN APPLICATION INVOLVING SERIOUS RISK TO LIFE OR PROPERTY WITHOUT
ENSURING THAT THE SYSTEM AS A WHOLE HAS BEEN DESIGNED TO ADDRESS THE RISKS, AND THAT THE
OMRON PRODUCT IS PROPERLY RATED AND INSTALLED FOR THE INTENDED USE WITHIN THE OVERALL
EQUIPMENT OR SYSTEM.
See also Product catalog for Warranty and Limitation of Liability.
Operation stopped.(control/alarm are both stopped.)
●Specifications
Power supply voltage
Operating frequency
Operating voltage range
Power consumption
Indication accuracy
Control output 1
Control method
Alarm output
(control output 2)
Ambient temperature
Ambient humidity
Storage temperature
Altitude
Recommended fuse
Weight
Installation environment
100-240V AC type
24V AC/DC type
50-60Hz
85 to 110% of the rated voltage
Approx. 7VA (AC100-240V)
Approx. 4VA (AC24V)
Approx. 2.5W (DC24V)
Thermocouple, platinum resistance
thermometer:
(±0.5 % of indication value or ±1
°
C,
which is greater) ±1 digit max.
Analog input:
±0.5 % FS ±1 digit max.
Relay output: SPST-NO,
250VAC 2A (resistive load)
Voltage output 12VDC 21mA
Electrical life of relay:
100,000 operations
ON/OFF or 2-PID control
SPST-NO, 250 VAC, 1 A(resistive load),
electrical life:100,000 operations
–10 to 55°C
(Avoid freezing or condensation)
RH 25 to 85%
–25 to 65°C
(Avoid freezing or condensation)
Max. 2,000m
T2A, 250V AC, time-lag,
low-breaking capacity
Approx. 90g (main unit only)
Setup category II, pollution
degree 2 (as per IEC61010-1)
●Input type
–200to850(℃)
–199.9to500.0(℃)
0.0to100.0(℃)
–199.9to500.0(℃)
0.0to100.0(℃)
/–300to1500(
。
F)
/–199.9to900.0(
。
F)
/0.0to210.0(
。
F)
/–199.9to900.0(
。
F)
/0.0to210.0(
。
F)
Setting range
Setting
0
1
2
3
4
Input type
Platinum
resistance
thermometer
Input
Pt100
JPt100
Platinumresistance
thermometer
inputtype
–200to1300(℃)
–20.0to500.0(℃)
–100to850(℃)
–20.0to400.0(℃)
–200to400(℃)
–199.9 to 400.0(℃)
0to600(℃)
–100to850(℃)
–200to400(℃)
–199.9 to 400.0(℃)
–200to1300(℃)
0to1700(℃)
0to1700(℃)
100to1800(℃)
0to90(℃)
0to120(℃)
0to165(℃)
0to260(℃)
/–300to2300(
。
F)
/0.0to900.0(
。
F)
/–100to1500(
。
F)
/0.0to750.0(
。
F)
/–300to700(
。
F)
/–199.9 to 700.0(
。
F)
/0to1100(
。
F)
/–100to1500(
。
F)
/–300to700(
。
F)
/–199.9 to 700.0(
。
F)
/–300to2300(
。
F)
/0to3000(
。
F)
/0to3000(
。
F)
/300to3200(
。
F)
/0to190(
。
F)
/0to240(
。
F)
/0to320(
。
F)
/0to500(
。
F)
Setting rangeSetting
0
1
2
3
4
17
5
6
7
18
8
9
10
11
12
13
14
15
16
Input type
Thermocouple
Infrared
Thermosensor
ES1B
Analog input
Input
K
J
T
E
L
U
N
R
S
B
10 –70℃
60 –120℃
115 –165℃
140 –260℃
0to50mV
Use the following ranges for scaling:
–1999 to 9999, –199.9 to 999.9
Thermocoupleinputtype
*6: Error shown only for "Process value / Set point". Not shown for other
status.
●Error display (trouble shooting)
When an error has occurred, the No.1 display alternately indicates error
codes together with the current display item.
No.1 display
Meaning
A/D converter error
*6
Memory error
Input error
*6
(S. Err)
(E111)
Check the wiring of inputs, disconnections,
shorts and input type.
Turn the power OFF then back ON again. If the dis-
play remains the same, the controller must be re-
paired. If the display is restored to normal, then a
probable cause can be external noise affecting the
control system. Check for external noise.
After the correction of input error, turn the power
OFF then back ON again. If the display remains
the same, the controller must be repaired. If the
display is restored to normal, then a probable
cause can be external noise affecting the control
system. Check for external noise.
CAUTION
Action
Status at error
Control
output
OFF
OFF
OFF
OFF
OFF
Alarm
1 2 3 4 5 6 7 89
TC
PT
A
BA
BB
+−
(−)(+)
+−
−+
RS-485
Communications
function
Voltage output
12V DC 21mA
(resistive load)
Control output 1
Input power supply:
•100 to 240V AC Type
•24V AC/DC Type
Analog input
Alarm 1/Control output 2
250V AC 1A
(resistive load)
48
24
35
CMW OUTSTOP
22.2
+0.3
0
22.2
+0.3
0
40 min.
+1
0
45
+0.6
0
CMW OUTSTOP CMW OUTSTOP
Adjustment level is for entering set
values and shift values for control.
AT execute =
AT cancel =
Communication write
*4
Temperature input shift
(Unit:
°C
or
°
F)
Input shift upper limit
(When Infrared Thermo-
sensor ES1A selected)
Input shift lower limit
(When Infrared Thermo-
sensor ES1A selected)
Proportional band
Derivative time
(Unit: secs)
Cooling coethcient
Dead band
Integral time
(Unit: secs)
Manual reset value
(Unit: %)
Hysteresis
(Control output 1)
Hysteresis
(Control output 2)
Operation level should normally be used
during operations.
PV/SP
Alarm value 1 *4
Alarm value upper limit 1
*3
Alarm value lower limit 1
*3
Run/Stop
When control start =
When control stop =
Operation / adjustment
protect
Initial /
Communication
protect
Setting change protect
Restricts which settings can be
displayed or changed, and restricts
change by key operation.
Press
(less than 1 second)
Hold down
for at least
3 seconds
Hold down for
at least 1 second
Hold and
M keys down for
at least 3 seconds
*3: Applicable only to models with alarm functions
*4: Applicable only to models with a communications function
*5: Operation is stopped when moved to the initial setting level. (control/alarm are
both stopped.)
*7:
The grayed-out setting items may not be displayed according to the models and setting.
●AT (auto-tuning)
Communication
unit No.
Communication
rate
Data length
Stop bit
Parity
Make sure the communication settings (Communication rate, etc.)
match those of the Host Computer.
●Communication setting level
Press
(less than 1 second)
STX
Node
No.
SID
FINS-mini
Command text
ETX
Sub-
address
BCC
STX
Node No.
Sub-address
SID
FINS-mini
command text
ETX
BCC
Code (H'02) to indicate the head of the communication frame (text).
If STX is received a second time while receiving a communication, it
indicates that the communication is starting again from that point.
Specifies the transmission destination unit No. Settings range from
00 to 99.
"00" (Fixed)
Service ID, "0" (Fixed)
Contains command contents such as read and write values, and sta-
tus data
Code (H'03) indicating the end of the text.
Block check character
Error check method used by FINS-mini.
Each byte from node No. through ETX has an XOR (exclusive OR)
value
For CompoWay / F
●Command format
Command
STX
STX
Node
No.
Node
No.
SID
Sub-ad-
dress
Sub-ad-
dress
Buffer sizeFormat
MRC
MRC
SRC
SRC
Response
ETX
Termina-
tion code
Response
code
BCC
0 3
0 3
0 5
0 5
0
00
●Controller attribute read-out
Use this function to check the controller's format
and communication buffer size.
212 11222 4 10 4
00
0F
10
11
12
13
14
16
18
Termina-
tion code
Name Description
Normal termination
Command error
Parity error
Framing error
Overrun
BCC error
Format error
Sub-address error
Frame length error
Unexecutable command received
Parity mismatch
No stop bit detected
Receive buffer overflowed
BCC mismatch
Incorrect data length
Incorrect sub-address
When the receive frame exceeds the specified byte count
●Termination code (For CompoWay / F)
• AT in Adjustment level
Designate “on: AT execute” to execute
AT and “off: AT cancel” to cancel AT.
Also when AT execution ends, the display
automatically returns to “off”.
ETX BCC
• Make sure that the surrounding temperature does not exceed the
allowable operating temperature given in the specifications espe-
cially when two or more controllers are mounted.
N6
*5
*7
*7
*7
*7
*7
*7
*7
*7
*7
*7
*7
*7
*7
*7
*7
*7
*7
*7
*7
*7
*7
*7
*7
*7
*7
No.1 display
flushes when hold
down for more
than 1 second
• Level key
Use this key to change levels:
• Press the key and the M key together for
at least 3 seconds to switch to protect level.
*4
• Default = "0"
44.8
(36.8)
1003
22
When waterproofing is
required, be sure to mount
the controller separately.
Attach the waterproof
packing from the terminal
side and then insert the
controller to the panel.
Recommended panel
thickness is 1 to 5 mm.
s-hc stnd
c-cp 20
Operates
as above
the upper
limit.
If the input value exceeds the display limit (–1999(–199.9) to
9999(999.9)), though it is within the control range, [[[[ will be displayed
under –1999(–199.9) and ]]]] above 9999(999.9). Under these
conditions, control output and alarm output will operate normally.
Refer to "E5GN User's Manual" for details of control range.
Hold and
M keys down for
at least 1 second
U
D
“AT execute” “at” flashes
“AT cancel”
Only the value set to the “ins: temperature input shift”
parameter is applied to the entire temperature input
range. When the process value is 200 °C, the process
value is treated
as 201.2 °C after input shift if the input
shift value is set to 1.2 °C.
The process value is treated as 198.8 °C after input shift
if the input shift value is set to –1.2 °C.
After shift
Before shift
Sensor input
Temperature
Inputshiftvalue:(1.2°C)
501.2℃
500.0℃
201.2℃
200.0℃
-18.8℃
-20.0℃
-20.0℃ 200.0℃ 500.0℃
(Ex.) Thermocouple input type, Input type:1,
Temperature unit:°C, temperature input shift:1.2 °C
Relay output
250V AC 2A
(resistive load)
EN
CAUTION
Indicates a potentially hazardous situation which, if
not avoided, is likely to result in minor or moderate
injury or property damage. Read this manual
carefully before using the product.
CAUTION
Safety Precautions
●Key to Warning Symbols
●Warning Symbols
●Operation / Adjustment protection
The following table shows the relationship between settings and
protect limits related to Operation level and Adjustment level.
Default setting : 0
◎:Can be displayed and changed
○:Can be displayed
×:
Can not be displayed and change
to other levels not possible
Operation level
Adjustment level
Process value
Set point
Others
Level
Set value
0
○
◎
◎
◎
1
○
◎
◎
×
2
○
◎
×
×
3
○
○
×
×
●Setting change protection
Setting changes by key operation are restricted.
OFF “off”: Setting can be changed by key operation
ON “on” : Setting cannot be changed by key operation
(Protect level settings can all be changed.)
●Initial setting/Communications protection
This protect level restricts movement to the initial setting level,
communications setting level and advanced function setting level.
Set value
0
1
2
○
○
×
○
○
×
○
×
×
Initial setting
level
Communications
setting level
Advanced function
setting level
Default setting : 1
○:Changetootherlevelspossible
×:Changetootherlevelsnotpossible
OMRON ELECTRONICS. LLC
ONE COMMERCE DRIVE SCHAUMBURG, IL 60173-5302 U.S.A
Phone 1-847-843-7900 FAX:1-847-843-7787
EUROPEAN H.Q : OMRON EUROPE B.V
Wegalaan 67-69 P.O.BOX.13 2130 AA HOOFDDORP THE
NETHERLANDS
Phone 31-23-5681300 FAX 31-23-5681388
OMRON ASIA-PACIFIC PTE.LTD.
83, Clemenceau Avenue, #11-01, UE Square, Singapore
239920 SINGAPORE
Phone 65-6-835-3011 FAX 65-6-835-2711