AVOID THIS FINISH
PRODUCE CROSS HATCH SCRATCHES
FOP.
FAST RING SEATING
FIGURE 30. CROSSHATCHING
BEARINGS
(Figures
31-33)
Removing camshaft or crankshaft bearings requires
complete disassembly of the engine. Use a press or a
suitable drive plug to remove the bearings. Support
the casting to avoid distortion and avoid damaging
the bearing bore during removal and installation. Use
oil on the bearings to reduce friction when installing
and again lubricate with oil after installing.
New camshaft bearings are precision type that do not
require line reaming or line boring after installation.
Coat the bearing with SAE20 oil to reduce friction.
Place the bearing on the crankcase over the bearing
bore with the elongated hole in proper position and
narrow section facing out (except bores without oil
holes install with bearing groove at the top). Be sure
to start the bearing straight. Press the front bearing in
flush with the outside end of the bearing bore. Press
the rear bearing in flush with the bottom of counter-
bore which received the expansion plug (see Figure
31).
PRECISION TYPE - DO NOT LINE REAM OR BORE.
ALIGN HOLE IN BEARING
\ \ I "
7/32
"
«>V/ FROM
, OUTSIDE
WITH HOLE
IN BEARING BORE
CAMSHAFT BEARING
FIGURE 31. CAMSHAFT BEARING
Crankshaft main bearings are precision type that do
not require line reaming or line boring after installa-
tion.
They are available in standard size and .002"
undersize. Expand the bearing bore by placing the
casting in hot water or in an oven heated to 200°F.
JCAUTION
If a torch is used, apply only a little heat.
To ease assembly, cool the precision bearing to
shrink it. Align the oil hole(s) in the bearing with the
oil hole(s) in the bearing bore. The oil passage must
be at least 1/2 open. Lubricate bearings with SAE20
oil before installing. The cold oiled precision bearing
should require only light taps to position it with a
driving
tool.
If head of lock pin is damaged, use side
cutters or Easy Out tool to remove and install new pin.
Apply oil to thrust washer (one used with each
bearing) to hold it in place while installing the
crankshaft. Oil grooves in thrust washers must face
the crankshaft and washers must be flat (not bent).
The two notches on each washer must fit over the two
lock pins to prevent riding on the crankshaft.
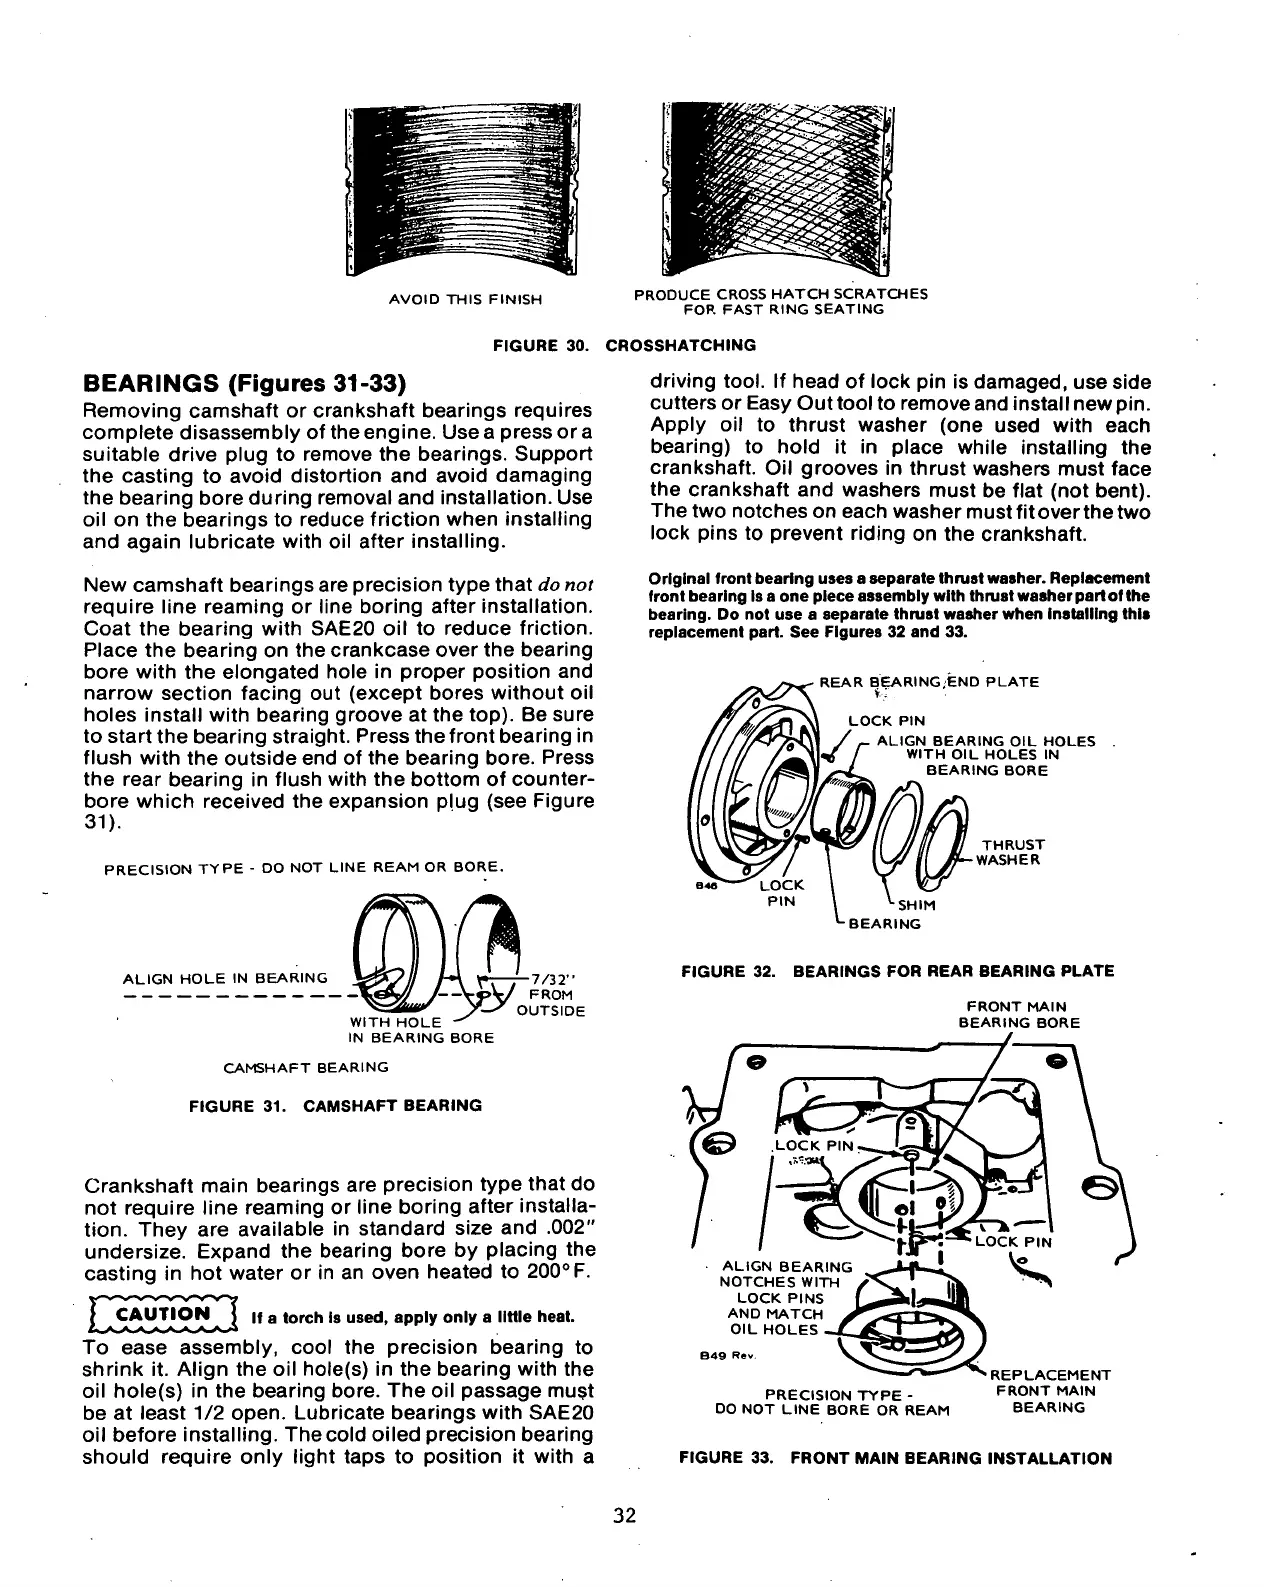
Original front bearing uses a separate thrust washer. Replacement
front bearing Is a one piece assembly with thrust washer part of the
bearing.
Do not use a separate thrust washer when Installing this
replacement part. See Figures 32 and 33.
REAR BEARING/END PLATE
LOCK PIN
ALIGN BEARING OIL HOLES
WITH OIL HOLES IN
BEARING BORE
THRUST
WASHER
SHIM
BEARING
FIGURE 32. BEARINGS FOR REAR BEARING PLATE
FRONT MAIN
BEARING BORE
ALIGN BEARING
NOTCHES WITH
LOCK PINS
AND MATCH
OIL HOLES
B49 Rev
PRECISION TYPE -
DO NOT LINE BORE OR REAM
REPLACEMENT
FRONT MAIN
BEARING
FIGURE 33. FRONT MAIN BEARING INSTALLATION
32
 Loading...
