Do you have a question about the One Click IntelliPlug AVC014 and is the answer not in the manual?
Lists items included: IntelliPlug, Remote Sensor, RJ12 Cable, User Manual.
Highlights benefits: Isolates power, saves money, and adds convenience.
Explains the function of the Mode and Slave LEDs on the IntelliPlug unit.
Lists important safety precautions and operational restrictions for the IntelliPlug.
Illustrates the top view of the IntelliPlug, showing the master socket.
Shows the bottom view of the IntelliPlug with mode switch and socket labels.
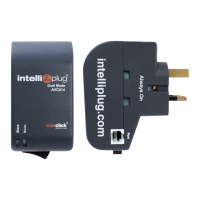
Displays the front of the IntelliPlug unit, indicating its model and branding.
Details the side view of the IntelliPlug, highlighting the "Port" connection.
Identifies the infra-red transmitter part of the remote sensor.
Points out the programming/activation button on the remote sensor.
Indicates the LED sensor component on the remote sensor unit.
Lists technical details like Part No., AC Input, Voltage, and Warranty.
Instructs to set the Master Socket Mode switch to "Infra Red" for TV/AV mode.
Advises on selecting an optimal location for the IntelliPlug near the equipment.
Outlines connecting one end of the RJ12 cable to the IntelliPlug.
Details connecting the RJ12 cable's other end to the Remote Sensor.
Guides on connecting the television to the master socket of the IntelliPlug.
Explains connecting peripheral devices to the slave socket via a power distribution panel.
Instructs to plug into mains, power on, and position the Remote Sensor for the TV.
Advises using the "Always On" socket for devices needing continuous power, like recorders.
Explains using an infrared remote to activate the IntelliPlug via the Remote Sensor.
Clarifies the function of GREEN and RED LEDs on the IntelliPlug for status.
Details pressing and holding the sensor button to initiate pairing mode.
Guides on pressing the remote control's power button to pair with the sensor.
Describes activating the TV and peripherals using the remote control.
Explains the LED feedback during the pairing process (flashing GREEN/YELLOW).
Details the final steps of pressing the remote and sensor buttons to finalize pairing.
Outlines steps A, B, C for operating the IntelliPlug via remote control.
Discusses using both TV and AV amplifier as master devices.
Guides on pairing an additional remote control to the sensor.
Provides instructions to clear the Remote Sensor's memory before reprogramming.
Explains the built-in timer for automatic power-off of connected equipment.
Details steps to set the delay timer (1, 2, 3, or 4 hours) using the remote sensor.
Differentiates between hard shutdown and soft timer shutdown modes.
Confirms successful programming and how to use the IntelliPlug.
Mentions the Programming and Interrogation Cable for PC connectivity.
States that the IntelliPlug is compatible with all AV devices.
Advises using only the supplied cable to connect the IntelliPlug to the Remote Sensor.
Explains the red LED behavior during television powering down.
Clarifies that the IntelliPlug won't operate without the Remote Sensor in IR mode.
Explains how to activate power by pressing the remote sensor button.
Details what the Mode and Slave LEDs indicate in different operational states.
Provides checks for when none of the IntelliPlug LEDs are working.
Offers solutions for when the IntelliPlug does not power on.
Provides steps for when connected devices are not powering off correctly.
Suggests causes for intermittent flashing of the Remote Sensor.
Offers troubleshooting steps if the Remote Sensor is not functioning.
Instructs to set the Master Socket Mode switch to "Always Live" for computer mode.
Mentions not using the Remote Sensor/RJ12 cable and power behavior.
Guides on connecting the computer to the master socket and peripherals to the slave socket.
Advises connecting devices like Wi-Fi hubs to the "Always On" socket.
Explains the meaning of GREEN LEDs for Operational Mode and Slave Status.
Provides checks for when none of the IntelliPlug LEDs are working.
Offers steps to diagnose and fix an IntelliPlug that stops working, including fuse check.
Details that the warranty covers defects in design, assembly, material, or workmanship.
States the OneClick product warranty period is for one (1) year.
Lists conditions that nullify the warranty, such as improper installation or tampering.
Describes the Power Monitor Application dialogue window and its features.
Lists the standards to which the IntelliPlug conforms, including EN standards.
Indicates the date the CE Mark was affixed to the product.
| Model | AVC014 |
|---|---|
| Category | Audio & Video Accessories |
| Standby Power Saving | Yes |
| IntelliPlug | Yes |
| Type | Smart Plug |
| Features | Energy monitoring |