DV-SP500
4
5
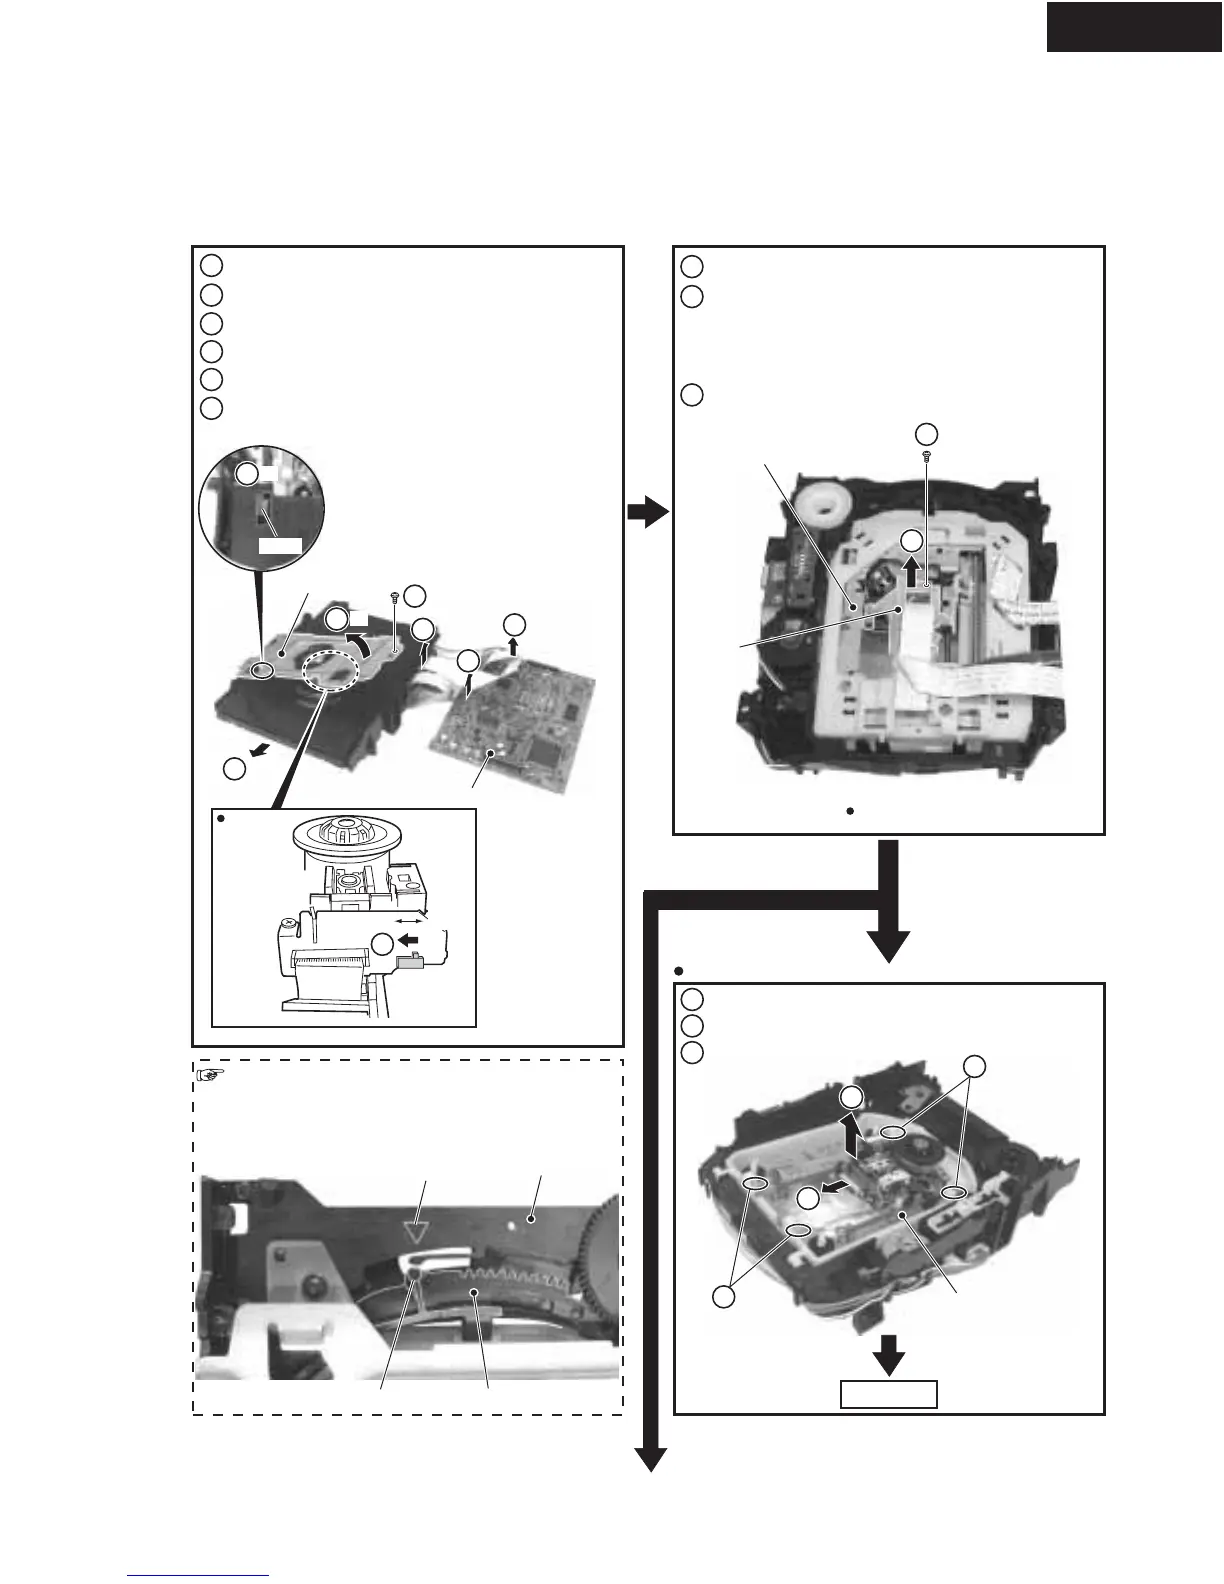
Turn the Short SW to Short side.
6
In the Tray insertion, insert it after matching a triangle mark
of the Loading Base and a position of pin of the Drive Cam.
8
Remove a screw.
7
Remove the Loading Mechanism Assy (Screws 4).
When Removing The Traverse Mechanism Assy
9
9
FFC
Holder
Traverse Mechanism
Assy
Traverse Mechanism
Assy
Remove the FFC Holder with the state which Flexible Cable
was attached.
Pull out the Tray and remove it while unhooking a Hook.
1
2
Remove the Tray panel and Front Panel.
3
Remove the Bridge (Screw 1).
Remove three connectors.
Remove the top cover and Tray Panel.
10
11
12
Unhook ( 4)
Remove the Traverse Mechanism Assy
Remove the Pickup Flexible Cable
8
3
2
2
Bottom View
RearView
Short
Bridge
-1
3
6
6
6
-2
4
-1
4
-2
DVD main PC board assy
Loading Base
Triangle mark
Drive CamPin
DVD main
PCB side
Short SW
5
Exchange
Hook
Caution in the tray insertion
Cautions:
Screw is locked with Silicone Adhesive.
Please lock it with Silicone Adhesive when installs it.
Silicone Adhesive
GEM1037
12
10
11
11
Disassembly of the Traverse Mechanism Assy-1
Open
Next
Pickup assy

 Loading...