EasyManua.ls Logo

Onkyo TX-SA705

Onkyo TX-SA705
162 pages
To Next Page IconTo Next Page
Loading...
E
n
AV Receiver
TX-SR705
AV Amplifier
TX-SA705
Instruction Manual
Thank you for purchasing an Onkyo AV Receiver/
AVAmplifier. Please read this manual thoroughly
before making connections and plugging in the unit.
Following the instructions in this manual will enable
you to obtain optimum performance and listening
enjoyment from your new AV Receiver/
AVAmplifier.
Please retain this manual for future reference.
Contents
Introduction......................................2
Connections...................................21
First Time Setup ............................45
Basic Operations ...........................59
Advanced Operations....................75
Advanced Setup.............................76
Zone 2 .............................................99
Controlling Other Components ..104
Specifications ..............................109
Troubleshooting...........................110

Table of Contents

Other manuals for Onkyo TX-SA705

Question and Answer IconNeed help?

Do you have a question about the Onkyo TX-SA705 and is the answer not in the manual?

Onkyo TX-SA705 Specifications

General IconGeneral
Audio Channels7.1
Number of Channels7
Amplifier TypeDiscrete
THD0.08%
Frequency Response5 Hz-100 kHz
HDMI Inputs3
HDMI Outputs1
HDMI Version1.3a
Component Video Inputs3
Analog Audio Inputs6
Dolby AtmosNo
DTS:XNo
Dolby Digital DecodingYes
DTS DecodingYes
Wi-FiNo
BluetoothNo
Power Output @ 8 Ohms100 W
Digital Audio Inputs3 Optical, 2 Coaxial
Surround Sound FormatsDolby Digital, DTS
Audio DAC192 kHz/24-Bit
THX CertifiedYes (THX Select2)

Summary

Important Safety Instructions

Precautions

For North American model

Model-specific precautions and operations.

For U.S. models

FCC information and user compliance.

Precautions-Continued

For British models

Specific electrical safety and plug information.

Supplied Accessories

Features

Front & Rear Panels

Front Panel

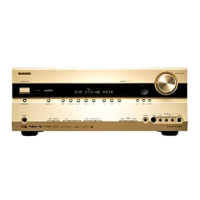
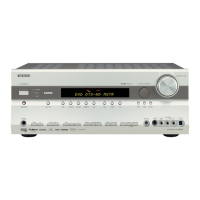
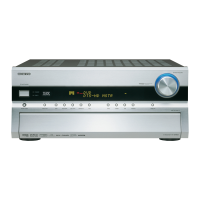
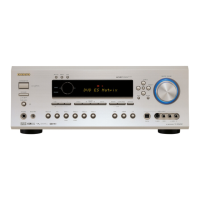
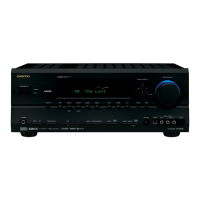
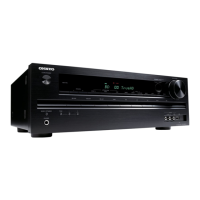
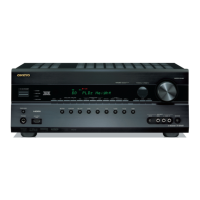
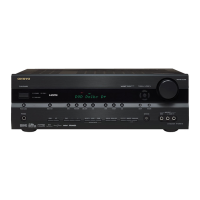
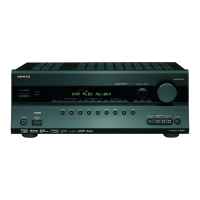
Overview of the front panel controls and indicators.

Front & Rear Panels-Continued

Display

Explanation of the front panel display indicators.

Front & Rear Panels-Continued

Rear Panel

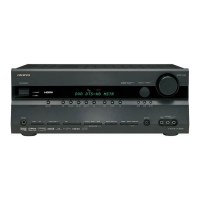
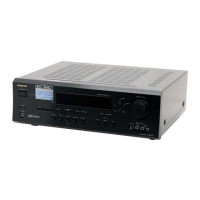
Overview of the rear panel connection terminals.

Remote Controller

Installing the Batteries

Steps to insert batteries into the remote.

Remote Controller-Continued

Using the Remote Controller

General guidance on remote operation and modes.

Remote Controller-Continued

DVD Mode

Instructions for controlling a DVD player.

Remote Controller-Continued

CDMDCDR Modes

Instructions for controlling CD, MD, and CDR players.

Remote Controller-Continued

DOCK Mode

Instructions for controlling an iPod via an RI Dock.

About Home Theater

Enjoying Home Theater

Guidance on achieving optimal surround sound experience.

Connecting the AV ReceiverAV Amplifier

About AV Connections

General guidance on making AV connections.

Connecting the AV ReceiverAV Amplifier-Continued

Speaker Configuration

Table showing speaker connection per number of speakers.

Connecting the AV ReceiverAV Amplifier-Continued

Speaker Connection Precautions

Important safety and connection guidelines.

Connecting the AV ReceiverAV Amplifier-Continued

Connecting the Indoor FM Antenna

How to connect the indoor FM antenna.

Connecting the AV ReceiverAV Amplifier-Continued

Video Connection Formats

Overview of available video connection types.

Connecting the AV ReceiverAV Amplifier-Continued

Connecting a TV or Projector

Step-by-step guide for connecting a TV or projector.

Connecting the AV ReceiverAV Amplifier-Continued

Connecting a DVD Player

Step-by-step guide for connecting a DVD player.

Connecting the AV ReceiverAV Amplifier-Continued

Connecting a VCR or DVD Recorder for Playback

Guide for connecting VCR/DVD for playback.

Connecting the AV ReceiverAV Amplifier-Continued

Connecting a VCR or DVD Recorder for Recording

Guide for connecting VCR/DVD for recording.

Connecting the AV ReceiverAV Amplifier-Continued

Connecting a Satellite, Cable, Set-top box, or Other Video Source

Guide for connecting satellite/cable receivers.

Connecting the AV ReceiverAV Amplifier-Continued

Connecting a Game Console

Guide for connecting a game console.

Connecting the AV ReceiverAV Amplifier-Continued

Connecting a Camcorder or Other Device

Guide for connecting camcorders or other devices.

Connecting the AV ReceiverAV Amplifier-Continued

Connecting Components with HDMI

Guide for connecting devices using HDMI.

Connecting the AV ReceiverAV Amplifier-Continued

Making HDMI Connections

Step-by-step guide for HDMI connections.

Connecting the AV ReceiverAV Amplifier-Continued

CD Player or Turntable (MM) with Built-in Phono Preamp

Connecting CD players or turntables with built-in preamp.

Connecting the AV ReceiverAV Amplifier-Continued

Connecting a Cassette, CDR, MiniDisc, or DAT Recorder

Guide for connecting tape, CDR, MD, or DAT recorders.

Connecting the AV ReceiverAV Amplifier-Continued

Connecting a Power Amplifier

Connecting to a more powerful external amplifier.

Connecting the AV ReceiverAV Amplifier-Continued

Connecting an RI Dock

Connecting Onkyo's RI Dock accessory.

Connecting the AV ReceiverAV Amplifier-Continued

Connecting the Power Cord

Steps for connecting the power cord.

Turning On the AV ReceiverAV Amplifier

Turning On and Standby

Procedures for turning the unit on and off.

First Time Setup

Using the Onscreen Setup Menus

Step-by-step guide to navigating setup menus.

First Time Setup-Continued

Speaker Settings

Configuring speaker impedance and type.

First Time Setup-Continued

HDMI Monitor Setup

Setting HDMI output for TV connection.

First Time Setup-Continued

HDMI Input Setup

Assigning HDMI inputs to input selectors.

First Time Setup-Continued

Component Video Setup

Assigning component video inputs to input selectors.

First Time Setup-Continued

Changing the Input Display

Setting the display name for input selectors.

First Time Setup-Continued

Digital Input Setup

Assigning digital input jacks to input selectors.

First Time Setup-Continued

TV Format Setup (not North American models)

Specifying the TV system used in your area.

First Time Setup-Continued

AM Frequency Step Setup (on some models)

Specifying the AM frequency step for your area.

First Time Setup-Continued

Automatic Speaker Setup (Audyssey MultEQ XT)

Automated setup using speaker microphone.

First Time Setup-Continued

Error Messages

Troubleshooting common setup errors.

First Time Setup-Continued

Changing the Speaker Settings Manually

Manual adjustment of speaker settings.

Basic Operations

Selecting the Input Source

How to select the audio/video input source.

Basic Operations-Continued

Adjusting the Bass & Treble

Adjusting low and high-frequency sound levels.

Basic Operations-Continued

Muting the AV receiverAV amplifier

Temporarily muting audio output.

Listening to the Radio (TX-SR705 only)

Tuning into Radio Stations

Methods for tuning into AM and FM radio stations.

Listening to the Radio (TX-SR705 only)-Continued

Presetting AMFM Stations

Storing favorite radio stations as presets.

Listening to the Radio (TX-SR705 only)-Continued

Using RDS (European models only)

Utilizing Radio Data System features.

Listening to the Radio (TX-SR705 only)-Continued

Finding Stations by Type (PTY)

Searching for radio stations by program type.

Using the Listening Modes

Selecting Listening Modes

Overview of how to select listening modes.

Using the Listening Modes-Continued

Listening Modes Available for Each Source Format

Table detailing modes for different audio formats.

Using the Listening Modes-Continued

Pure Audio

Pure Audio listening mode for high-fidelity reproduction.

Using the Listening Modes-Continued

DTS Neo:6

DTS Neo:6 mode for 7.1 channel playback.

Using the Listening Modes-Continued

Onkyo Original DSP Modes

Category for Onkyo's original DSP sound modes.

Recording

AV Recording

Basic procedure for recording audio sources.

Advanced Operations

Adjusting Individual Speaker Levels

Adjusting the volume of each speaker during playback.

Advanced Setup

About the Onscreen Setup Menus

Overview of the onscreen setup menu structure.

Advanced Setup-Continued

Speaker Setup

Checking and manually setting speaker configurations.

Advanced Setup-Continued

Low-Pass Filter for the LFE Channel

Specifying the cutoff frequency for the LFE channel.

Advanced Setup-Continued

Double Bass

Function to boost bass output by feeding front bass to subwoofer.

Advanced Setup-Continued

Speaker Distance

Specifying speaker distance from listening position.

Advanced Setup-Continued

Speaker Level Calibration

Adjusting speaker levels using built-in test tone.

Advanced Setup-Continued

Equalizer Setting

Adjusting the EQ of individual speakers.

Advanced Setup-Continued

THX Audio Setup

Setting THX specific audio parameters.

Advanced Setup-Continued

Audio Adjust Functions

Overview of audio adjustment settings.

Advanced Setup-Continued

LFE Level Settings

Setting LFE channel level for various sources.

Advanced Setup-Continued

Assigning Listening Modes to Input Sources

Setting default listening modes for input sources.

Advanced Setup-Continued

IntelliVolume

Setting input levels for individual sources.

Advanced Setup-Continued

Correcting Sound and Picture Sync

Adjusting audio delay for sync issues.

Advanced Setup-Continued

Name Edit

Entering custom names for inputs and presets.

Advanced Setup-Continued

Volume Setup

Configuring volume display and settings.

Advanced Setup-Continued

OSD Setup

Configuring OnScreen Display settings.

Advanced Setup-Continued

Changing the AV ReceiverAV Amplifiers ID

Changing the remote control ID.

Advanced Setup-Continued

HDMI Setup

Configuring HDMI related settings.

Advanced Setup-Continued

Control

CEC and HDMI control settings.

Advanced Setup-Continued

Lock Setup

Protecting settings by locking setup menus.

Advanced Setup-Continued

Changing the Remote Controllers ID

Changing the remote controller's ID.

Zone 2

Connecting Zone 2

Overview of Zone 2 connection methods.

Zone 2-Continued

Setting the Powered Zone 2

Enabling Zone 2 speakers for sound output.

Zone 2-Continued

Using Zone 2

Basic operation of Zone 2.

Zone 2-Continued

Adjusting the Volume for Zone 2

How to adjust the volume for Zone 2.

Zone 2-Continued

Using the Remote Controller in Zone 2 and Multiroom Control Kits

Using remote control kits for Zone 2 operation.

Controlling Other Components

Entering Remote Control Codes

Entering codes to control other devices.

Controlling Other Components-Continued

Remote Control Codes for Onkyo Components Connected via

Specific remote control codes for Onkyo components.

Controlling Other Components-Continued

Controlling a TV

Instructions for controlling a TV with the remote.

Controlling Other Components-Continued

Learning Commands

Teaching the remote controller new commands.

Controlling Other Components-Continued

Using Macros

Programming the remote controller's macro buttons.

Specifications

Amplifier Section

Technical specifications for the amplifier.

Troubleshooting

Cant turn on the AV receiverAV amplifier

Troubleshooting steps for power issues.

Troubleshooting-Continued

The surround speakers produce no sound

Troubleshooting steps for no surround speaker sound.

Troubleshooting-Continued

Theres no picture

Troubleshooting steps for no video output.

Troubleshooting-Continued

Cant control other components

Troubleshooting issues with controlling other devices.

Related product manuals