38
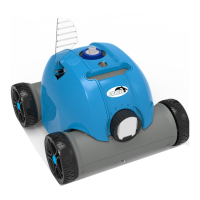
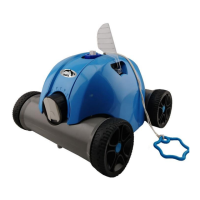
COMPOSITION DU COFFRET
PRÉPARATION DU ROBOT AVANT L’UTILISATION
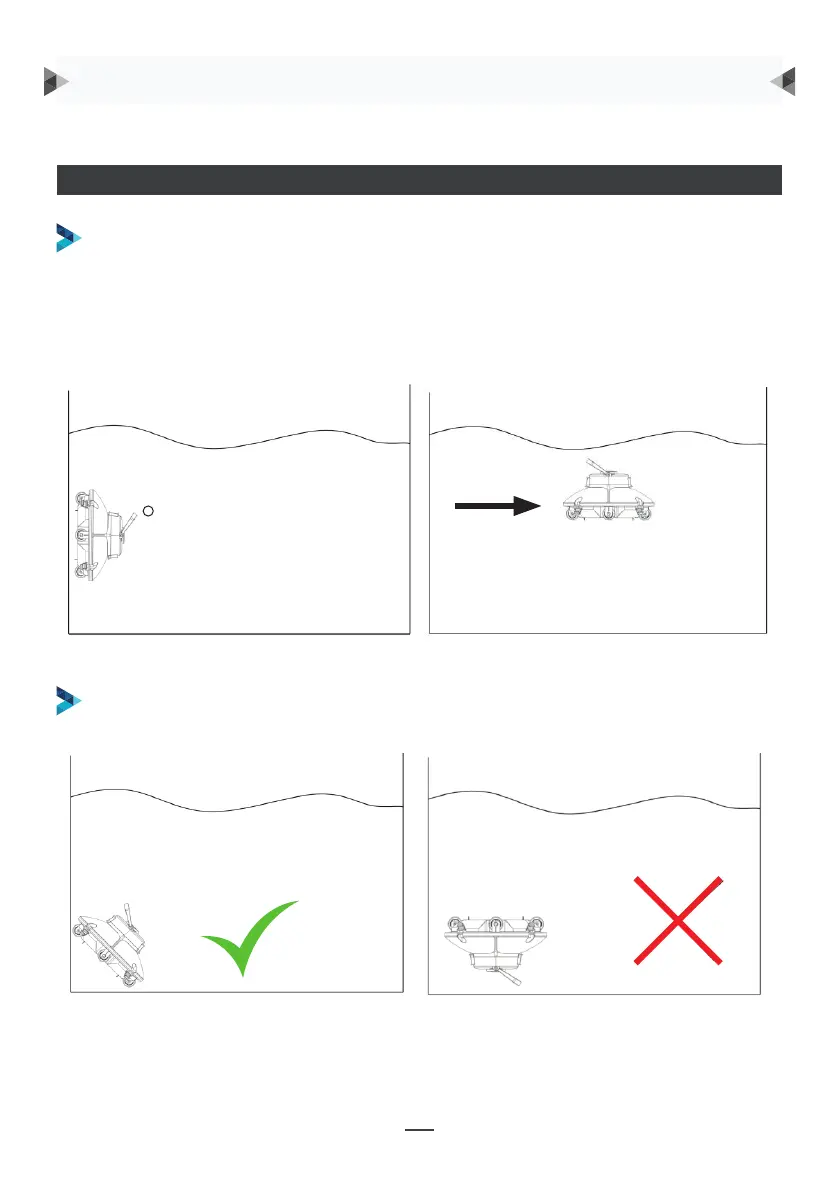
MISE À L’EAU
Tenir le robot verticalement dans l’eau quelques secondes en le vidant au maximum des
bulles d’air, démarrer le robot dans l’eau et le tourner horizontalement à 90°C pour le
vider complètement de l’air emprisonné, puis l’immerger horizontalement jusqu’au fond
du bassin à l’aide du crochet fourni en laissant échapper le reste des bulles d’air.
FONCTIONNEMENT DU ROBOT
LORS DE L’IMMERSION OU DE LA SORTIE DU ROBOT, POSITIONNER LE ROBOT
CORRECTEMENT SUR SES ROUES (LE DESSOUS DU ROBOT FACE AU FOND DE LA
PISCINE) POUR NE PAS ENDOMMAGER LE REVÊTEMENT DE LA PISCINE.
4
IV. Operating instruction
4.1. Precautions
a. When putting the cleaner into the pool, the air inside the cleaner should be discharged as follow:
① Hold the cleaner and submerge it vertically for 5-6 seconds until no bubbles come out (Fig. 1).
② Press the switch button to power on and rotate the cleaner 90 degrees.
③ Submerge it horizontally into the pool floor until a large number of bubbles are discharged from
the nozzle (Fig. 2).
Fig. 1 Fig. 2
b. Put into or lift out of the pool with the cleaner bottom towards the wall to avoid any possible
scratches to the pool.
C. Please ensure that the top cover of the cleaner is tightly assembled to its chassis.
 Loading...