3
GB
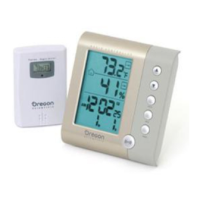
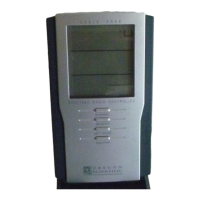
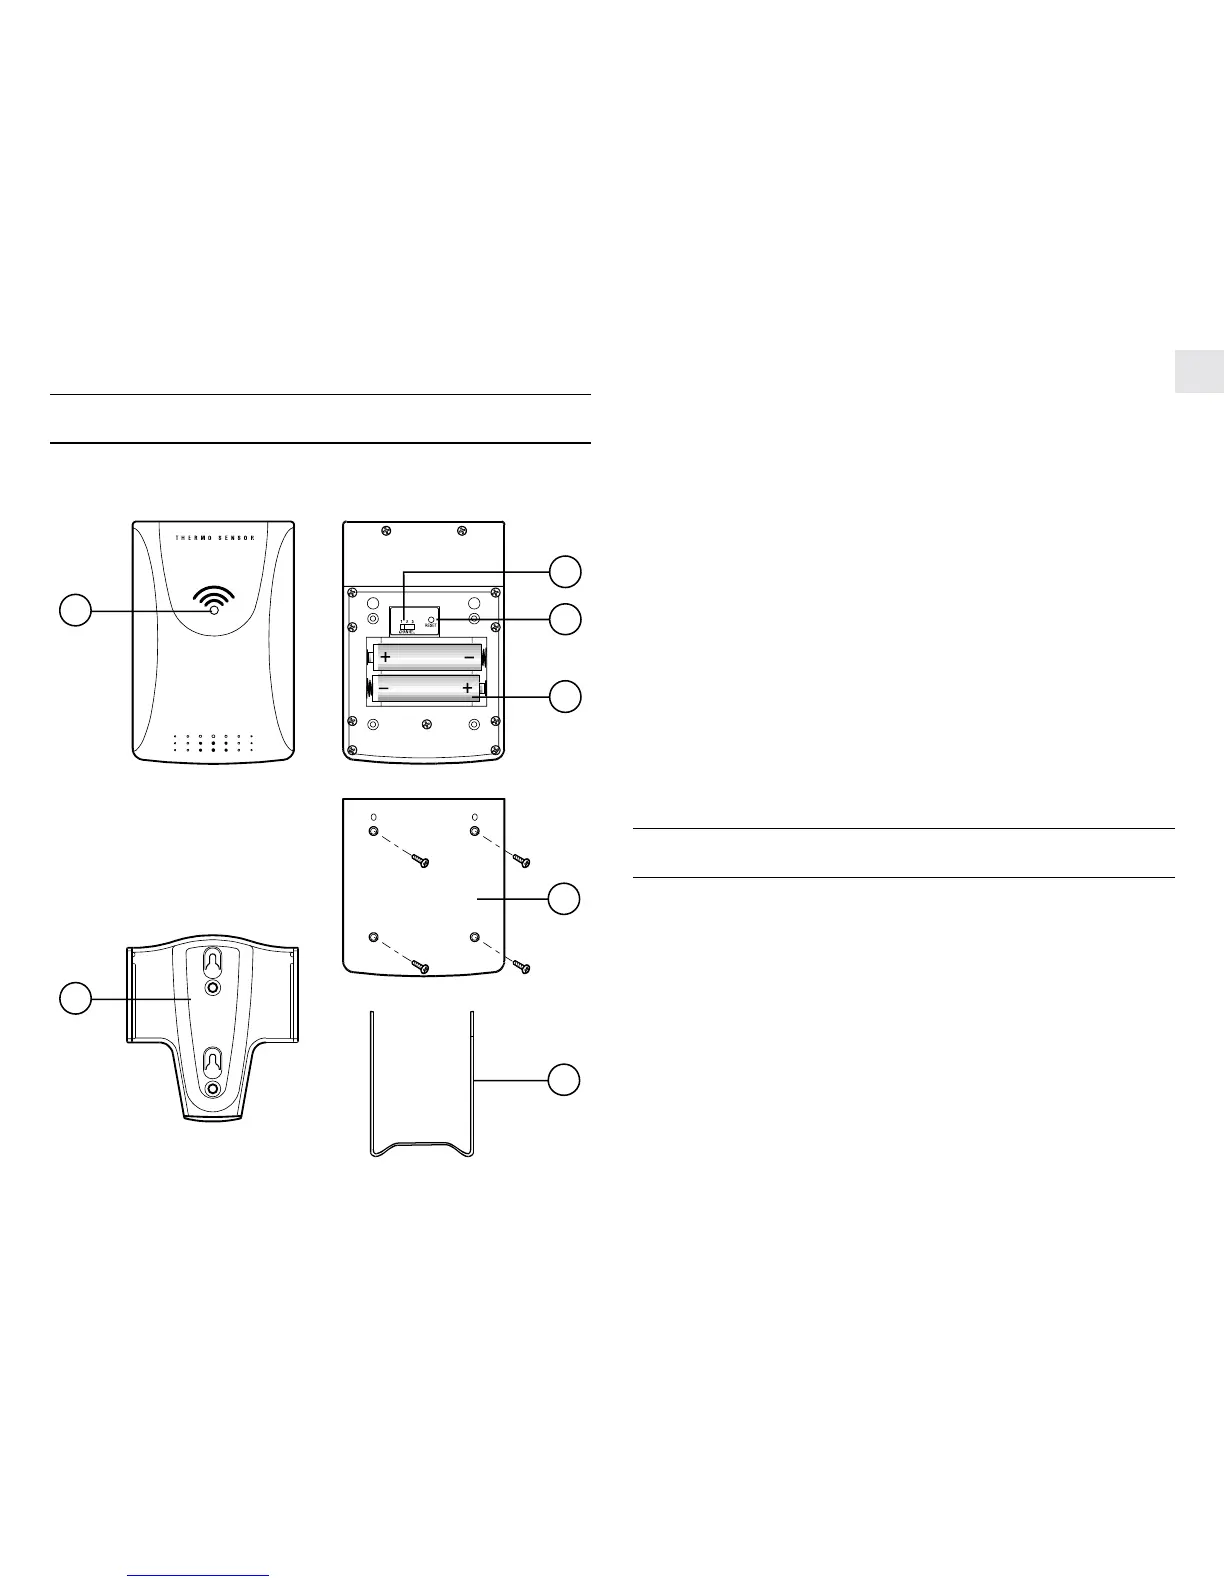
REMOTE SENSOR FEATURES
433MHZ CABLE FREE
B
D
C
A
E
G
F
A. LED LIGHT
Flashes when the remote sensor transmits data to the main unit
B. CHANNEL SLIDE SWITCH
Assigns and identifies the channel of the remote sensor
C. RESET BUTTON
Returns all settings to their original default values
D. BATTERY COMPARTMENT
Accommodates two “AA” (UM-3) size batteries
E. BATTERY COMPARTMENT DOOR
F. WALL-MOUNT HOLDER
Holds the remote sensor for wall-mounted display
G. MOVABLE TABLE STAND
For standing the remote unit on a flat surface
BEFORE YOU BEGIN
For best operation:
1. When using more than one remote sensor assign a different
channel to each of the remote sensors.
2. Insert batteries in the remote sensor BEFORE inserting the
batteries into the main unit.
3. Press [RESET] on the main unit after installing batteries. Place
the main unit close to the remote unit as this will expedite
initial synchronization between the remote sensor and the main
unit.
4. Position the remote sensor within the effective transmission
range of 21 - 32 yards (20 - 30 meters) from the main unit.
 Loading...