SWG OPERATOR INSTALLATION GUIDE
- 7 -
ARTICULATING-STYLE ARM ASSEMBLY INSTRUCTIONS FOR MODEL SWG
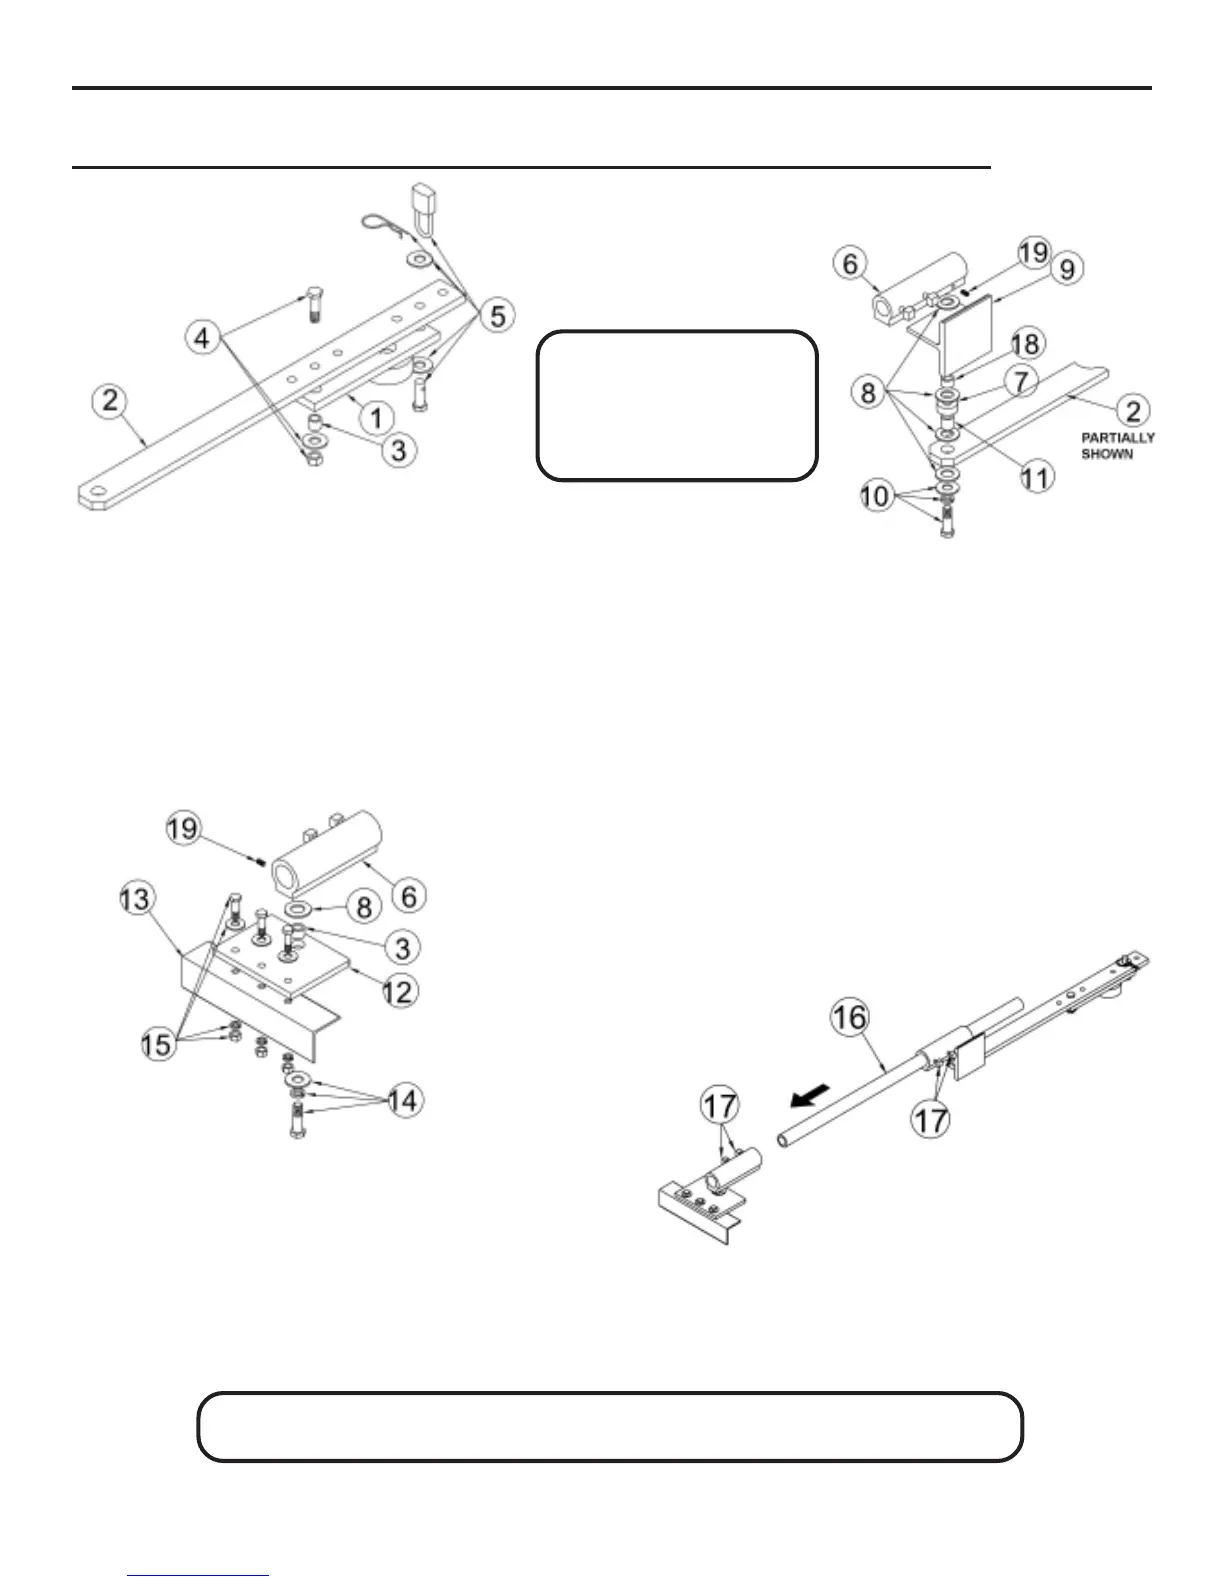
NOTE: Illustrations shown on this page are for right-hand application.
For left-hand, overtravel stop (9) should be on the opposite side from what is shown above.
Numbered items in these
drawings are for instructional
reference only. For actual part
numbers, go to the parts lists
in the back of this booklet.
Place the crank extension (2) on the operator crank
(1) as shown. Slide a black spacer (3) into the crank
and hold it while sliding a 1/2-13 x 1 3/4” hex head
bolt (4) through the extension and crank. Assemble
with a 1/2” flat washer and locknut and tighten. Slide
the clevis pin (5) and a 1/2” flat washer through the
crank and the extension. Slide another 1/2” flat
washer over the end of the pin and lock it with either
a disconnect pull pin or with an optional pad lock
through the pin.
Angle iron (not supplied) (13) should be welded to the gate
prior to this step. Attach the gate plate (12) to the angle iron
using 3/8 bolts, flat washers, lock washers and hex nuts
(15). Slide a 1/2-13 x 1 1/4” bolt, 1/2” lock washer, 1/2” flat
washer (14), and a black spacer (3) through the gate plate.
Place a nylon washer (8) over the opening in the gate plate.
Thread the bolt into the hole in the gate clamp (6) and tighten
carefully. Do not overtighten! Tighten set screw (19) to
further lock hex bolt (14) in place.
Slide the pipe link (16) through the arm assembly as shown.
Place the 5/16” square bolts in the gate clamps (17) and
tighten carefully. Do not overtighten!
Slide a 1/2” lockwasher and flatwasher onto the 1/2-13 x 2 1/
2” hex head bolt (10). Add a nylon washer (8), then slide the
bolt through the crank extension (2) and hold in place Next,
insert the yellow-plated pivot spacer (11) into the crank ex-
tension, add a nylon washer (8) and place the offset spacer
(7) on top of the nylon washer. Add a nylon washer (8) to the
top of the offset spacer (7) and add the silver zinc-finish
overtravel stop spacer (18). Slide the overtravel stop bracket
(9) over the silver zinc-finish spacer and add the last nylon
washer (8) above the bracket. Carefully screw the bolt as-
sembly into the aluminum gate clamp (6) until the lockwasher
has been fully compressed. The overtravel stop and crank
extension should float freely, without binding, when it is fully
assembled. Tighten set screw (19) to further lock hex holt
(10) in place.
8-04-18