Model 5000 Five-Channel Power Amplier
7
¼ To connect your speakers to the Model 5000 using
bare wire:
1. Strip approximately 1/2 to 3/4 inch (20mm) of
insulation from the end of the speaker wire and
carefully twist the strands together.
Be careful not to cut the individual strands or twist them
o. For optimal performance, all strands must be used.
2. Loosen the knob of the desired speaker output
terminal on the rear panel of the Model 5000.
Make sure all of the pass-through hole on the terminal is
revealed.
3. Thread the twisted strands of the positive (+)
and negative (–) speaker wire through the pass-
through holes of the speaker output terminal.
Make sure to maintain correct polarity as described above.
4. Once both connections are made, twist the caps
back to secure the speaker wire.
Do not over tighten or use tools, as this may break the
delicate wire strands and decrease system performance.
5. Repeat steps 1-4 for each speaker in your system.
¼ To connect your speakers to the Model 5000 using
spade lugs:
1. Loosen the knob of the desired speaker output
terminal on the rear panel of the Model 5000.
2. Place the positive (+) and negative (–) lugs between
the plastic cap and the back of each terminal.
Make sure to maintain correct polarity as described above.
3. Twist the caps back to secure the spade lugs.
You only need to nger tighten to obtain a secure contact.
4. Repeat steps 1-4 for each speaker in your system.
¼ To connect your speakers to the Model 5000 using
banana plugs:
1. Tighten the knob of the desired speaker output
terminal on the rear panel of the Model 5000.
2. Insert the the positive (+) and negative (–) jacks
axed to your speaker wire into the hole of each
colored screw cap on the binding post.
Make sure to maintain correct polarity as described above.
3. Repeat steps 1-4 for each speaker in your system.
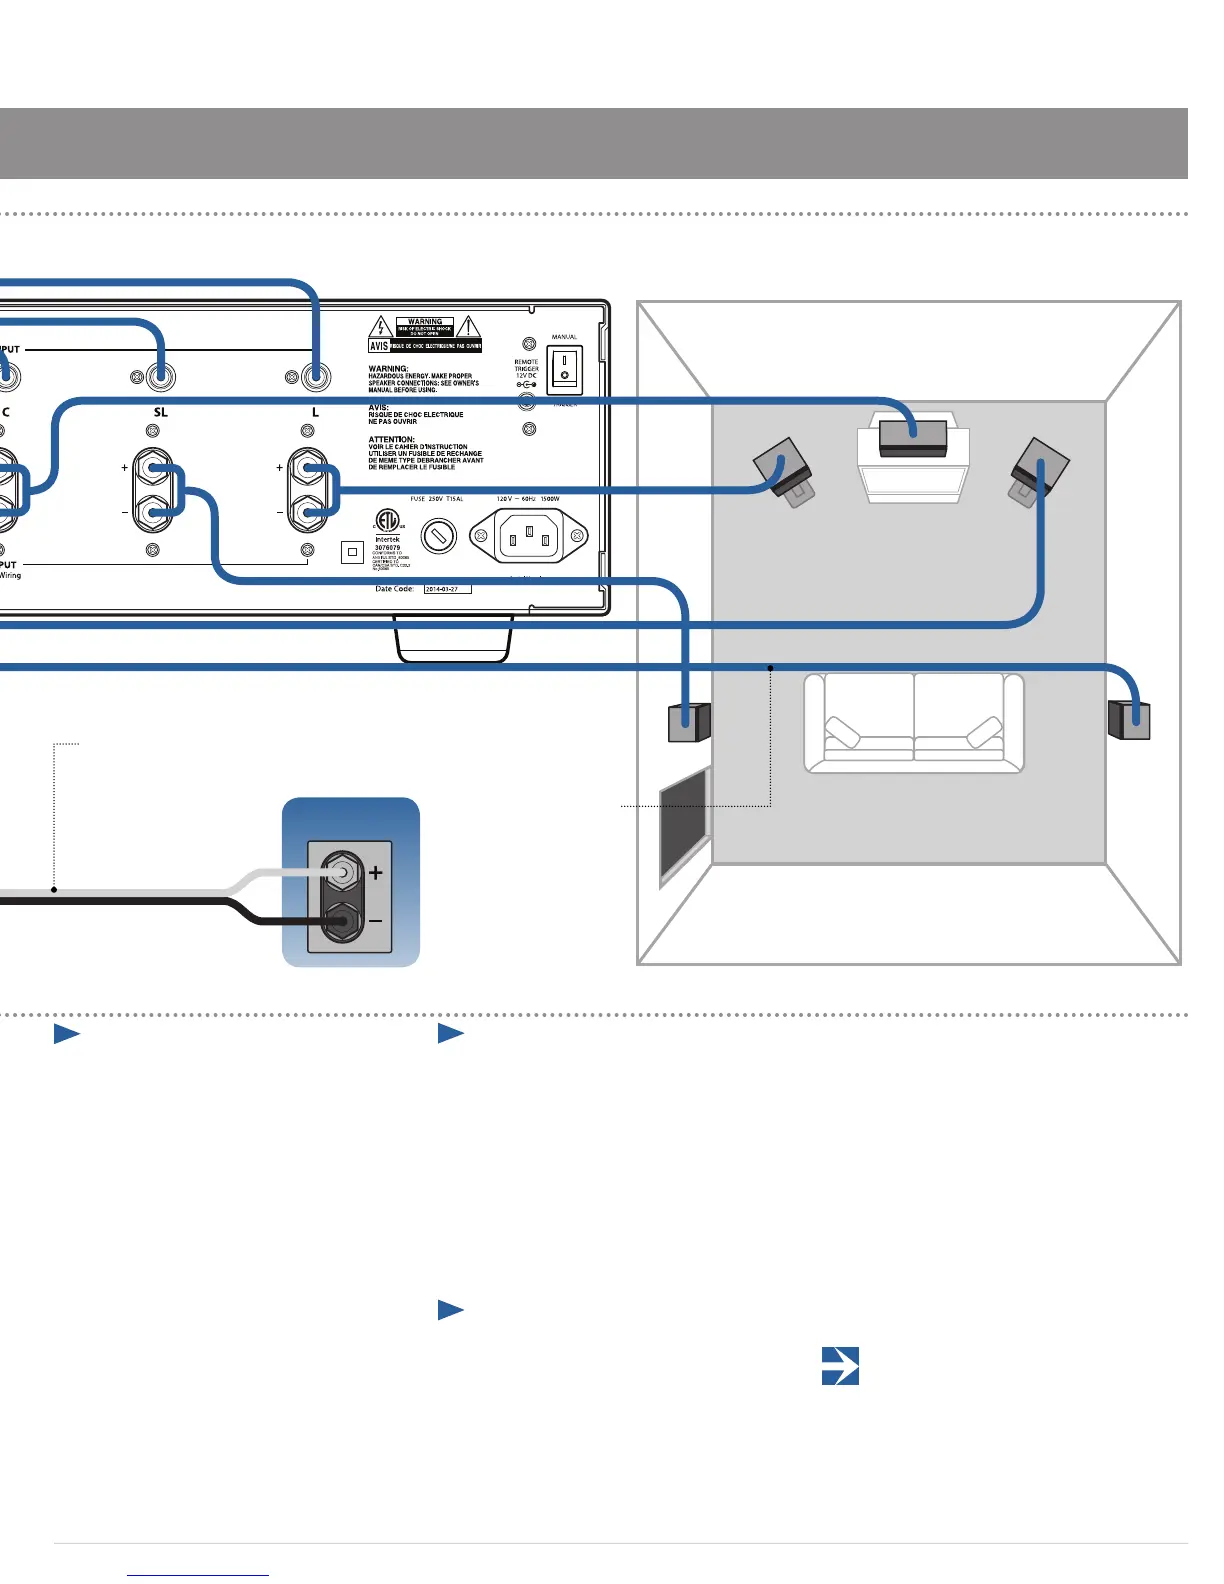
Once all of the connections have been made to the rear
panel of the Model 5000, run the cables to the speaker
locations. We recommend using similar wire lengths to each
pair of speakers. For example, make certain that the wires
connecting the left and right front speakers are the same
length, even though one speaker may be physically closer to
the amplier than the other. Do not coil any excess cable, as
this may create hum and frequency response variations in
your system.
Finally, connect the wires to the speakers, again being
certain to observe proper polarity, connecting the positive
(red) and negative (black) wires to the matching terminals
on each speaker.
While most speaker manufacturers follow the industry
standard of using red terminals for positive connections
and black terminals for negative, some may not. To assure proper
phase connections, and optimal performance, consult the
markings on your speaker terminals, or the speaker’s manual to
verify polarity. If you do not know the polarity of your speaker,
consult the speaker’s manufacturer for further information.
Speaker
Speaker Polarity
Make sure to observe correct
polarity by connecting the same
half of the speaker cable to
the positive (red) and negative
(black) terminals between the
amplier and each speaker.
Speaker Cable Length
It is recommended that cables
run to each pair of speakers
(for example, front left and
right, or surround left or right)
be of equal length regardless
of whether one speaker
is physically closer to the
amplier than the other.