Do you have a question about the Oval ALTI mass CA006 and is the answer not in the manual?
Detailed specifications for Type U, Type S, and Type B sensor units, including materials and connections.
Performance characteristics such as accuracy, repeatability, and zero stability for Type U, S, and B models.
Outline dimensions for Type U sensor units, including separately mounted and integrally mounted models.
Outline dimensions for Type S sensor units in stainless steel and titanium tube types, integrally and separately mounted.
Outline dimensions for Type B sensor units, both integrally and separately mounted models.
Details on standard piping conditions, vibration influence, cavitation prevention, and gas mixed flows.
Specific installation procedures for flange type, sanitary fitting type, and screw-in type connections.
Instructions for making power and output signal connections to the transmitter housing terminals.
Details on wiring analog outputs (4-20mA) to receiving instruments, including load resistance.
Instructions for connecting pulse outputs, including frequency limits and jumper settings for output types.
Diagrams illustrating transmitter power and output signal wiring, including terminal identification.
Detailed instructions for connecting power and output signals to the transmitter's terminal blocks.
Wiring instructions for connecting the separately mounted sensor unit to the transmitter using interconnect cable.
Perform zeroing adjustment when measuring conditions reach equilibrium with downstream valve shut off.
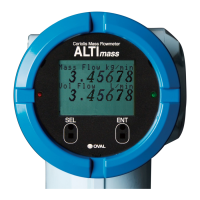
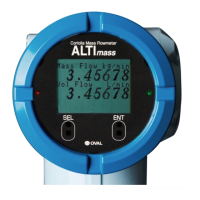
Introduction to parameters and functions, and procedures to access the MODE SELECT menu screen.
Procedure to access the MODE SELECT menu for parameter configuration and function setup.
Flowchart detailing navigation through parameter setup screens for display, password, and process variables.
Procedure for entering numerical data for parameters, using temperature damping factor as an example.
Procedure for selecting menu items of parameters, using temperature unit setting (Kelvin) as an example.
Overview of self-diagnostic functions for early fault identification and maintenance.
Diagnostic test to check the probe circuitry for problems and identify possible faults.
Diagnostic test to check the drive coil for problems and ensure accurate measurement.
Diagnostic test to check the transmitter for problems, indicating results and corrective actions for faults.
Diagnoses installation for external disturbances by checking pipeline vibration at zero flow.
Diagnoses installation for external disturbances by checking pipeline oscillation during normal flow.
Procedure to provide a simulated analog output (e.g., 12.00mA) for testing cable faults and performance.
Procedure to provide a simulated pulse output at any desired frequency for testing purposes.
Procedure to provide a simulated status output, setting the output to ON or OFF.
Detects zeroing errors and reduces offset flowrate drift, essential for accurate measurement.
Procedure for performing zeroing using the LCD switches, including confirmation steps.
Procedure for performing zeroing using a status input signal, requiring specific setup and precautions.
Procedure for readjusting analog output levels (4mA or 20mA trim) if absolutely necessary.
Procedure to reset counters and totalizers to zero, ensuring accurate pulse output synchronization.
Setup for two pulse outputs, including independent, double, and bidirectional pulse outputs.
Setup procedure for pulse output 1, including assignment, frequency, flowrate, and low cutoff settings.
Setup procedure for pulse output 2, similar to pulse output 1, with options for double pulse output.
Function to assign analog outputs to measurements like mass flow, density, and temperature.
Allows assigning one output for status information, flow direction, or alarm state.
Assigns functions like pulse/analog output fix, zeroing, or totalizer reset to status input.
Initiates automatic zeroing to reduce offset flowrate drift when input arrives across status terminals.
Resets counters and totalizers to zero when input arrives across status input terminals.
Resets counter 1 and totalizer 1 to zero when input arrives across status input terminals.
Resets counter 2 and totalizer 2 to zero when input arrives across status input terminals.
Sets up high/low alarms for flowrate, temperature, density, and total flow for quick condition grasp.
Table of error messages, their descriptions, coping actions, and influences on output signals.
Details on explosionproof specifications, including TIIS, ATEX, IECEx, KCs, CSA, EAC, NEPSI, ITRI.
Explanation of product codes for Type U models (CA00A to CA080), including model selector chart.
Explanation of product codes for Type S models (stainless steel and titanium tube types).
Explanation of product codes for Type B models, detailing various configurations.
| Brand | Oval |
|---|---|
| Model | ALTI mass CA006 |
| Category | Measuring Instruments |
| Language | English |