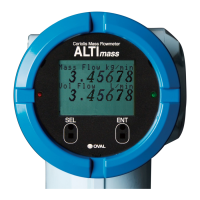
Do you have a question about the Oval ALTImass CA004 and is the answer not in the manual?
Factors to consider for selecting an optimal installation location for performance and maintenance.
Guidelines for securely mounting the sensor unit and piping clamps to ensure measurement accuracy.
General instructions for making wiring connections, including cable lead-in.
Details on accessing and making power and output signal connections at the transmitter housing.
Schematic diagram illustrating transmitter power and output signal wiring connections.
Detailed wiring diagram for transmitter power and output signals, including terminal identification.
Procedure for zeroing the instrument when measuring conditions stabilize, after closing downstream valve.
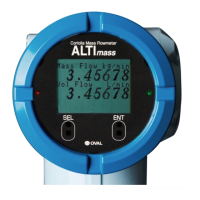
Overview of how to view and understand transmitter parameters and functions.
Procedure to access the MODE SELECT menu for parameter reconfiguration and function access.
Procedure for entering numerical data for parameters, with an example of adjusting temperature damping.
Procedure for selecting menu items and options, using temperature unit as an example.
Steps to enable and set up a password for safeguarding transmitter settings against unauthorized modification.
Steps to enable and set up a password for safeguarding transmitter settings against unauthorized modification.
Comprehensive self-diagnostic functions for early identification of instrument trouble.
Diagnostic test for the probe circuitry, identifying potential faults and suggesting corrective actions.
Diagnostic test to check the drive coil for problems, identifying faults and suggesting checks for connections.
Diagnostic test for transmitter components, identifying faults and providing corrective actions.
Feature to detect errors and minimize offset flowrate drift, essential for accurate measurement.
Procedure for performing zeroing using the device's LCD display switches.
Procedure for trimming analog outputs to adjust output levels, with examples for 4mA and 20mA.
Procedure for resetting counters and totalizers to zero, either individually or in pairs.
Functionality for two independent pulse outputs, including double and bidirectional options.
Setup procedure for pulse output 1, including assignment, frequency, flow rate, and low cutoff settings.
Setup procedure for pulse output 2, similar to pulse output 1, covering assignment and other parameters.
How to set up bidirectional pulse output for flow direction information and independent pulse counting.
Functionality for double pulse output, synchronized with pulse output 1, with examples of phase settings.
How to assign measurements to analog outputs and configure parameters like URV, LRV, and damping.
Assigning flowmeter status information, like errors or alarms, to the status output.
Assigning flowmeter status information, like errors or alarms, to the status output.
Using status output to represent flow direction, enabling reverse flow pulse output.
Assigning high/low alarm status to output, indicating alarm conditions with status signals.
Assigning functions like output fixing, zeroing, or reset to status input terminals.
Initiating automatic zero adjustment via status input to minimize offset flowrate drift.
Setting up high/low alarms to monitor installation conditions and signal events with status output.
Table of error types, their indications, influences, and recommended coping actions.
Detailed explosionproof specifications for various certifications (ATEX, IECEx, KCs, CSA, GOST, NEPSI).
Explosionproof specifications for ATEX and IECEx certifications for integral and separate types.
Explosionproof specifications for KCs certification, covering integral and separate types.
Explosionproof specifications for CSA certification, covering integral and separate types.
Explosionproof specifications for GOST certification, covering integral and separate types.
Explosionproof specifications for NEPSI certification, covering integral and separate types.
Precautions for using and handling explosionproof equipment safely.
Special conditions for safe use of explosionproof equipment, including prohibitions on altering parts.
Precautions for handling the flameproof enclosure to maintain its performance, focusing on screws and side lid.
| Type | Coriolis Mass Flow Meter |
|---|---|
| Measurement Principle | Coriolis |
| Ingress Protection | IP67 |
| Material | Stainless Steel (316L) |
| Output Signal | 4-20 mA, Pulse |
| Power Supply | 24 VDC |