10
Adjusting Pressure Switch
Pressure switches are used to send 12V DC signals to the microprocessor. The remote control uses
hydraulic pressure to tell when one step of the cycle is ended and another needs to start.
To adjust the pressure switches follow these steps. You will need a flat screwdriver.
Note: There are indicator lights on the receiver (white box) that tells you when each pressure switch
is closed. The left one is for the left valve, the right one is for the right valve.
1. Lower the lid.
2. Turn the receiver on.
3. With the lid down push the valve handle away from you and hold, this will allow the
maximum pressure of 2600 psi* to be achieved, then release handle. Each pressure switch is
wired to an indicator light on the receiver box. This light will tell you when the pressure
switch is closed.
4. Slowly push the valve handle away from you and watch the pressure on the gauge. You can
tell what pressure the switch is set at, by looking at the pressure reading on the gauge when
the light comes on. Important: Let the pressure on the gauge rise very slowly.
5. Set both pressure switches at 2400 psi. This means the light will come on at 2400 psi.
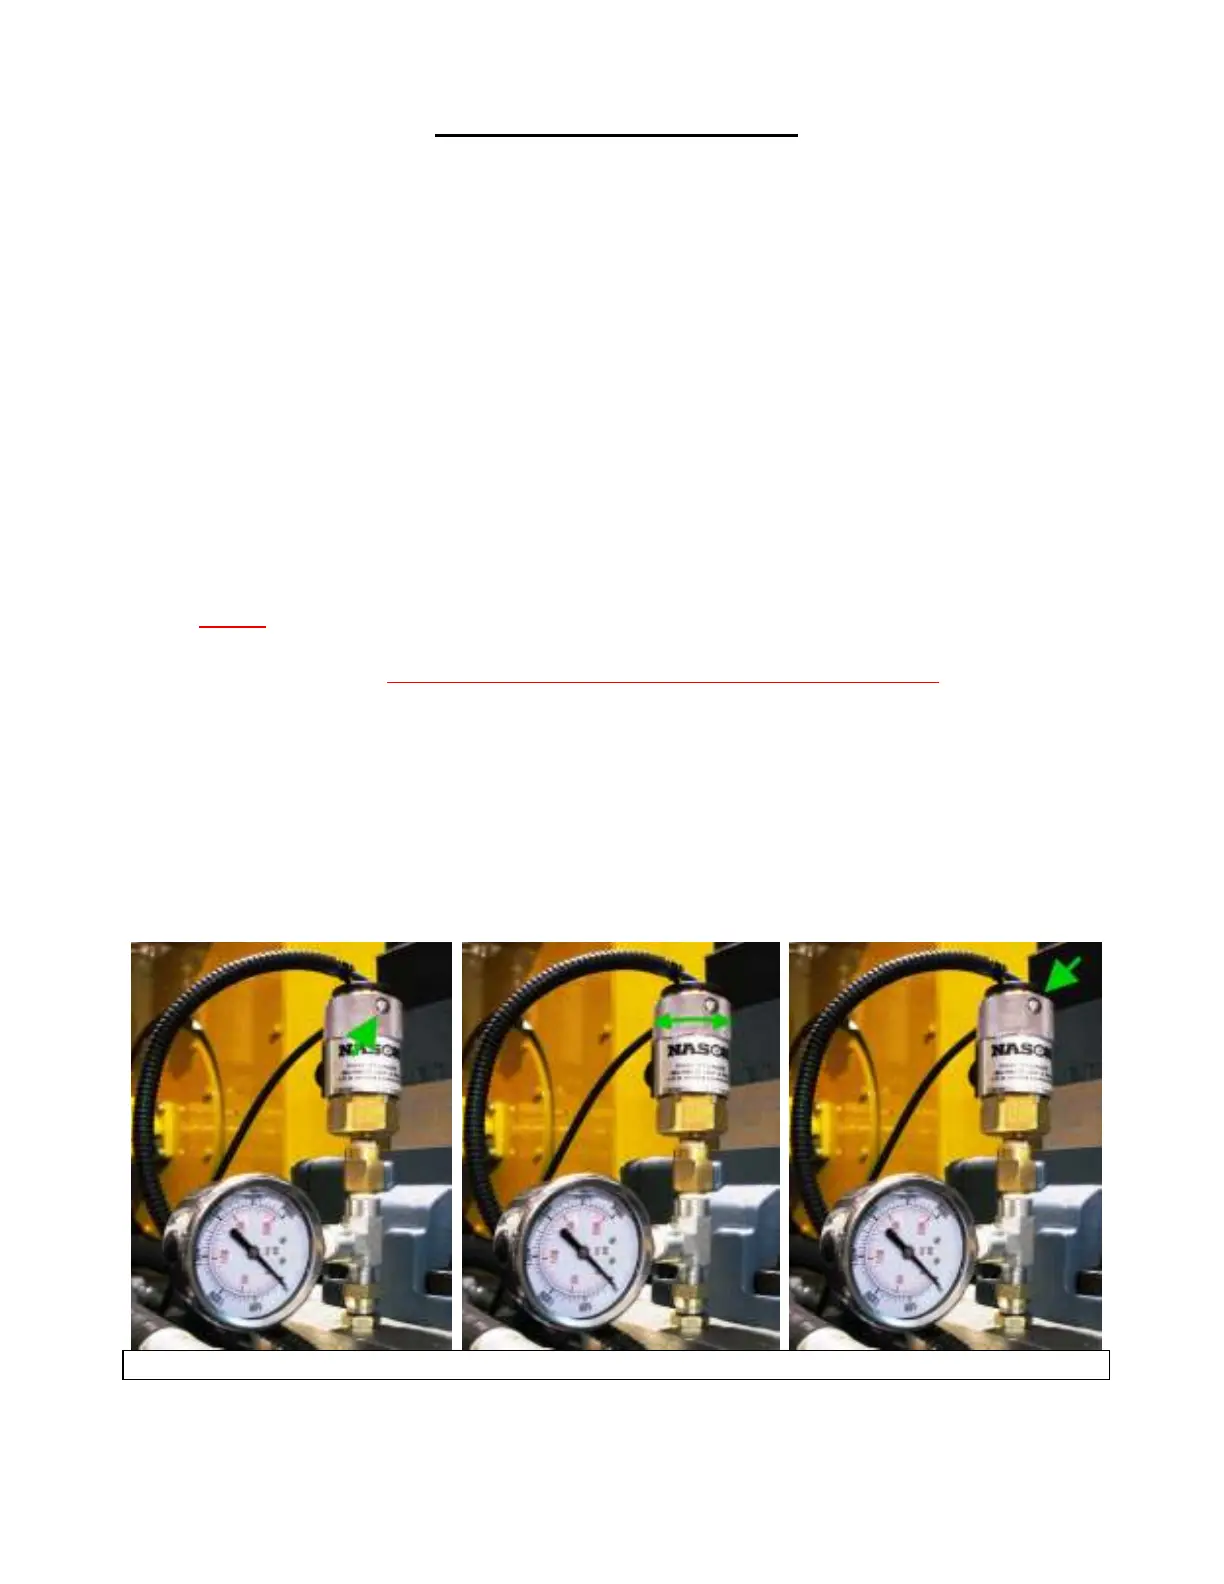
6. To adjust the pressure, loosen the setscrew (flat screwdriver) on the side of the adjustment
ring.
7. Twist the adjustment ring clockwise to increase the release pressure or counterclockwise to
decrease the release pressure.
8. Re-tighten the setscrew.
Loosen the setscrew Twist the adjustment ring Tighten the setscrew
• The gauge should read 2600 psi when the valve is fully open. If it does not, go to the Adjusting
Relief Valves section on page 8.