10400610-001 ©2011-14 Overland Storage, Inc. Page 4 of 6
Add-on/Spare PCIe Card Instructions
Replace PCIe Card
NOTE: If you are only installing an additional card, go to “Install a
New PCIe Card.”
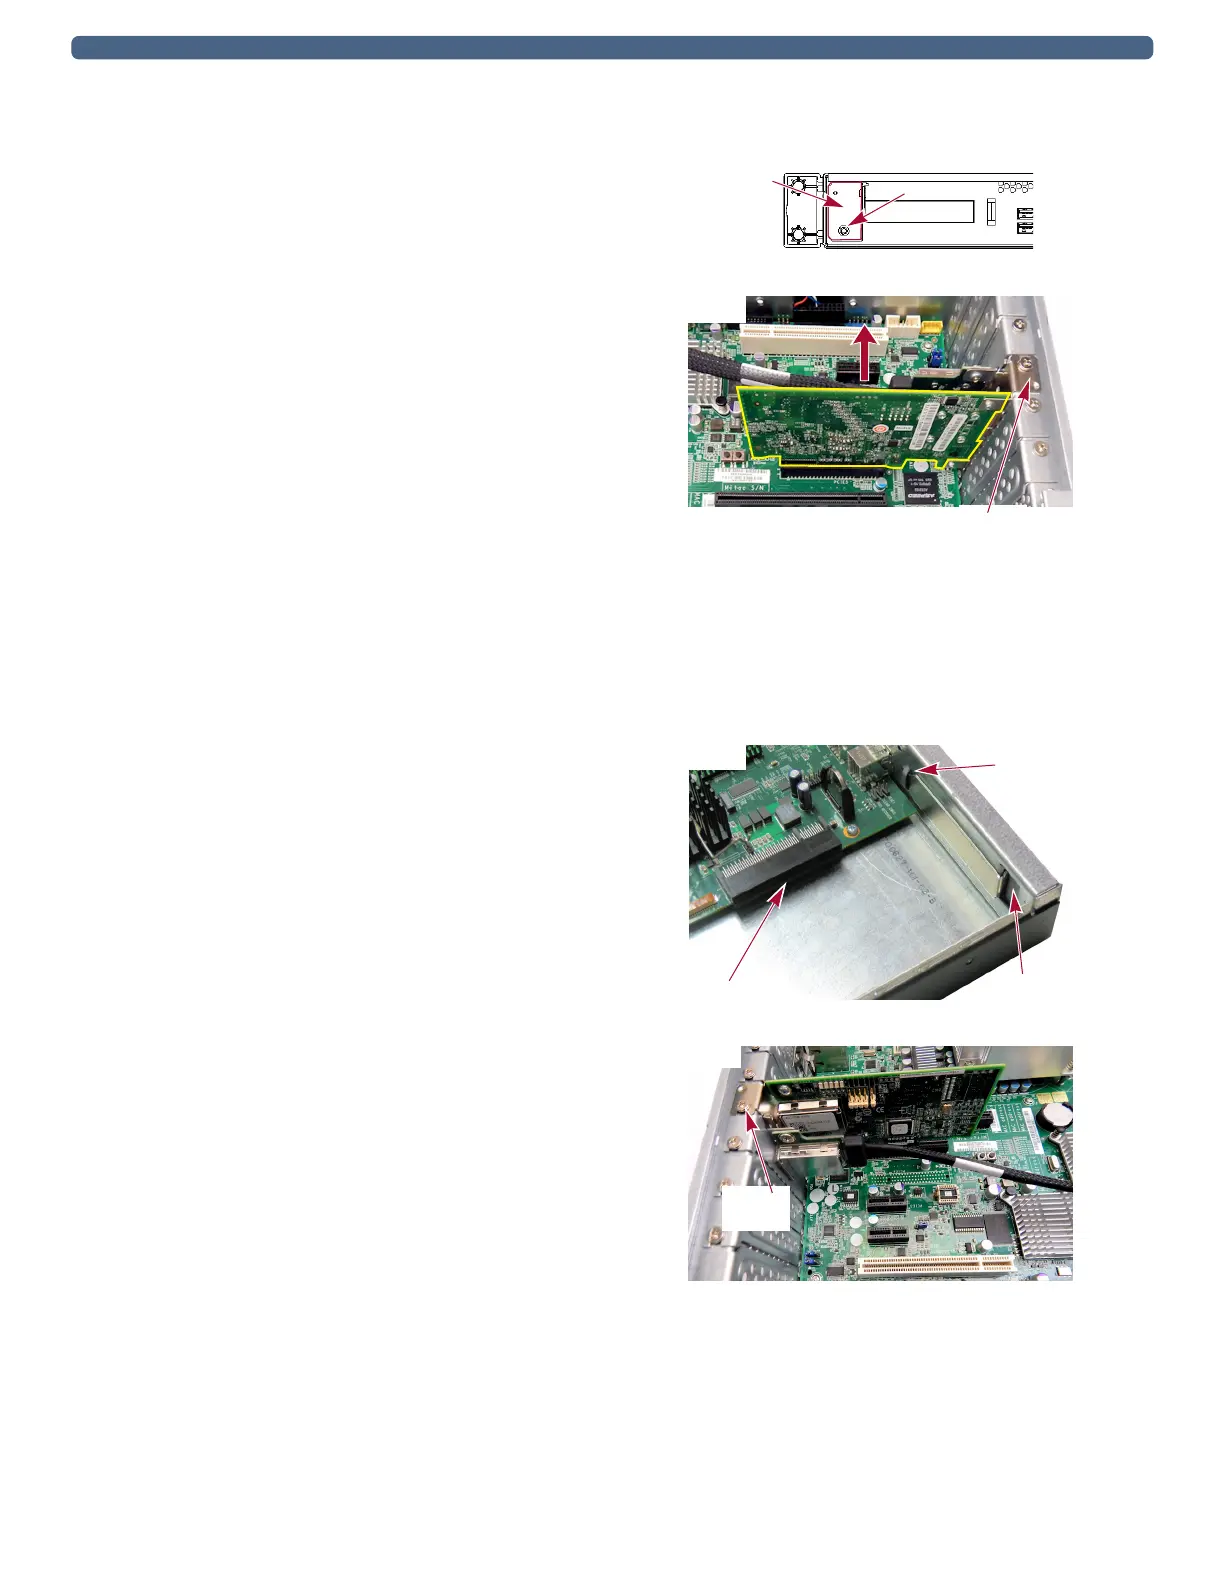
1. Release the bracket lock holding the PCIe card in place:
• DX1: At the rear on the outside, remove and retain the
screw holding the card bracket lock on the chassis. Set
the lock aside.
• DX2: At the rear (along the top of the rear wall),
release and lift the bracket lock holding the PCIe
cards in place.
2. Grasp the existing PCIe card and carefully pull it
straight up out of the socket, and set it aside.
3. Insert the new PCIe card:
• DX1: Insert the new PCIe card into the motherboard
socket positioning the cover bracket in the bracket slot
inside the rear.
• DX2: Insert the new PCIe card into the same socket,
positioning the cover bracket in the rear bracket slot.
4. Fold down and press the bracket lock until it clicks into
place.
5. Additional DX1 step: On the backplate, use the
retained screw to secure the bracket lock in place.
Continue with “Reinstall Top Cover.”
Install a New PCIe Card
1. Release the bracket lock holding the PCIe slot cover in
place:
• DX1: At the rear on the outside, remove and retain the
screw holding the card bracket lock on the chassis.
• DX2: At the rear (along the top of the rear wall),
release and lift the bracket lock holding the PCIe slot
cover in place.
2. Remove and retain the PCIe bracket lock from the
chassis.
3. Insert the new PCIe card into the motherboard socket
positioning the cover bracket in the bracket slot inside the
rear.
4. Additional DX1 step: On the backplate, use the
retained screw to secure the bracket lock in place.
Card
Screw
Lock
DX1
Bracket
Lock
DX2
Card Socket
Bracket
Card Lock
Slot
DX1
Bracket
Lock
DX2