If the OWC Gemini is assembled with (2) U2 Shuttles for a total of (6) M.2 NVMe
drives.
•
Both drives are configured as an OWC SoftRAID RAID 0.•
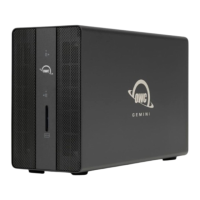
Plug the power cable into the OWC Gemini DC IN power port located on the back and
into a power outlet. The Power LED will illuminate a solid white.
1.
Connect the included Thunderbolt cable into one of the two Thunderbolt 3 ports
located on the back of the OWC Gemini and into a system. The Power LED will
illuminate a solid blue.
2.
NOTE
: The OWC Gemini has (2) 40Gb/s Thunderbolt 3 ports with 27W Dynamic Power
Delivery. 27W of power is delivered to the first connected system or device. 15W of
power is delivered to the second connected system or device.
Downloading and installing the latest version of SoftRAID is recommended to
experience the best performance.
3.
NOTE•
: OWC Gemini devices come bundled with "
3 Years of SoftRAID Premium Access
". Please visit
OWC SoftRAID Product Details
for more information regarding SoftRAID and the bundled Premium Access.
NOTE•
: The OWC SoftRAID license is located on the bottom of the OWC Gemini.
Mac OWC SoftRAID Setup
Download•
OWC SoftRAID for Mac
Please review and follow the steps outlined in•
OWC SoftRAID Installation for Mac
Windows OWC SoftRAID Setup
If you are using the OWC Gemini with the Windows operating system, the
pre-installed drives need to be reconfigured before they can be used. The following
options will allow the Mac formatted OWC Gemini to work as a Windows formatted
device.
•