Page 18
Click on the start button and then Control Panel.
Step
3
JBOD - All 4 hard drives formatted independently, as four individual
hard drive volumes. If you had 4 1TB drives in your OWC Mercury Elite 4
Bay RAID Rack, you would have 4 1TB volumes mount on your desktop.
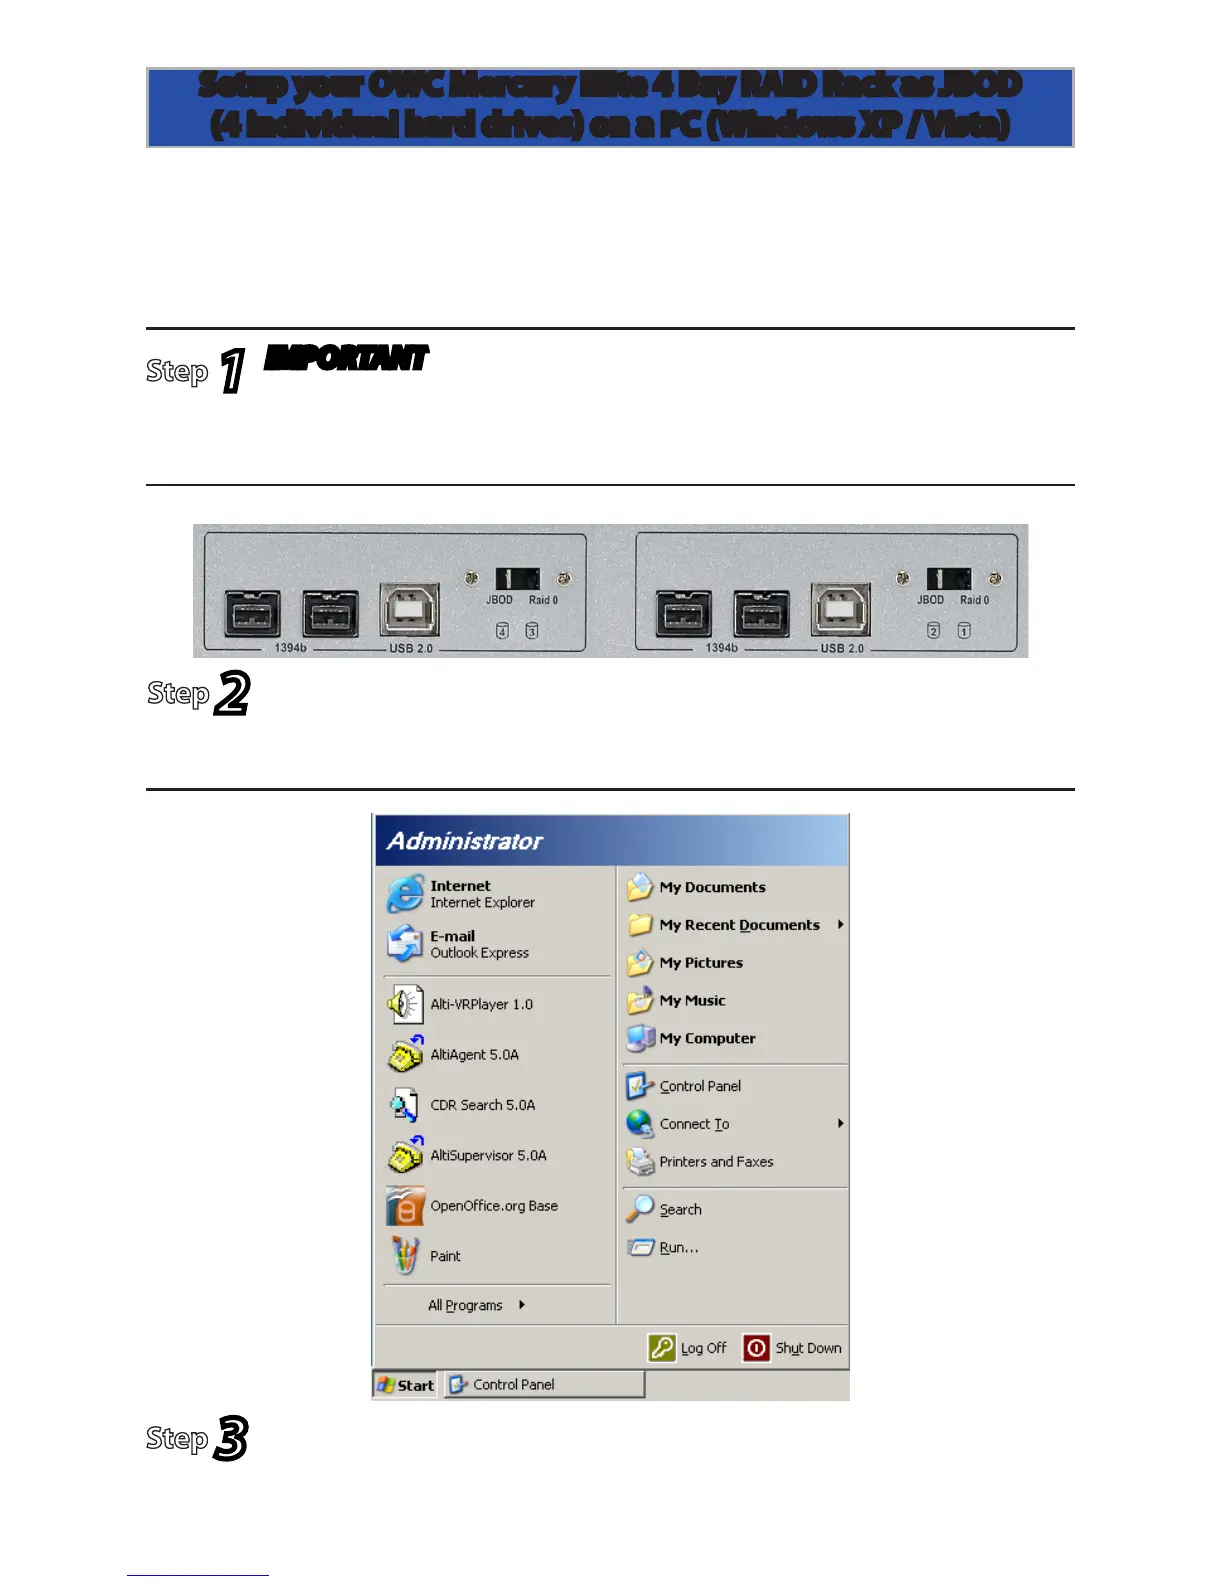
Look at the back of the OWC Mercury Elite 4 Bay RAID Rack and
locate the switches to the right of the USB port. Make sure they
are both on the “JBOD” position (LEFT).
Step
2
(IMPORTANT) Realize that reconguring your RAID will destroy
all data on this storage enclosure. Be sure you have a backup
before proceeding. Make sure that the power is turned o.
Step
1
Setup your OWC Mercury Elite 4 Bay RAID Rack as JBOD
(4 individual hard drives) on a PC (Windows XP / Vista)