OWC THUNDERBAY 4
SYSTEM SETUP
5
1. Open SoftRAID, then go to the ‘SoftRAID’ menu on the menu bar next to the Apple
logo and select ‘Email Notification...’
2. In the ‘Sender Info’ tab, enter the full name and email address that you want to use
when SoftRAID sends out email notifications. Note that this information does not
need to match a real email address. It can be anything you like, and is simply there to
identify the email as being sent by SoftRAID.
3. In the ‘Outgoing Server’ tab, enter the information for the server, username, and
password that will be used to send the email messages. The ‘Configure For’ dropdown
menu will help fill in the server information for common email services like Gmail and
Yahoo! mail. There is an option to configure an alternate SMTP server as a backup, but
it is not necessary.
4. The next two tabs, ‘Notifying Events’ and ‘Alarms’, contain checkboxes that allow you
to customize what will cause SoftRAID to send out an email notification. ‘Notifying
Events’ contains mostly hardware problems such as disk I/O errors and rebuild failures.
‘Alarms’ lets you set optional thresholds for things like a disk becoming too full or
abnormally high CPU load.
5. The last tab, ‘Recipients’, lets you set one or more email addresses to receive the email
notifications.
2.3.2 Disk Failure, Replacement, and RAID Rebuild
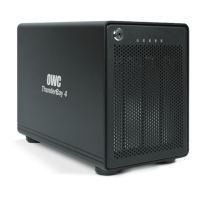
In the event of a disk failure or similar event, SoftRAID will indicate that the RAID volume
of which the failed disk is a member is in a degraded state. If your ThunderBay 4 has a
failed disk, it will look like this:
To replace the failed disk and rebuild the RAID volume, follow these steps:
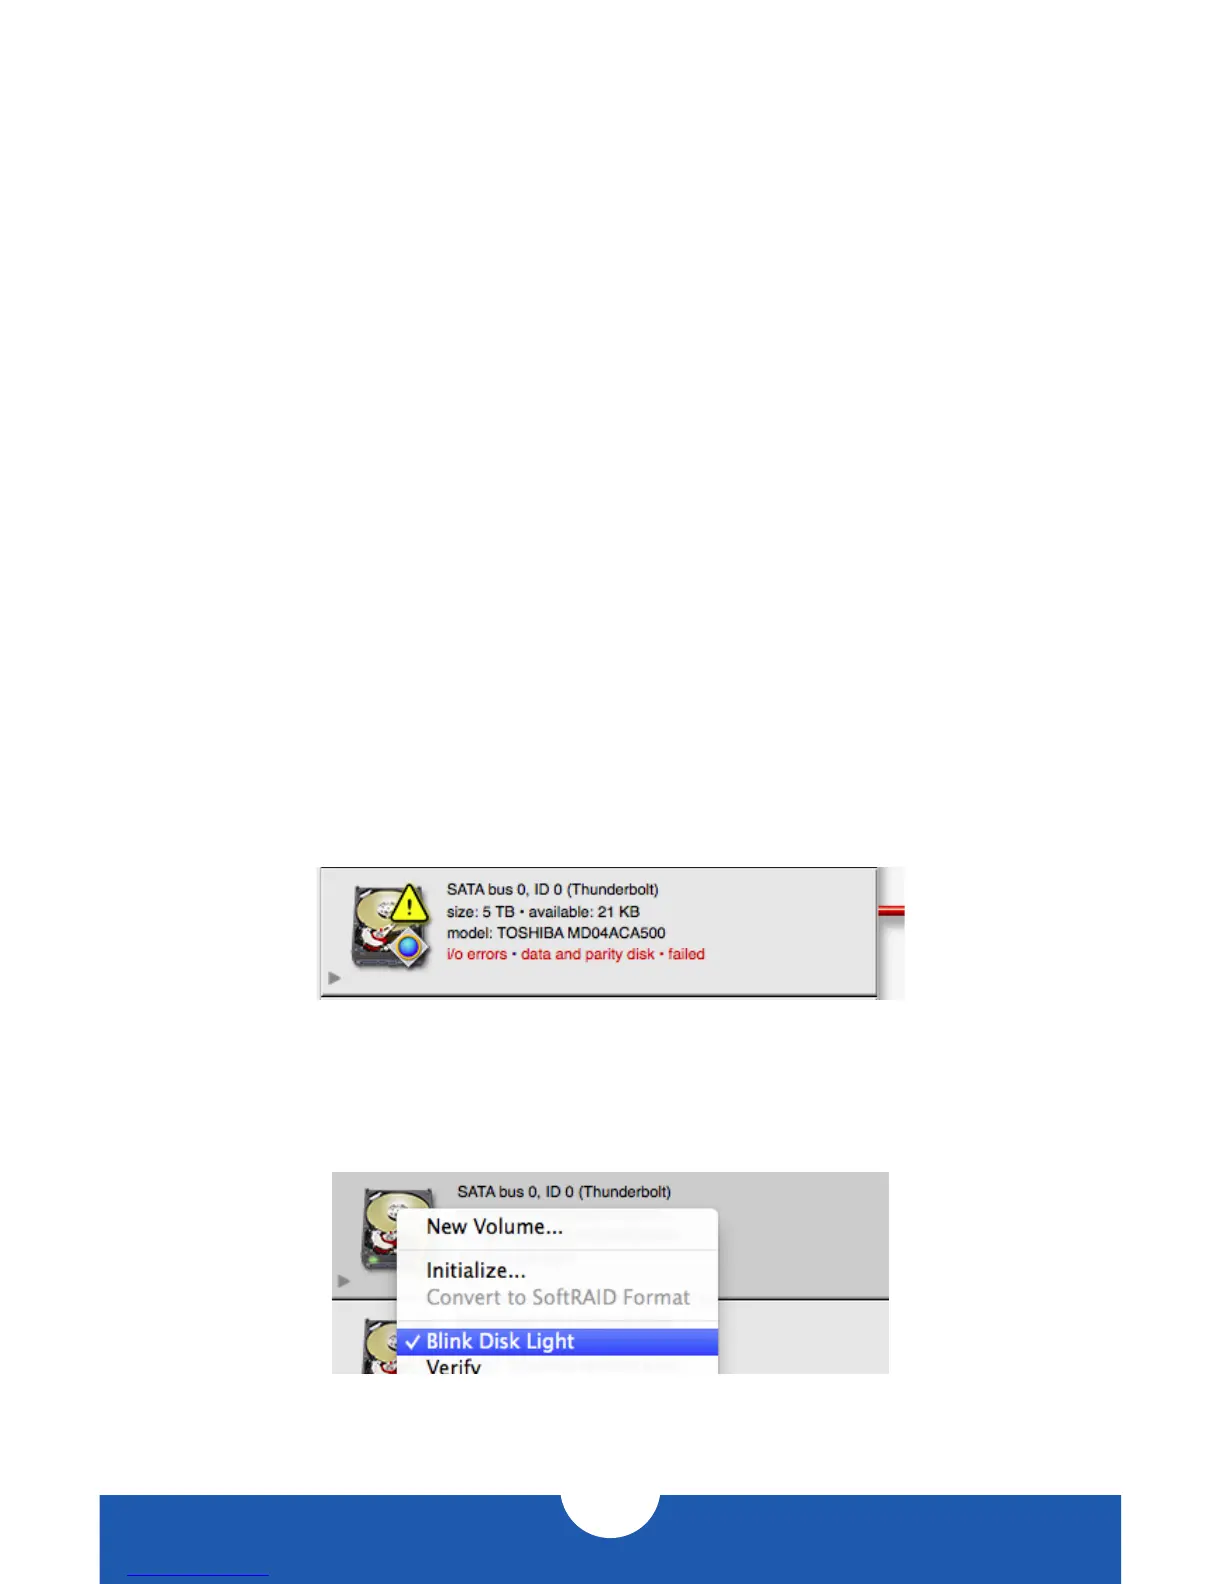
1. Identify the disk in the ThunderBay 4. To do this, right-click on the disk in SoftRAID, then
on the menu that appears, select ‘Blink Disk Light’.
Look at the front of the ThunderBay 4 and remove the disk with the blinking light.