51
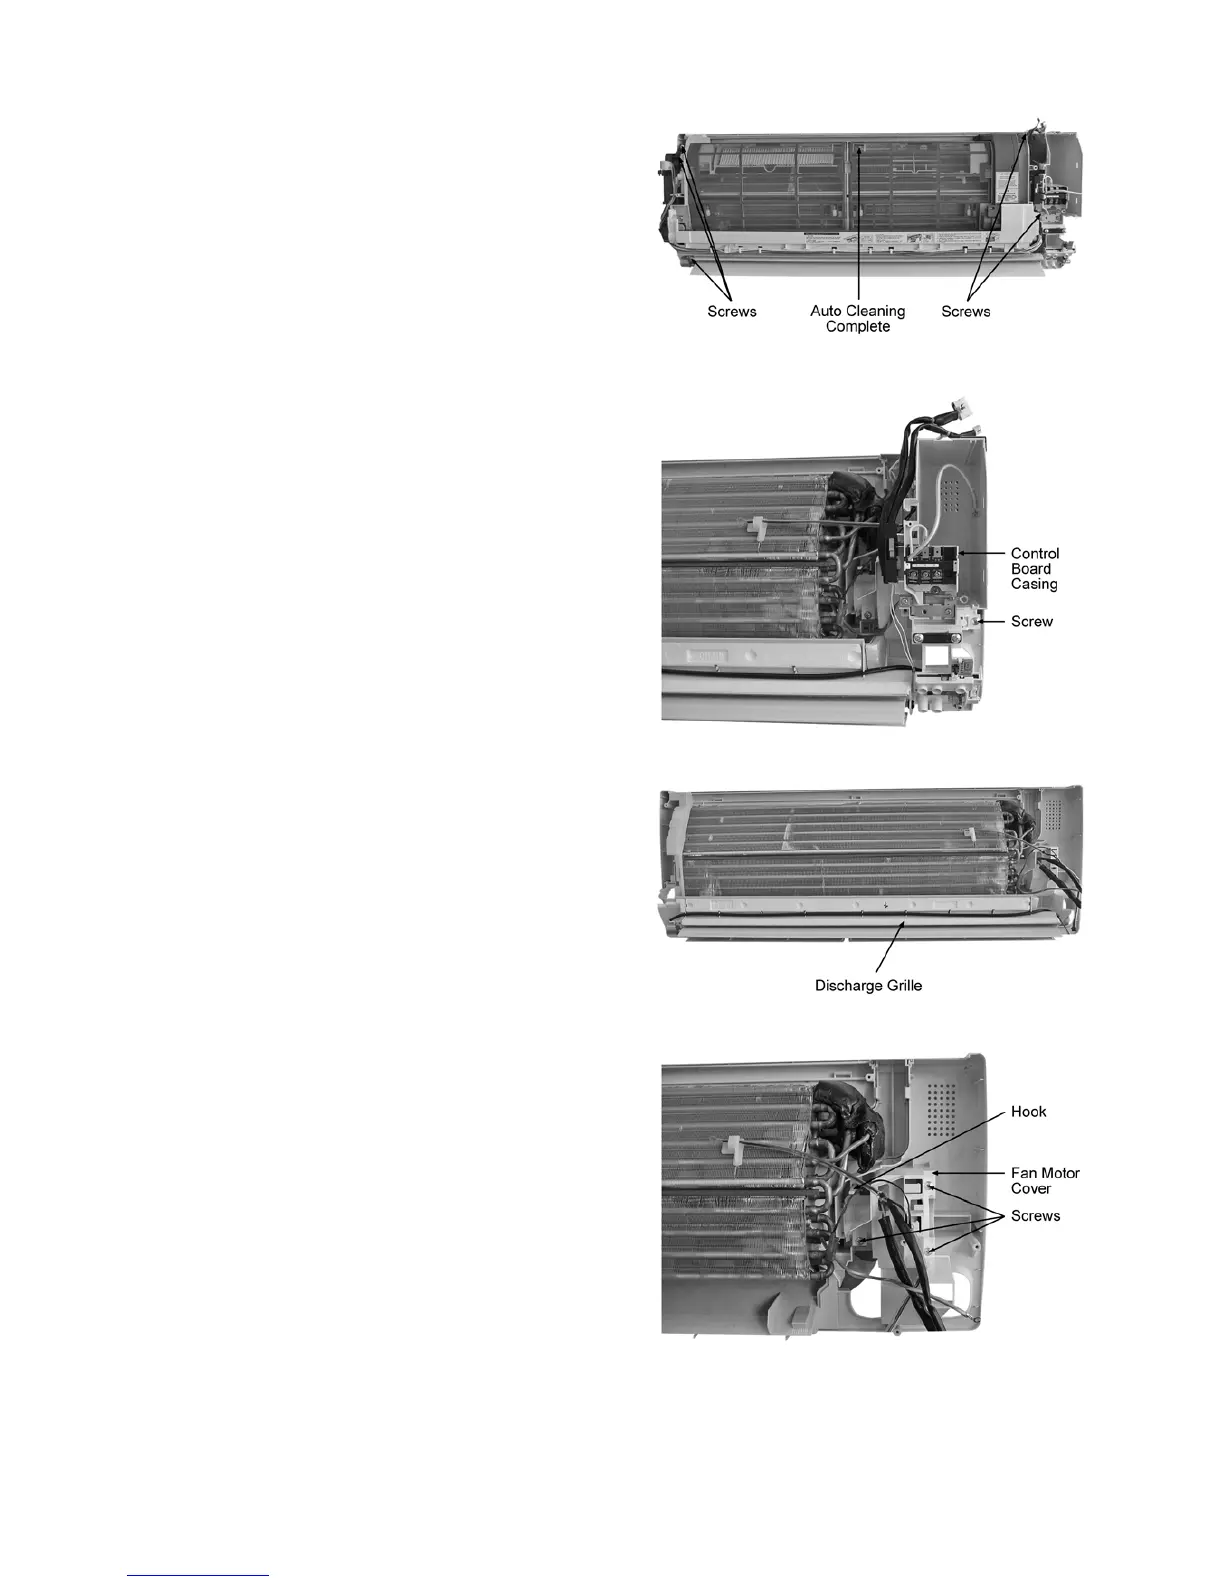
14. Remove the Auto Cleaning Complete by releasing the 5 screws.
(Fig. 8). For detailed instructions, please refer to 16.2 Filter Cleaning
Device Complete Removal Instructions.
Fig. 8
15. Remove the Control Board by releasing the screw. (Fig. 9)
Fig. 9
16. Pull out the Drain Hose (behind the Discharge Grille) from outlet to
remove the Discharge Grille. (Fig. 10)
Fig. 10
17. Release the 3 screws Fan Motor Cover. (Fig. 11)
18. By pressing down the hook at the left, you will be able to remove the
Fan Motor Cover. (Fig. 11)
Fig. 11





 To Next Page