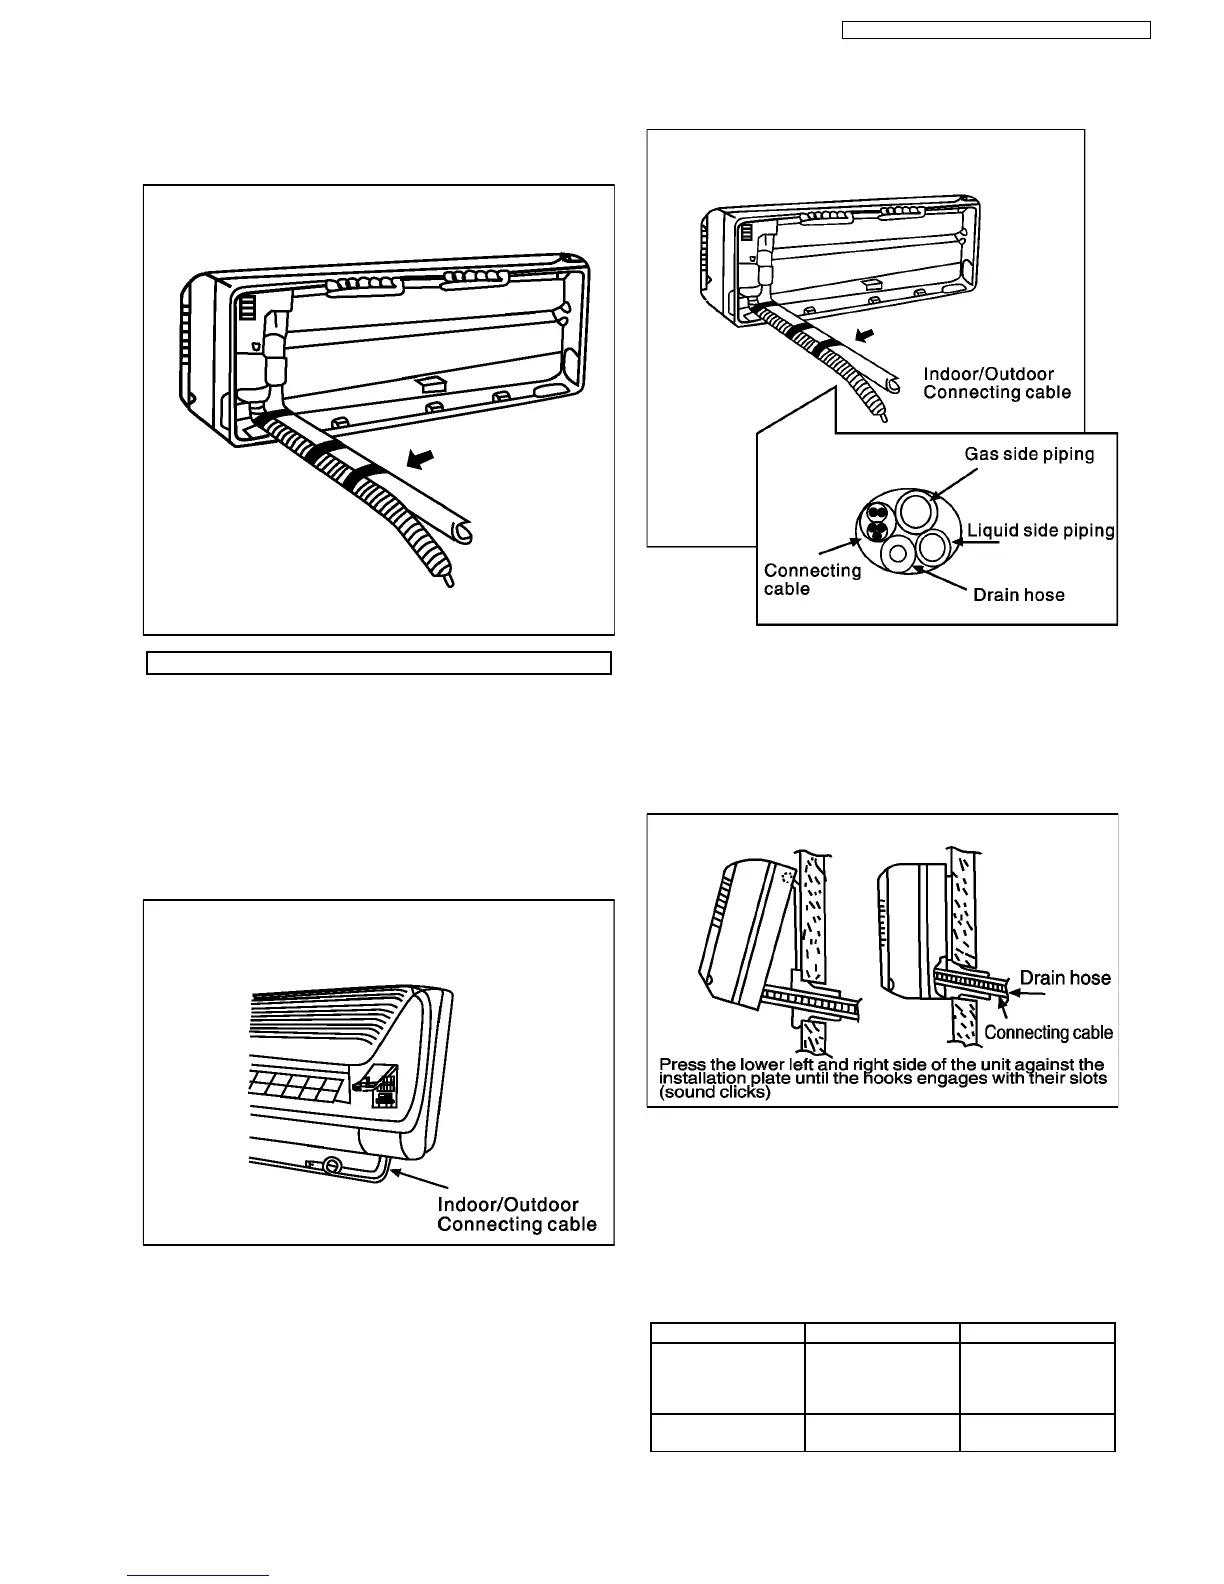
Remove the indoor piping
•
• •
•
Pull the tube out of chasis.
For the right piping
1. Pull the tube out of chassis.
2. Insert the tube and drain hose into the hole.
3. Insert the connecting cable into the indoor unit through the
hole.
•
• •
•
Do not connect the unit to power supply.
•
• •
•
Make a small loop with the cable for easy connection
later.
4. Tape the tube, drain hose and cable.
5. Indoor unit installation
•
• •
•
Hook the indoor unit onto the upper portion of
installation plate. (Engage the two hooks of the rear top
of the indoor unit with the upper edge of the installation
plate.)
•
• •
•
Ensure the hooks are properly seated on the installation
plate by moving it left and right.
6. Connecting the piping to the indoor unit
•
• •
•
Align the center of the piping and sufficiently tighten the
flare nut with fingers.
•
• •
•
Finally, tighten the flare nut with torgue wrench until the
wrench clicks.
When tightening the flare nut with torque wrench,
ensure the direction for tightening follows arrow on the
wrench.
Model Piping side Torque
CS-SA9CKP/
CU-SA9CKP5
CS-SA12CKP
CU-SA12CKP5
Liquid side 1/4" 18N.n
CS-SA9CKP/ CU-
SA9CKP5
Gas side 3/8" 42N.n
8.4.2. Connection of piping
31
CS-SA9CKP CU-SA9CKP5 / CS-SA12CKP CU-SA12CKP5