59
RQT9089
Advanced Editing
Accessing the Album (still picture)/
Picture View
Preparation:
RAM
SD
Release protection (disc, cartridge, card
➔ 76, Setting Protection)
•
Show Album View screen.
-R
-R DL
CD
USB
SD
(➔ 42, Showing the menu screen)
HDD
RAM
While stopped
1. Press [DRIVE SELECT] to select the drive.
2. Press [DIRECT NAVIGATOR].
When “PICTURE” is not selected, press the “Green”
button to select “PICTURE”.
Editing an album:
2a
Press [
e
,
r
,
w
,
q
] to select the album.
Multiple editing (➔ below, Tips)
When you want to create an album using “Create
Album”, press [OPTION] without selecting album.
Editing a still picture:
2b
1.
Press [
e
,
r
,
w
,
q
] to select the album which
contains the still picture to edit, then press [OK].
2. Press [
e
,
r
,
w
,
q
] to select the still picture.
Multiple editing (➔ below, Tips)
Press [OPTION] to display the menu list.
To view more options
Press [
e
,
r
] to select “Edit Album”, then press [OK].
Items that cannot be selected are grey.
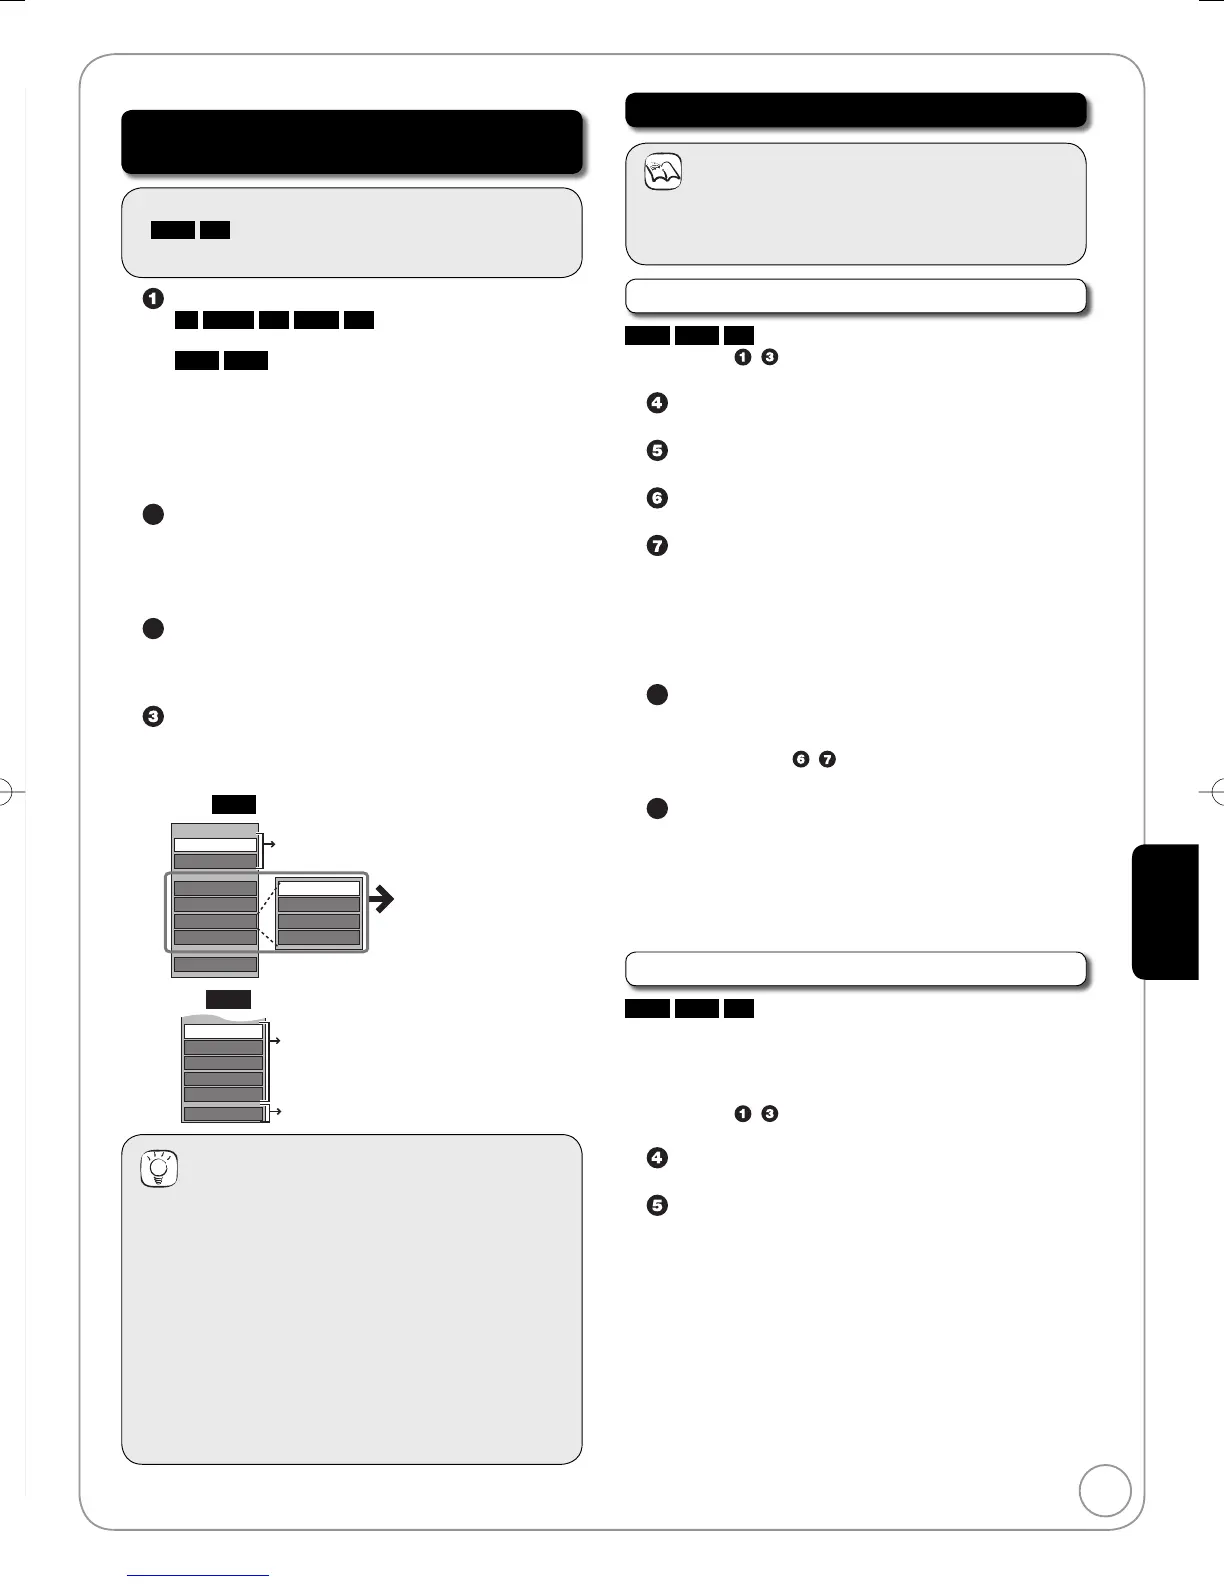
e.g.,
HDD
Editing an album
e.g., Editing a still picture
Slide Show Setting
Add Pictures
Create Album
Edit Album
Copy to DVD-RAM
VIDEO/MUSIC
Start Slide Show
Change Date
Set up Protection
Cancel Protection
Delete Album
Refer to “Album
(still picture)/
Picture Operations”
(➔ right).
Refer to “Slide Show” (➔ 45).
You can go back to the Album View.
Properties
Change Date
Set up Protection
Cancel Protection
Album View
Delete Picture
Refer to “Album (still picture)/
Picture Operations” (➔ right).
HDD
Tips
To view other pages
Press [
e
,
r
,
w
,
q
] to select “Previous” or “Next”, then
press [OK].
You can also press [
u
,
i
] to view other pages.
Multiple editing
Select with [
e
,
r
,
w
,
q
], then press [
h
PAUSE].
(Repeat.)
A check mark appears. Press [
h
PAUSE] again to
cancel.
To return to the previous screen
Press [RETURN].
To exit the menu screens
Press [DIRECT NAVIGATOR].
–
–
–
–
–
•
Album (still picture)/Picture Operations
Notes
Timer recordings do not start when performing “Change
Date”, “Copy to DVD-RAM”, “Copy to HDD”, “Add Pictures”
or “Create Album”.
•
Add Pictures/Create Album
HDD
RAM
SD
Perform steps − of “Accessing the Album (still picture)/
Picture View” (➔ left).
Press [
e
,
r
] to select “Add Pictures” or “Create
Album”, then press [OK].
Press [
w
] to select “Start” or “Yes”, then press
[OK].
Press [
e
,
r
,
w
,
q
] to select the album containing
picture to add, then press [OK].
Press [
e
,
r
] to select “Select pictures to copy” or
“Copy all pictures”, then press [OK].
If “Select pictures to copy” is selected
Press [
e
,
r
,
w
,
q
] to select the picture, then press
[OK].
If “Copy all pictures” is selected
All the still pictures in the album will be copied.
8
Press [
q
] to select “No” to fi nish copying, then
press [OK].
If you want to continue copying, select “Yes” and
repeat steps
– .
Only when you select “Create Album”
9
Press [
w
,
q
] to select “Yes” or “No”, then press
[OK].
If “Yes” is selected
You can give a name for the album (➔ 53, Entering
Text).
If “No” is selected
The album name is automatically given.
Delete Album/Delete Picture
HDD
RAM
SD
Important: Once deleted, contents cannot be recovered.
When deleting an album, non-picture files in the album will
also be deleted. (This does not apply to subordinate folders
in the album.)
Perform steps
− of “Accessing the Album (still picture)/
Picture View” (➔ left).
Press [
e
,
r
] to select “Delete Album” or “Delete
Picture”, then press [OK].
Press [
w
] to select “Delete”, then press [OK].
•
•
–
•
•
•
Still Pictures and Music—Editing
RQT9089-BDMR-EX98VEB.indb59RQT9089-BDMR-EX98VEB.indb59 2008/04/2319:00:432008/04/2319:00:43
 Loading...