61
RQT9089
Advanced Editing
Accessing the Album (CD)/Group (CD)/Track View
HDD
Preparation:
Press [DRIVE SELECT] to select the HDD drive.•
Press [DIRECT NAVIGATOR].
When “MUSIC” is not selected, press the “Yellow”
button to select “MUSIC”.
Press [
e
,
r
] to select “Play CD on HDD” or “Play
MP3 on HDD” and press [OK].
Editing an album/group
Press [
e
,
r
] to select the album/group and press [OPTION].
Editing a track
1.
Press [
e
,
r
] to select the album/group and press [OK].
2.
Press [
e
,
r
] to select the track and press [OPTION].
Press [
e
,
r
] to select the operation and press [OK].
To edit the album (CD)/group (MP3)
e.g., Album View (CD)
Enter Album Name
Repeat Play Setting
Sort
Track View
Delete Album
➔ below
Album (CD)/Group (MP3)/Track (CD/
MP3) Operation (➔ below)
Useful functions during music play
(➔ 48)
To edit the track (CD/MP3)
e.g., Track View (MP3)
Properties
Enter Track Name
Repeat Play Setting
Group View
Enter Artist Name
Delete Track
Useful functions during music play (➔ 48)
Album (CD)/Group (MP3)/Track (CD/
MP3) Operation (➔ below)
You can go back to Album View (CD)/
Group View (MP3)
Tips
To return to the previous screen
Press [RETURN].
To exit the screen
Press [DIRECT NAVIGATOR].
Album (CD)/Group (MP3)/Track (CD/MP3) Operation
After performing steps − (➔ above)
Delete Album (CD)
Delete Group (MP3)
Delete Track (MP3)
Press [
w
,
q
] to select “Delete” and
press [OK].
Once deleted, the recorded contents
are lost and cannot be restored.
Make certain before proceeding.
•
Enter Album Name (CD)
Enter Group Name (MP3)
Enter Track Name (CD/MP3)
You can give names to albums/
groups and tracks.
(➔ 53, Entering Text)
Enter Artist Name
(CD/MP3)
You can edit the artist name of the track.
(➔ 53, Entering Text)
Notes
Timer recordings do not start while editing music.•
–
Deleting still pictures and music using
Delete Navigator
Preparation:
RAM
SD
Release protection (disc, cartridge, card
➔ 76, Setting Protection).
•
HDD
RAM
SD
Important: Once deleted, contents cannot be recovered.
Press [DRIVE SELECT] to select the HDD, DVD or
SD drive.
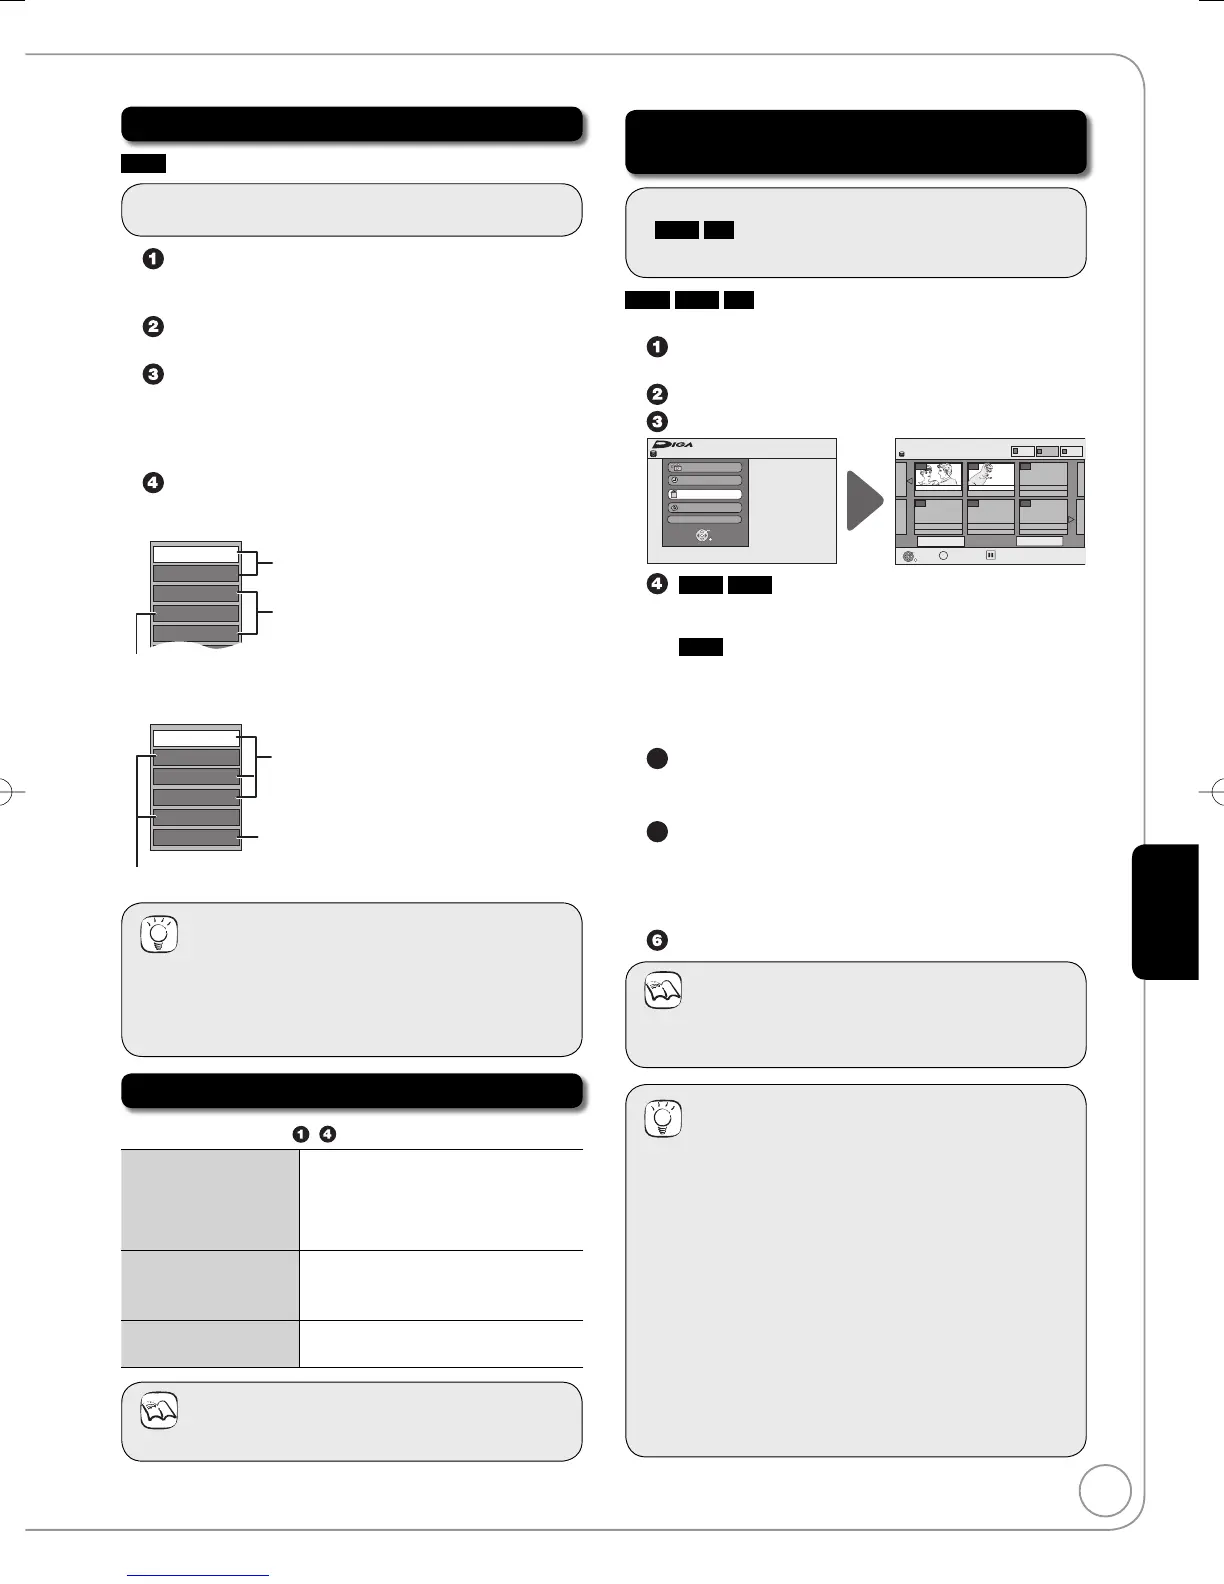
Press [FUNCTION MENU].
Press [
e
,
r
] to select “Delete”, then press [OK].
Remain
FUNCTION MENU
30:00 SP
HDD
Recording
Playback
Copy
Delete
To O the rs
OK
RETURN
DELETE Navigator Album View
Previous
Page 01/01
Next
OK
RETURN
OPTION
Press OK to show
pictures.
MUSIC
HDD
PICTURE
VIDEO
001
- - -
- - -
- - -
- - -
002
1/ 1/ 06 Total 5
2/ 1/ 06 Total 3
Date: 2. 1.2006Date: 1. 1.2006
Select
HDD
RAM
Press the colour button to select “PICTURE” or
“MUSIC”.
HDD
If you pressed the “Yellow” button, press
[
e
,
r
] to select “Delete CD on HDD” or “Delete MP3
on HDD” and press [OK].
Deleting an album (still picture), album (CD) or group
(MP3):
5a
Press [
e
,
r
,
w
,
q
] to select the album, then press
[ DELETE].
Deleting a still picture or track (MP3):
5b
1. Press [
e
,
r
,
w
,
q
] to select the album or group
which contains the still picture or track to
delete and press [OK].
2. Press [
e
,
r
,
w
,
q
] to select the still picture or
track and press [OK].
Press [
w
,
q
] to select “Delete”, then press [OK].
Notes
You cannot delete while recording or copying.
You cannot delete a track (CD) individually.
•
•
Tips
To view other pages
Press [
e
,
r
,
w
,
q
] to select “Previous” or “Next”, then
press [OK].
You can also press [
u
,
i
] to view other pages.
Multiple editing
Select with [
e
,
r
,
w
,
q
], then press [
h
PAUSE].
(Repeat.)
A check mark appears. Press [
h
PAUSE] again to cancel.
Deleting an item increases the available space by the
amount of space taken by the item deleted.
To return to the previous screen
Press [RETURN].
To exit the screen
Press [EXIT].
–
–
–
RQT9089-BDMR-EX98VEB.indb61RQT9089-BDMR-EX98VEB.indb61 2008/04/2319:00:472008/04/2319:00:47
 Loading...