3
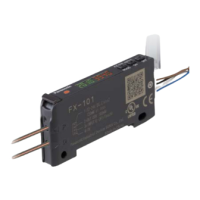
Terminal arrangement diagram, FX-301 connector type
The following symbols are used in this section.
NPN output type
PNP output type
50mA max. if five or more connector type FX-301(P) amplifiers are
connected in cascade.
When the power supply is switched on, a communication self-check is
executed. The RUN mode indicator lights up green and the digital display
shows the incident light intensity.
The terminology in the following table will help you navigate through the
various modes and make your settings.
General navigation tips
Press <MODE> briefly and repeatedly to switch from mode to mode.
Press <MODE> for 2s or more to return to RUN mode.
To cancel the setting process, press <MODE>.
Press the jog switch to confirm settings.
Turn the jog switch to navigate between sub-modes.
When the jog switch is turned in RUN mode, the current threshold value
is displayed. Then the current incident light intensity is displayed again
automatically
Navi mode
Starting in RUN mode, you will navigate through the modes in the following
order.
7 I/O CIRCUIT DIAGRAMS
Symbol Meaning
D Reverse supply polarity protection diode
ZD Surge absorption zener diode
Tr1 NPN output transistor
Tr2 PNP output transistor
8 OPERATION PROCEDURE
MODE key Jog switch
Press Press Turn
"+" side "-" side
+V
0V
1
3
2
Output
D
1
1
2
3
T
r1
+
-
Z
D1
±10%
12 to 24V DC
Internal circuit
Users' circuit
(Brown) +V (note)
Load
(Black) Output
Sensor circuit
100 mA max. (note)
(Blue) 0V (note)
Color of core wire of the main quick-
connection cable
Terminal no.
D
2
Z
D2
1
2
3
T
r2
+
±10%
-
12 to 24V DC
Internal circuit
Users' circuit
(Brown) +V (note)
Load
(Black) Output
Sensor circuit
100 mA max. (note)
(Blue) 0V (note)
Color of core wire of the main quick-
connection cable
Terminal no.
Mode Description
RUN Normal sensing operation.
TEACH Sets threshold value by “2-point teaching”, “limit teach-
ing”, or “full-auto teaching”.
See “TEACHING MODE” on page 4.
ADJ Allows fine adjustment of the threshold value.
See “THRESHOLD VALUE ADJUSTMENT MODE” on
page 5.
L/D Sets output operation to either Light-ON or Dark-ON.
See “OUTPUT OPERATION MODE” on page 5.
TIMER Configures operation of the timer.
See “TIMER OPERATION MODE” on page 5.
PRO Press the jog switch to enter the PRO sub-
modes, which allow you to make various
detailed settings.
See “PRO MODE” on page 5.
RUN Normal sensing operation.

 Loading...
