Recording
38
DVQX1333 (ENG)
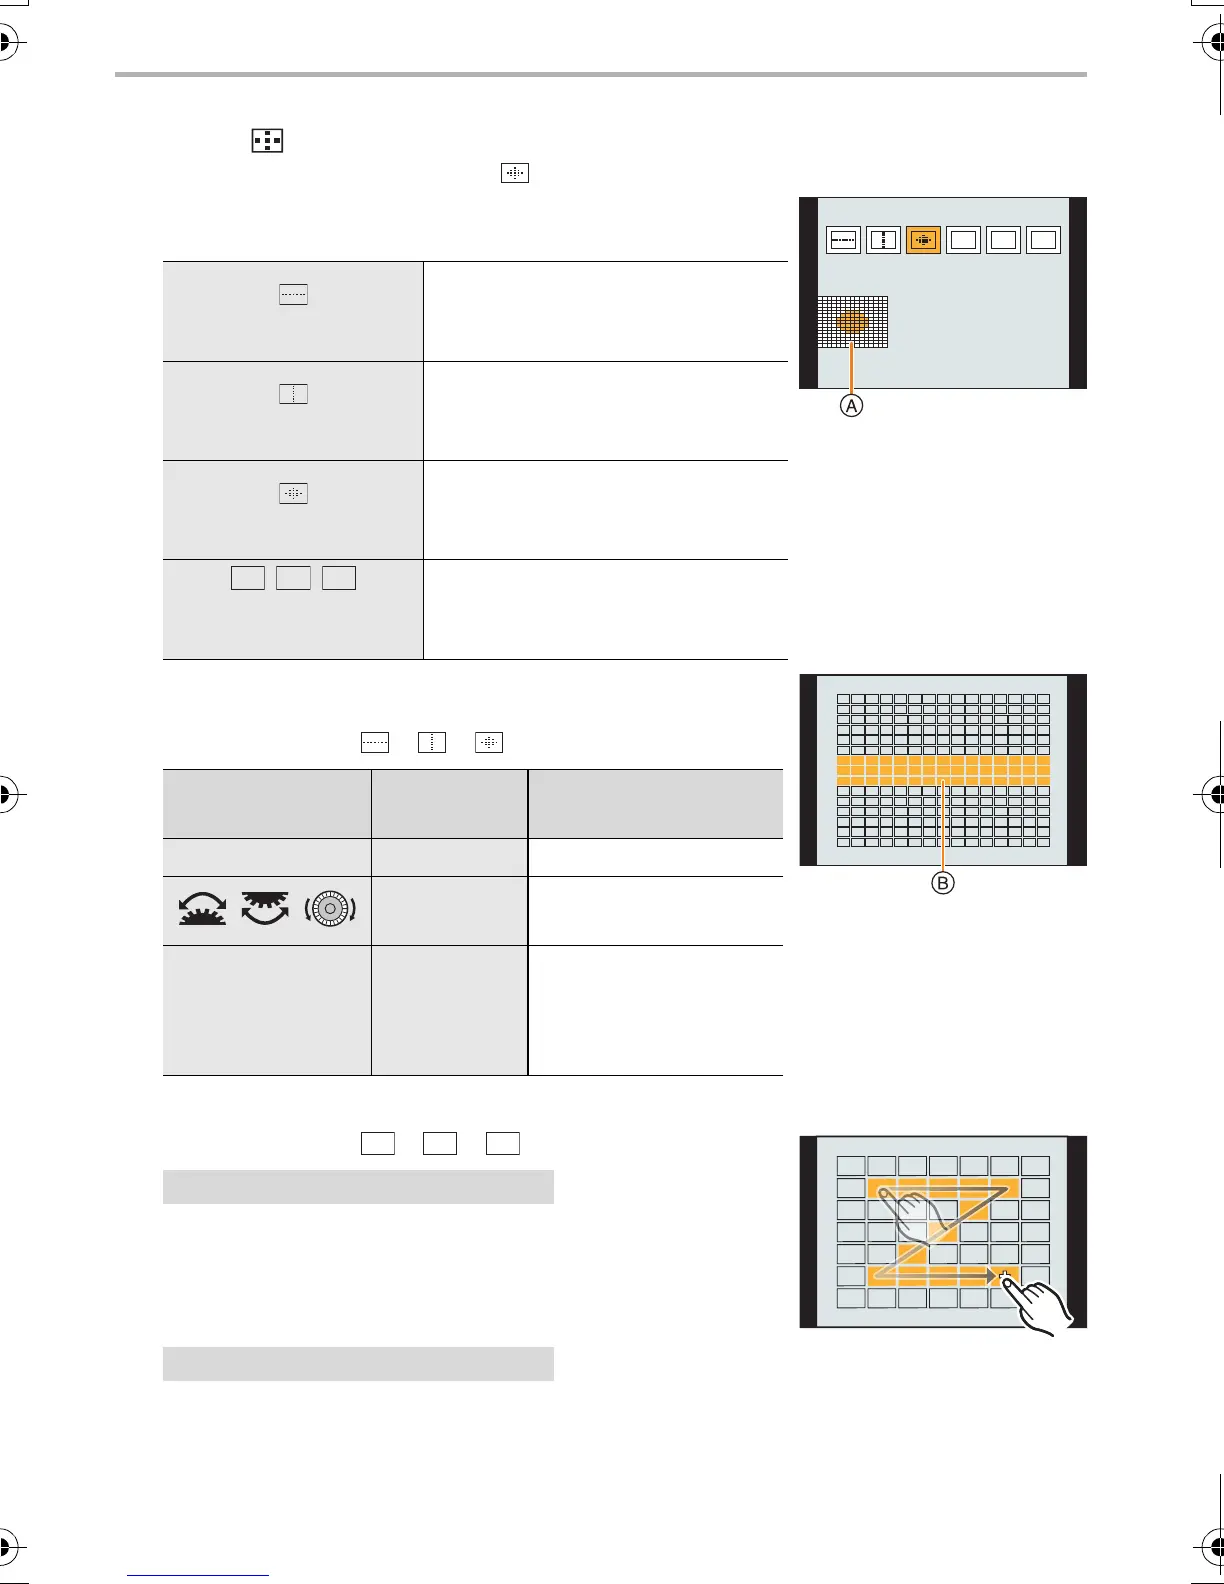
∫ Setting the shape of the AF area ([Custom Multi])
1 Press [ ].
2 Select a Custom Multi icon ([ ], etc.), and press 3.
3 Press 2/1 to select a setting and then press 4.
A The current shape of the AF area
4 Select AF areas.
B The selected AF areas
When selecting [ ]/[ ]/[ ]
Press [MENU/SET] to set.
When selecting [ ]/[ ]/[ ]
Drag your finger over the parts you want to set as AF
areas.
• To cancel the selection of a particular AF area, touch the
area again.
Press 3/4/2/1 to select the AF area, and then press [MENU/SET] to set (repeat).
• The setting is cancelled when [MENU/SET] is pressed again.
Press [Fn1] to set.
([Horizontal Pattern])
This shape is convenient for
taking panning shots or similar
shots.
([Vertical Pattern])
This shape is convenient for
recording objects, such as
buildings.
([Central Pattern])
This shape is convenient when
you want to bring the centre area
into focus.
//
([Custom1]/
[Custom2]/[Custom3])
You can select a customised
setting.
Button operation
Touch
operation
Description of
operation
3/4/2/1 Touching Moves the position
//
Pinching in/
out
Changes the size
[DISP.] [Reset]
First time: The position
is reset to the centre
Second time: The size
is reset to the default
Touch operation
Button operation
ヤピヤビヤヒ
ヤビ ヤピ
ヤヒ
ヤピ
DC-G9BodyGH-DVQX1333_eng.book 38 ページ 2017年11月17日 金曜日 午前11時44分

 Loading...