20
Preparations/Basics
DVQX1391 (ENG)
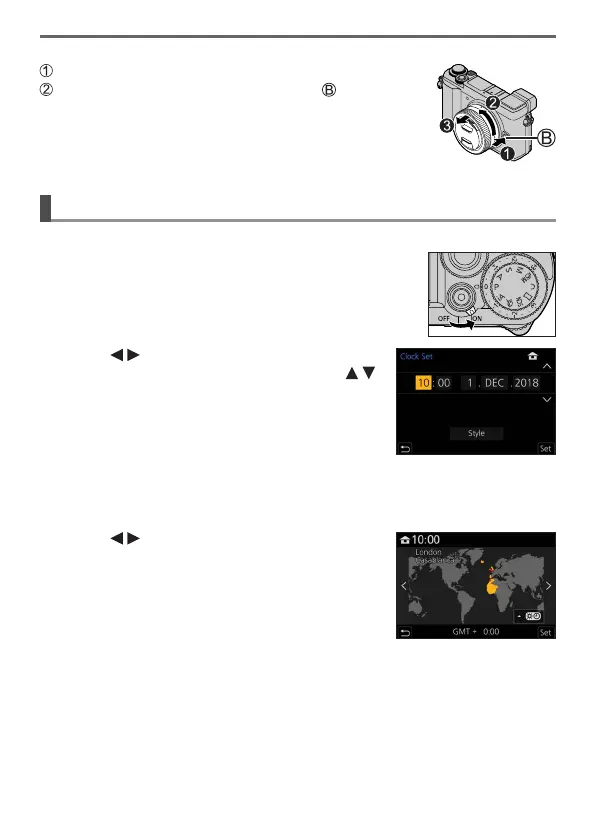
■
Detaching the lens
Attach the lens cap
While pressing on the lens release button ( ), rotate the
lens toward the arrow until it stops and then remove
• Hold the part around the base of the lens to rotate it.
Setting the clock
The clock is not set when the camera is shipped.
1
Turn the camera on
2
Press [MENU/SET]
3
Press to select the items (year,
month, day, hour, minute), and press
to set
4
Press [MENU/SET]
5
When [The clock setting has been
completed.] is displayed, press
[MENU/SET]
6
When [Please set the home area] is displayed, press
[MENU/SET]
7
Press to set your home area and
press [MENU/SET]

 Loading...