Do you have a question about the Panasonic NA-F80GD and is the answer not in the manual?
Service information intended for experienced technicians, warns of potential dangers.
Highlights critical safety parts and the need for manufacturer-specified replacements.
Wiring diagram for washing machines with a 3-pin power plug.
Wiring diagram for washing machines with a 2-pin power plug.
Details the timer-controlled drying function and its operation.
Guide on using the TUB DRY feature to prevent black mold in the tub.
Explains the lid lock's function and the procedure for releasing it.
Steps for disassembling the PC board, lid lock switch, and rotary detector.
Guide for disassembling the motor, heater, fan, and related mechanical parts.
Instructions for disassembling Body B, outer tub cover, and mechanism case.
Detailed procedure for performing test runs without water.
Illustrates the placement of various parts across different groups (A, B, C, D).
Comprehensive lists of part numbers and descriptions for all component groups.
Details the parts included in the product packaging.
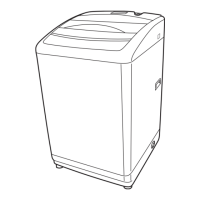
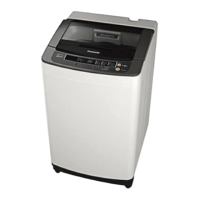
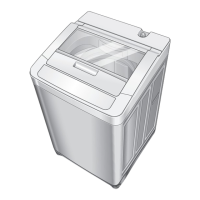
This document outlines the operational and maintenance procedures for the NA-F80GD washing machine, a top-loading appliance designed for efficient garment care.
The NA-F80GD washing machine is equipped with various functions to cater to different laundry needs, including washing, rinsing, spinning, and drying. The machine features a timer-type drying function, which operates by circulating hot air within the tub to dry garments. The drying process is controlled by a timer, with the heater, fan motor, and fan case integrated into the panel. Humid air is expelled through an exhaust filter located at the upper portion of the tub. The drying capacity is rated at 3.0kg, with approximate drying times varying based on the load: 3 hours for 3.0kg, 2-3 hours for 2.0kg, 1.5-2 hours for 1.0kg, and 1-1.5 hours for 0.5kg. These times may adjust based on atmospheric temperature, humidity, and installation conditions. Overfilling the dryer can reduce its effectiveness and cause wrinkles. An overfilling indicator flashes for about 30 seconds if the capacity exceeds 3.0kg, after which operation resumes. This detection is active only when dry items are inserted for WASH & DRY with the Normal Course.
The machine also includes a "TUB DRY" function, designed to prevent black mold by eliminating humidity in the tub after washing. This function should be activated once a week by turning on the power, selecting "Tub Dry," closing the inner cover and lid, and pressing START. The tub rotates quickly, and hot air blows for approximately 30 minutes, concluding with a buzzer sound. The effectiveness of "Tub Dry" in preventing mold depends on the usage environment, and it cannot remove existing mold.
A lid lock mechanism is active during "Rinse," "Spin," "First half drying," and "Tub Dry" cycles to ensure safety. The lid lock light illuminates when active. To release the lid lock, the user must press and hold the START/HOLD button and wait for a snapping sound, which occurs when the tub stops rotating (approximately 15 seconds). It is crucial not to force open the lid when locked to prevent damage. The lock requires power to release, so the power plug should not be pulled out. If a power outage occurs, the user should wait for power to return before turning the switch ON.
The machine offers a "Power Save Mode" for drying, which reduces energy consumption by blowing only air into the tub without using the heater midway through the drying operation. This mode is selectable for "WASH & DRY" and "DRY" courses. When selected, the user may need to increase the set drying time to compensate for the reduced drying power.
The "Keep Dry" function helps maintain the fluffiness of items after drying. After drying, the pulsator rotates for 6 seconds every 5 minutes over a period of about 2 hours. This function is initially set to "OFF" at purchase. To activate it, the user must press the power ON button while simultaneously pressing the "WASH & DRY" button for at least 3 seconds. A single buzzer sound confirms activation, though the indicator light may not immediately illuminate; pressing "WASH & DRY" again will confirm the light. To deactivate, the same steps are followed, and two buzzer sounds confirm deactivation.
The washing machine also features automatic water level adjustment based on garment load, with manual selection options for 22L, 38L, 49L, 57L, or 67L, depending on the course. The "Micro Foam Wash" function generates foam for effective cleaning, and "Auto Tub Clean" automatically washes the tub after rinsing. These features are indicated by flashing lights during operation. The "Soak Time" can be set to 1 or 8 hours. The "Reserve" function allows users to set the operation end time. "Wash & Dry" performs a combined wash and dry operation, available for Normal and My Favorite courses.
The control panel provides intuitive access to various settings. The "Power Switch" turns the machine ON and OFF. After turning off, it cannot be turned on again for approximately 10 seconds. The machine automatically turns off after a function cycle is finished or if washing is not initiated within 10 minutes of turning on. A buzzer sounds when the power switch is turned off, and the PROGRAM indicator for the Normal Course lights up when the power is turned on. The "Start/Hold" button initiates or pauses a cycle.
The "Water Level/Detergent Amount/Time Remaining" display shows the approximate water level (L), detergent amount (cups), and time left (minutes) after startup. The remaining time display may vary from actual time depending on laundry type and installation conditions. For programmed times, the display shows hours until the end of operation.
"Course Selection" allows users to choose suitable programs based on laundry volume and stain levels. "Child Lock" can be set using a dedicated button to prevent unintended operation. "Wash, Rinse, Spin" buttons allow customization of washing/spinning times and the number of rinses.
For optimal drying results, it is recommended to avoid overfilling the machine and to separate difficult-to-dry items (e.g., cottons, heavy garments) from easy-to-dry items (e.g., synthetics). Items that are not sufficiently spin-dried should not be dried. To reduce wrinkles, users can pause the operation and redistribute items, especially lighter items that tend to rise to the top.
Regular maintenance is crucial for the longevity and performance of the washing machine. Users should clean the exhaust filter and intake filter after every run and reinsert them securely. Clogged filters can diminish drying power, and incorrect filter installation can lead to dust accumulation and malfunctions.
Good ventilation is essential during operation to ensure proper drying performance and prevent condensation on windows, walls, and flooring due to humidity changes.
To minimize shrinkage, users should check garment tags for material and care instructions before drying. Hanging garments outside to partially dry before machine drying can yield better results. Cotton items that have shrunk can often be restored to their original shape by soaking and stretching.
The service manual also provides detailed instructions for checking input and output voltage of the PC.Board, which is essential for troubleshooting and replacement. This includes verifying the test meter range, setting the machine to working mode for output voltage checks, confirming motor circuit combinations, and measuring push switch circuit voltage.
Disassembly instructions are provided for various components, including the PC Board, body parts, heater, fan, fan motor, lid lock switch, mechanism case, flapper, shaft bushing, spinner shaft flange nut, spinner shaft washer, mounting plate, and rotary detector. These instructions include steps for removing screws, connectors, and other fasteners, with cautions to prevent scratching the body and ensuring proper reassembly. For instance, when removing the flapper, it's advised not to remove the mounting screw completely but to hold it while pulling out. If pulling the flapper from the tub, the two detergent inlets (blue pockets) must be removed first to allow the flapper to pass through the groove on the balancer.
A critical step in reassembly involves checking the lid switch movement. If the lid switch is functioning normally, pushing the tub towards the lid switch lever should cause the water amount lamp to indicate 67L.
Error indication descriptions are provided to help diagnose issues, with codes like U11 (malfunction of drain), U12 (lid open), U13 (unbalanced load), U14 (malfunction of water supply), U15 (water remaining at drying process), U25 (unbalanced load at drying), H01 (water level detector), H04 (short circuit of power relay), H05 (data not memorized), H07 (malfunction of rotary detector), H09 (open circuit of PC.Board's communication line), H10 (malfunction of thermistor), H21 (water leaked from filling solenoid), H25 (malfunction of geared motor for drain), H26 (malfunction of clutch), H27 (malfunction of door lock switch), H51 (malfunction of overloading), H52 (malfunction of high voltage), H53 (malfunction of low voltage), H55 (high current in mechanism motor), H56 (high current in mechanism motor), H57 (low magnetic current of mechanism motor), H59 (malfunction of fan motor), and H66 (malfunction of heater circuit). Each error code includes detect contents, check points, and methods to clear the error, such as opening/closing the lid, redistributing the load, checking connectors, replacing components, or pressing the power switch to OFF.
| Capacity | 8.0 kg |
|---|---|
| Weight | 42 kg |
| Water Level Selection | 5 Levels |
| Voltage | 220 - 240 V |
| Type | Top Load |