Adding New Sound on
a
Recorded
Cassette
(Audio Dubbing)
1
WAE!#€IB%%
[OFFION] RM3PR
LONI
o
--
-.
;;~p~p~~~p?g%%.=p
,,;,,i
z:-*--=
,zzzBG.2.Ec:(5=?5J
2
B
[VCRICAMERA]
(&%%f&/
B%%%%)
B
E
[VCR]
BES
o
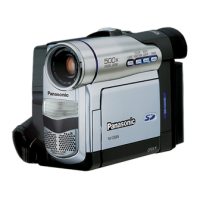
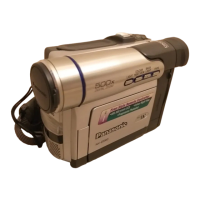
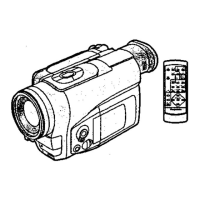
To perform audio dubbing, the Remote Controller is
necessary.
You can add music or narration on a recorded cassette.
*If
you perform audio dubbing onto a tape that was
recorded with [AUDIO REC] on the [OTHER
FUNCTIONS] Sub-Menu of the
[CAMERA
FUNCTIONS] Main-Menu set to [16bit]. the original
sound is
erased. (If you intend to perform audio dubbing
but
also want to keep the original sound. be sure to set
[AUDIO REC] to
[12bit] before maklng the original
recording.)
It is not possible to
perform audio dubbing onto
recordings made in the LP Mode.
(+
24)
1
Insert
the
recorded
cassette and set the
[OFFION]
Switch
to
[ON].
Make sure that the prevention slider of the cassette
is
set to (REC].
2
Press
the
[VCRICAMERA]
Button
so
that
the
[VCR]
Lamp
lights.
3
At
the
point
from which you
want
to
insert
the
new
sound,
switch the Movie Camera
over
to
the
Still Playback Mode.
Using Cue Playback or Review Playback makes it
easy to
search for this point.
4
Press
the [A.DUB]
Button
on
the Remote
Controller.
5
Press the Pause Button
[II]
on
the Remote
Controller to start audio dubbing.
Stopping Audio Dubbing
Press the Pause Button
[l l] on the Rernote Controller
The Movie Carnera is
agail n tbe
Stbli
Playback Mode
 Loading...