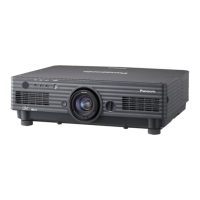
Do you have a question about the Panasonic PT-D5700E and is the answer not in the manual?
Provides guidelines for safe servicing and maintenance of the projector.
Details the procedure for checking leakage current to prevent electric shock.
Warns about UV radiation and lamp handling during maintenance.
Explains the function of the interlock switch for safety.
Provides steps to access and activate the projector's serviceman mode.
Details the procedure to exit serviceman mode and return to user mode.
Details how to set projector IDs for remote control operation.
Provides guidance on replacing P.C.Boards and transferring data.
Instructions and cautions for replacing the A-P.C.Board lithium battery.
Lists important safety and procedural cautions during service.
Details procedures for powering off the projector safely.
Warns about the high intensity light from the projector lamp.
Steps and warnings before replacing the lamp unit.
Important safety notes for handling and replacing the lamp unit.
Guidance on when to replace the lamp unit based on usage.
Explains the meaning of lamp monitor indications and remedial measures.
Provides a visual flowchart of the disassembly sequence.
Step-by-step guide to remove the projector's top case.
Procedure for removing the A-P.C.Board component.
Steps to remove the J-P.C.Board from the projector.
Instructions for safely removing the power module.
Procedure for removing the R-P.C.Board.
Steps to remove the S-P.C.Board.
Instructions for removing Ballast-1 and Ballast-2 modules.
Step-by-step guide for removing the projector lamp unit.
Instructions for removing the projector's projection lens assembly.
Procedure for removing the analysis block component.
Steps to remove the synthesis mirror assembly.
Instructions for removing the color wheel block.
Procedure for removing the rod component.
Steps to remove the full reflection mirror assembly.
Detailed steps for removing the DMD block and associated parts.
Instructions for removing the mechanical shutter unit.
Troubleshooting steps for no picture or abnormal display.
Guidance for resolving issues with video, S-Video, RGB, and DVI inputs.
Steps to check the A-P.C.Board for faults.
Specific troubleshooting steps for S-Video input problems.
Troubleshooting steps for RGB1 and RGB2 input issues.
Troubleshooting steps for DVI-D input problems.
Detailed checks for specific components on the A-P.C.Board.
Diagnostic steps for the main CPU and related circuits.
Procedures for troubleshooting the FM-Module.
Troubleshooting steps for remote control issues.
Troubleshooting steps for SERIAL IN/OUT communication errors.
Shows the interconnection of major circuit boards (part 1).
Shows the interconnection of major circuit boards (part 2).
Illustrates the power supply circuitry and its components.
Diagram showing signal processing paths (part 1).
Diagram showing signal processing paths (part 2).
Diagram illustrating the fan and motor control system.
Detailed schematic for the A-P.C.Board (section 1).
Detailed schematic for the A-P.C.Board (section 2).
Detailed schematic for the A-P.C.Board (section 3).
Detailed schematic for the A-P.C.Board (section 4).
| Contrast Ratio | 2000:1 |
|---|---|
| Lamp Life | 2000 hours (Normal Mode) / 3000 hours (Eco Mode) |
| Lamp Type | 275W UHM |
| Projection Size | 30 - 300 inches |
| Input Connectors | DVI-D, VGA, S-Video |
| Resolution | 1024 x 768 (XGA) |