ENGLISH - 63
Note
f When the [CORNER CORRECTION] individual adjustment screen is displaying, the individual adjustment screen of the next corner can also
be displayed by pressing the <ENTER> button.
f Depending on the correction amount, the image aspect ratio may change.
Setting [CURVED CORRECTION]
(Not available for PT-LB306)
1) Press as to select [SCREEN ADJUSTMENT].
2) Press the <ENTER> button.
f The [SCREEN ADJUSTMENT] screen is displayed.
3) Press as to select [CURVED CORRECTION].
4) Press the <ENTER> button.
f The [CURVED CORRECTION] screen is displayed.
5) Press as to select one item to adjust.
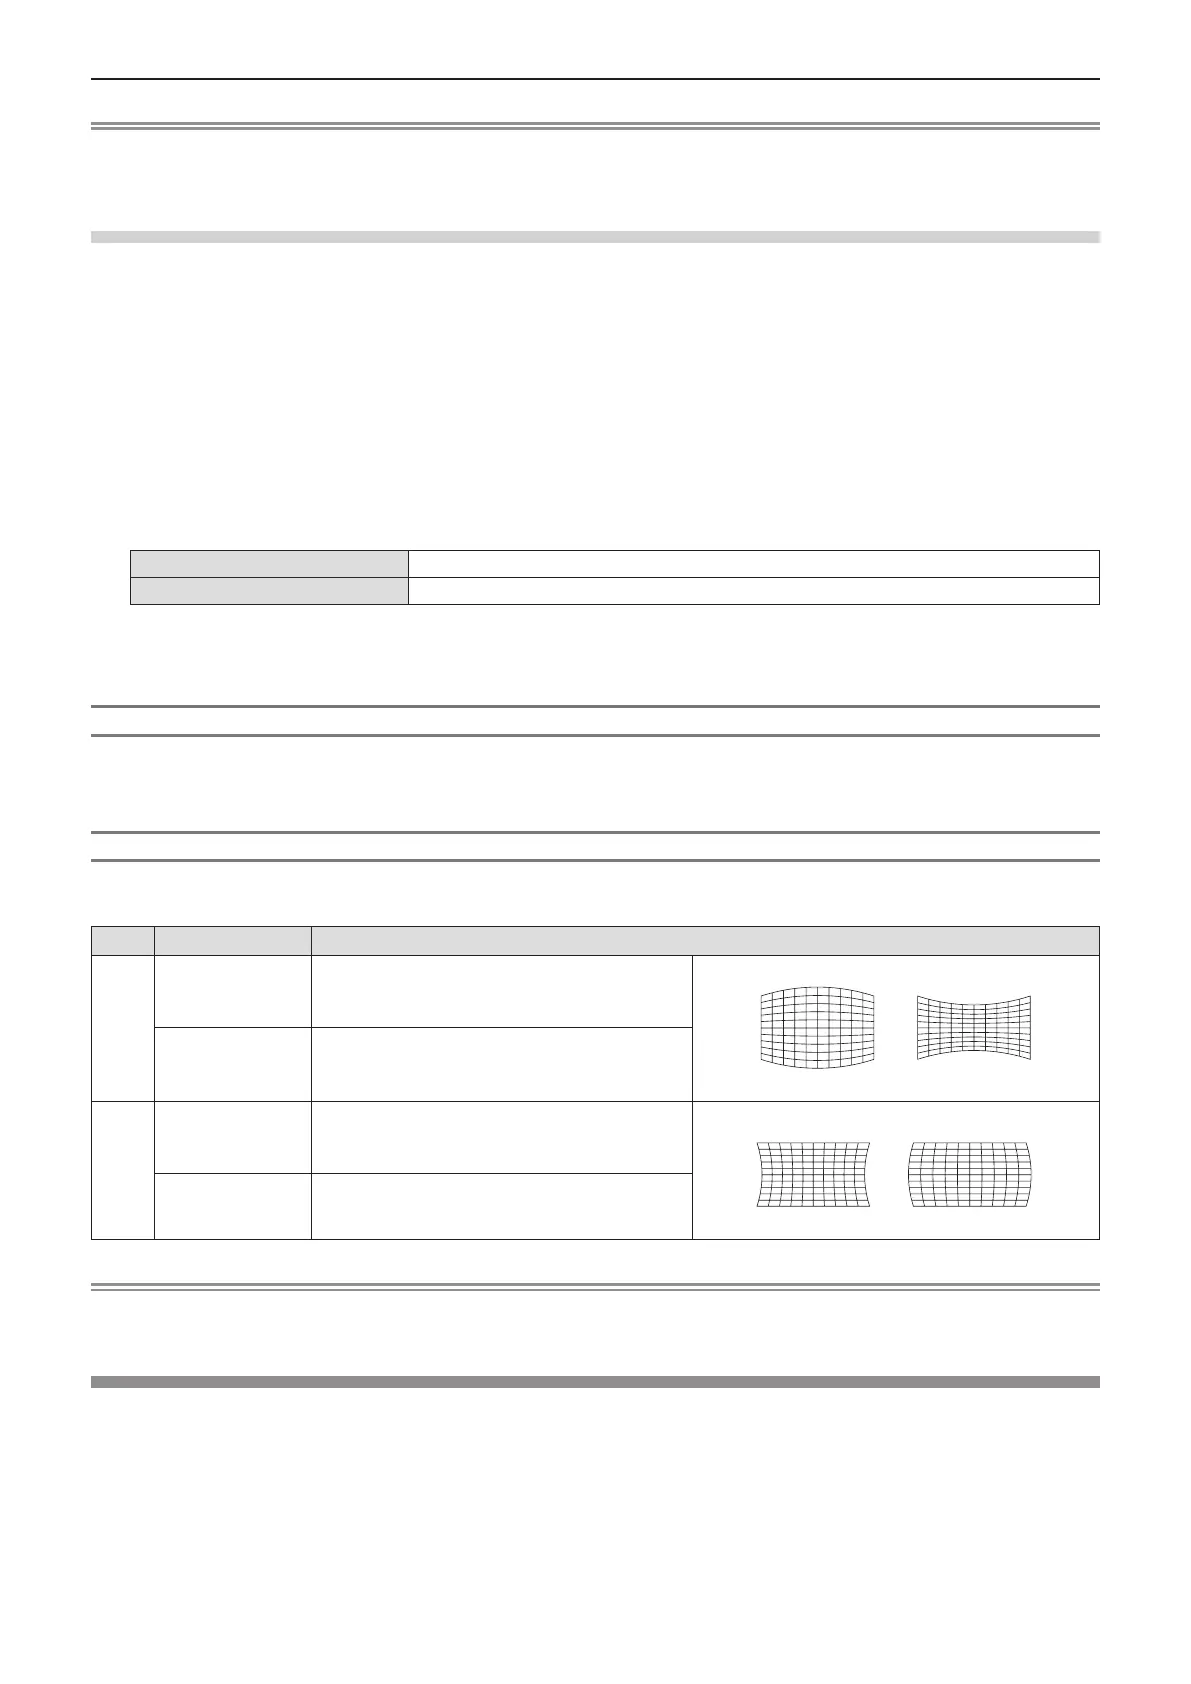
[KEYSTONE]
Adjusts when the trapezoid of the projected image is distorted.
[ARC]
Adjusts when the radian of the projected image is distorted.
6) Press the <ENTER> button.
f The [KEYSTONE] or the [ARC] individual adjustment screen is displayed.
Adjusting [KEYSTONE]
1) Press asqw to adjust.
f For details, please refer to “Setting [KEYSTONE]”. (x page 61)
Adjusting [ARC]
1) Press asqw to adjust.
Items Operation Adjustment
[H]
Press the q button.
The top and the bottom of horizontal line will bulge.
Press the w button.
The top and the bottom of horizontal line will dent.
[V]
Press the a button.
The left and the right of vertical line will dent.
Press the s button.
The left and the right of vertical line will bulge.
Note
f Pressing the <ENTER> button while the individual adjustment screen is displayed can switch to the individual adjustment screen of other
items.
[SHIFT]
(Only for COMPUTER1 input / COMPUTER2 input / COMPUTER input)
Move the image position vertically or horizontally if the image position projected on the screen is shifted even
when the relative position of the projector and the screen is installed correctly.
1) Press as to select [SHIFT].
2) Press the <ENTER> button.
f The [SHIFT] screen is displayed.
Chapter 4 Settings - [POSITION] menu
 Loading...