EasyManua.ls Logo

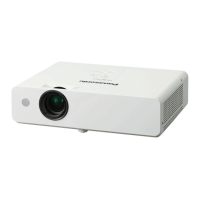
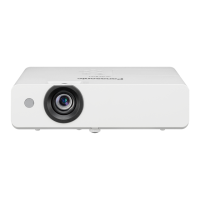
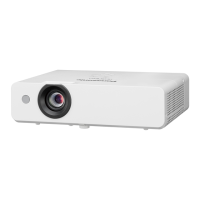
Panasonic PT-LW312

Panasonic PT-LW312
113 pages
To Next Page IconTo Next Page
Loading...
Operating Instructions
Functional Manual
LCD Projector
Commercial Use
Thank you for purchasing this Panasonic Product.
This manual is intended for products manufactured from May 2016 and beyond.
Before operating this product, please read the instructions carefully, and save this manual
for future use.
Before using your projector, be sure to read “Read this rst!” (x pages 2 to 9).
Model No.
PT-LW362
PT-LW312

PT-LB412
PT-LB382
PT-LB332
ENGLISH
TQBJ0839-2

Table of Contents

Questions and Answers:

Panasonic PT-LW312 Specifications

General IconGeneral
BrandPanasonic
ModelPT-LW312
CategoryProjector
LanguageEnglish

Summary

Operating Instructions

Read this first! Important Safety Information

Covers essential safety warnings before operating the projector, including electrical and environmental precautions.

Read this first! Regulatory and Specific Warnings

FCC Notice and Compliance Requirements

Details FCC compliance, interference guidelines, and installation location warnings for regulatory adherence.

Specific Warnings for UK Plug and Mercury

Provides safety information regarding the UK plug, fuse, and the presence of mercury in the lamp.

Read this first! Power, Installation, and Operation Safety

Power Connection and Outlet Safety

Ensures safe power connection, handling of foreign objects, and avoiding overloaded outlets.

Safe Installation Practices

Guidelines on projector placement, ventilation, stability, and avoiding hazardous environments.

Operational Safety Precautions

Covers warnings related to air exhaust ports, lens light exposure, and component handling.

Read this first! Component Handling and Maintenance Safety

Power Cord and Battery Handling Safety

Safety advice for power cords, depleted batteries, and general operational precautions.

Battery and Accessory Safety

Safe handling of batteries, accessories, and warnings about disassembling components.

Chapter 1 Preparation

Pre-Use Checks and Chapter Overview

Introduces the chapter content covering essential checks before projector use.

Chapter 1 Preparation - Precautions for Use

Transporting and Installing the Projector Safely

Guidelines for safe transport, installation locations, and altitude settings for optimal performance.

Projector Placement and Security

Advice on projector placement, ventilation, security measures, and optimizing picture quality.

LCD Panel, Lamp, and Wireless Connection Notes

Details on LCD panel characteristics, lamp life, and precautions for wireless connections.

Wireless LAN Restrictions and Disposal

Information on country-specific wireless LAN use, security risks, and proper product disposal.

Chapter 1 Preparation - Accessories and Projector Details

Included Accessories List and CD-ROM Contents

Lists supplied accessories like remote control, cables, and contents of the CD-ROM.

Optional Accessories Overview

Details optional accessories such as ceiling mount brackets, replacement lamps, and wireless modules.

Remote Control and Projector Body Overview

Identifies projector parts, buttons on the remote control, and their functions.

Control Panel, Indicators, and Rear Terminals

Explains the projector's control panel, indicator lights, and rear connection terminals.

Chapter 1 Preparation - Remote Control Setup

Remote Control Battery Installation

Step-by-step guide for inserting and removing batteries from the remote control.

Multi-Projector Remote Control Usage

Instructions for setting remote control ID numbers to manage multiple projectors.

Chapter 2 Getting Started

Initial Setup and Connection Guide

Outlines the steps for setting up and connecting the projector.

Chapter 2 Getting Started - Projector Setup

Installation Mode Selection

Explains how to set the projector's installation orientation (front, rear, ceiling).

Optional Ceiling Mount Bracket Information

Details required optional brackets for ceiling installations.

Screen Size and Throw Distance Chart

Provides a table detailing projection distances based on screen size and aspect ratio.

Projection Distance Calculation Formulas

Formulas to calculate projection distances for screen sizes not listed in the manual.

Adjusting the Projectors Adjustable Foot

Instructions on how to adjust the projector's tilt angle using the adjustable foot.

Chapter 2 Getting Started - Device Connections

Connection Precautions and Computer Terminal Pinouts

General connection guidelines and pin assignments for computer and monitor terminals.

HDMI Terminal and AV Equipment Connection

Details HDMI terminal pinouts and provides an example for connecting AV equipment.

Computer Connection Example

Illustrates how to connect computers and USB memory devices to the projector.

Chapter 3 Basic Operations

Overview of Basic Projector Operations

Introduces the chapter covering fundamental operations of the projector.

Chapter 3 Basic Operations - Powering the Projector

Connecting the Power Cord and Power Indicators

Steps for connecting the power cord and understanding the status of power indicators.

Powering On the Projector and PIN Code Entry

Detailed procedure for turning the projector on and entering the PIN code if set.

Initial Adjustments and Powering Off

Guidance on making initial adjustments and the correct procedure for powering off.

Chapter 3 Basic Operations - Projecting Images

Selecting Input Signals

How to choose the desired input source for projection.

Adjusting Image Projection State

Steps for adjusting projection angle, zoom, and focus for optimal image display.

Chapter 3 Basic Operations - Remote Control Functions

Automatic Setup and Input Signal Switching

Using auto setup for image optimization and switching between input sources.

Aspect Ratio and Keystone Correction

Adjusting image aspect ratio and correcting keystone/curved distortions.

Information Functionality

Displaying projector status information via the remote control.

Chapter 3 Basic Operations - Special Functions

Freeze, AV Mute, and Presentation Timer

Using freeze to pause, AV mute for temporary silence, and the presentation timer.

Switching Lamp Power

Adjusting lamp power settings for different operating conditions.

Digital Zoom and Volume Control

Using digital zoom to enlarge images and controlling the speaker volume.

Image Mode and Mute Functions

Switching between image modes and using the mute function for audio.

Daylight View Lite and Remote ID Settings

Improving image in bright light and managing remote control ID numbers.

Chapter 4 Settings

Overview of On-Screen Menu Settings

Introduces the chapter covering projector settings and adjustments via the on-screen menu.

Chapter 4 Settings - Menu Navigation

Navigating the On-Screen Menu System

Step-by-step guide on how to navigate through the projector's menu interface.

Chapter 4 Settings - Menu Structure and Options

Main Menu Items and Navigation

Lists the main menu categories and provides further navigation instructions.

Submenu Options Overview

Details the settings available within the [Display], [Color adjust], [Setting], and [Expand] submenus.

Chapter 4 Settings - Submenu Details

[Memory Viewer] and [Info.] Menu Options

Explains settings for [Memory Viewer] and information display within the [Info.] menu.

Chapter 4 Settings - Input Menu

Switching Between Input Sources

Procedure for selecting the desired input signal via remote control or control panel.

Chapter 4 Settings - Display Menu

[Auto PC Adjustment] and [Fine Sync]

Automating PC image adjustments and fine-tuning for flickering or smeared images.

[Horizontal Position] Adjustment

Procedure for adjusting the horizontal position of the projected image.

Chapter 4 Settings - Display Menu Adjustments

[Vertical Position] and [Horizontal Size] Adjustments

Adjusting vertical image position and image width (dots).

[Aspect Ratio] Settings

Options for fitting the image to the screen size while maintaining aspect ratio.

Chapter 4 Settings - Display Menu Configuration

[Project Way], [Menu Position], and [Background Display]

Setting projection orientation, menu position, and background when no signal is detected.

[System] Settings for Resolution and Color

Configuring system settings to match input resolution and color system.

Chapter 4 Settings - Color Adjust Menu

[Image Mode] Selection and [Contrast] Adjustment

Choosing picture modes and adjusting the contrast of the projected image.

[Brightness] Adjustment

Procedure for adjusting the brightness of the dark parts of the projected image.

Chapter 4 Settings - Color Adjust Menu Details

[Color], [Tint], and [Color Temperature] Settings

Adjusting color saturation, skin tone, and color temperature for optimal picture quality.

[Red][Green][Blue] White Balance Adjustments

Fine-tuning white balance by adjusting individual color components.

Chapter 4 Settings - Color Adjust Menu Fine-Tuning

[Sharpness] Adjustment

Adjusting the sharpness of the projected image contours.

[Daylight View] Functionality

Enhancing image vividness for projection in bright environments.

Chapter 4 Settings - Setting Menu

[On Start] and [Standby Mode] Settings

Configuring projector startup behavior and power consumption during standby.

[High Land] Mode Configuration

Adjusting settings based on the projector's operating altitude.

Chapter 4 Settings - Setting Menu Features

[Lamp Control] and [Cooling Fast] Options

Managing lamp brightness and cooling fan speed for performance and longevity.

[Closed Caption] Display Settings

Enabling and configuring closed caption display for NTSC signals.

Chapter 4 Settings - Setting Menu Controls

[Key Lock] and [Iris] Settings

Disabling control buttons and optimizing contrast using the iris function.

[Sound] Settings and Volume Control

Adjusting audio volume and configuring sound output settings.

Chapter 4 Settings - Setting Menu Advanced

[HDMI Setup] for Image and Sound

Configuring HDMI input settings for optimal image and audio transmission.

Chapter 4 Settings - Expand Menu

[Language] Selection and [Auto Setup]

Changing OSD language and initiating automatic setup functions.

Chapter 4 Settings - Expand Menu Automation

[Input Search], [Auto PC Adj.], [Auto Keystone]

Automating input detection, PC adjustments, and vertical keystone correction.

Chapter 4 Settings - Expand Menu Keystone

[Keystone] Settings and Adjustments

Configuring keystone correction retention and adjusting horizontal/vertical trapezoids.

Chapter 4 Settings - Expand Menu Keystone Correction

[Corner Correction] and [Curved Correction]

Correcting distortions in the four corners and pincushion/barrel effects.

Chapter 4 Settings - Expand Menu Logo and Reset

[Curved Correction Offset] and Keystone Reset

Adjusting curved correction offsets and resetting keystone correction to defaults.

[Logo] Settings and Capture

Configuring logo display, capturing custom startup images, and setting PIN codes.

Chapter 4 Settings - Expand Menu Security

Logo and Security PIN Code Management

Setting and changing PIN codes for logo protection and projector operation security.

Chapter 4 Settings - Expand Menu Power Management

[Power Management] and Timer Settings

Optimizing power usage and configuring timers for power management functions.

Chapter 4 Settings - Expand Menu Maintenance

[Filter Counter] and [Test Pattern]

Managing filter usage counter and displaying built-in test patterns.

[Network] Initialization

Preparing the projector for network connectivity.

Chapter 4 Settings - Expand Menu Network

[Network Setting] and Information

Configuring network settings (IP, DHCP) and viewing network status.

[Remote Control] ID Settings

Managing remote control ID numbers for multi-projector operation.

Chapter 4 Settings - Expand Menu Defaults

[Factory Default] Reset Procedure

Restoring all projector settings to their original factory default values.

Chapter 4 Settings - Memory Viewer Menu

[Set Slide], [Transition Effect], [Sort Order]

Configuring slide show settings like starting, transitions, and file order.

[Rotate] Image Direction

Changing the orientation of images displayed in the Memory Viewer.

Chapter 4 Settings - Memory Viewer Options

[Best Fit], [Repeat], and [Apply] Settings

Options for fitting images to screen, repeating slide shows, and applying settings.

Chapter 4 Settings - Info Menu

Displaying Projector Information

Viewing details like input signal, sync frequencies, lamp status, and serial number.

Chapter 5 Operation of Function

Overview of Projector Function Operations

Introduces the chapter covering the operation methods of various projector functions.

Chapter 5 Operation - Memory Viewer Function

Projectable File Formats and USB Memory Precautions

Lists supported file types and provides safety guidelines for using USB memory.

Inserting and Removing USB Memory

Step-by-step instructions for connecting and disconnecting USB memory devices.

Chapter 5 Operation - Memory Viewer Playback

Displaying Viewer Screen and Playing Pictures

Accessing the viewer and playing individual pictures.

Executing Slide Shows and Playing Videos

Setting up and playing slide shows, and playing video files.

Chapter 5 Operation - Memory Viewer PDF and Termination

Displaying PDF Files and Terminating Viewer

Viewing PDF documents and exiting the Memory Viewer function.

Chapter 5 Operation - USB Display Function

USB Display for Windows Environment

System requirements and projection steps for USB Display on Windows.

USB Display for Mac OS Environment

System requirements and projection steps for USB Display on Mac OS.

Terminating USB Display

Procedure for disconnecting the USB display connection.

Chapter 5 Operation - Network Connection

Network Connection Overview and Wired LAN Setup

Features of network connectivity and steps for wired LAN setup.

Wireless LAN Setup and Module Installation

Instructions for wireless LAN connection and installing the wireless module.

Chapter 5 Operation - Network and Software Functions

Presenter Light Software Download

Guide to downloading and using the Presenter Light software for image transfer.

VueMagic Software Connection

Steps for connecting compatible iOS/Android devices using VueMagic software.

Chapter 5 Operation - Web Control Function

Web Browser Requirements and Access

Information on compatible web browsers and steps to access the projector via web browser.

Web Control Interface Description

Details of the web control interface items and the system status page.

Web Control General and Picture Setup Pages

Configuration options for general settings and picture adjustments via web control.

Web Control Image Setup Page

Settings for aspect ratio, sync, position, size, freeze, and correction functions.

Web Control Alert and Mail Setup Pages

Configuration for email alerts and mail server settings within the web interface.

Web Control Network Setup Page

Settings for wired and wireless network configuration through the web interface.

Chapter 6 Maintenance

Inspection, Maintenance, and Unit Replacement Overview

Introduces the chapter covering inspection, maintenance, and replacement procedures.

Chapter 6 Maintenance - Indicators and Troubleshooting

Power and Warning Indicators Status

Explanation of projector power and warning indicator lights and their meanings.

Indicator Troubleshooting Guide

Table detailing indicator status, causes, and solutions for troubleshooting.

Chapter 6 Maintenance - Cleaning and Replacement

Pre-Maintenance Precautions and Exterior Cleaning

Safety steps before maintenance and instructions for cleaning the outer case and lens.

Air Filter Unit Maintenance Procedures

Steps for removing, cleaning, and attaching the air filter unit.

Chapter 6 Maintenance - Filter and Lamp Procedures

Air Filter Cleaning, Attachment, and Counter Reset

Detailed steps for cleaning, attaching the air filter, and resetting the filter counter.

Lamp Unit Replacement Precautions and Timing

Safety warnings for lamp replacement and criteria for when to replace the lamp unit.

Chapter 6 Maintenance - Lamp Replacement

Lamp Unit Replacement Procedure

Step-by-step instructions for safely replacing the projector's lamp unit.

Chapter 6 Maintenance - Counter Resets

Resetting the Lamp Counter

Procedure to reset the lamp usage counter after replacement.

Air Filter Unit Replacement and Counter Reset

Steps for replacing the air filter unit and resetting its counter.

Chapter 6 Maintenance - Troubleshooting

Troubleshooting Common Projector Problems

A guide to identifying and resolving common issues with causes and solutions.

Chapter 7 Appendix

Specifications and After-Sales Service Overview

Introduces the chapter covering projector specifications and service information.

Chapter 7 Appendix - Technical Information

PJLink Protocol Usage and Security

Details on using the PJLink protocol for projector control and its security authentication.

Serial Communication Terminal SERIAL IN

Information on the RS-232C serial terminal for computer control.

Command Format for Projector Control

Explains the basic and sub-command formats for controlling the projector via computer.

Projector Control Commands and Cable Specifications

Lists projector control commands and provides cable pin assignments for computer connection.

Chapter 7 Appendix - Signal Compatibility

List of Compatible Signals (Part 1)

Table detailing signal types, resolutions, scanning frequencies, and format compatibility.

List of Compatible Signals (Part 2)

Continues the table of compatible signals, including VESA CVT-RB compliance.

Chapter 7 Appendix - Projector Specifications

Power, LCD Panel, and Lamp Specifications

Details on power supply, LCD panel size, lens, and luminous lamp specifications.

Signal Frequency and Resolution Specifications

Information on scanning frequencies, dot clock, and displayable resolutions.

Chapter 7 Appendix - Terminal and Environmental Specifications

Projector Terminal Connections

Detailed list of all projector terminals, their types, and capabilities.

Environmental and Physical Specifications

Details on noise level, operating environment, dimensions, weight, and remote control specs.

Chapter 7 Appendix - Dimensions

Projector Dimensions Diagram

Visual representation of the projector's physical dimensions in millimeters and inches.

Chapter 7 Appendix - Ceiling Mount Safeguards

Ceiling Mount Bracket Installation Safety

Safety guidelines and procedures for installing ceiling mount brackets.

Related product manuals