EasyManua.ls Logo

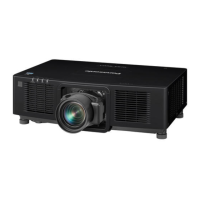
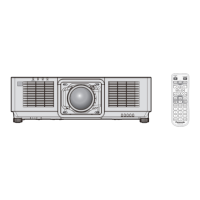
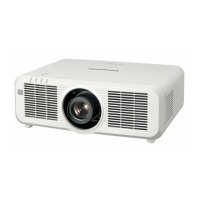
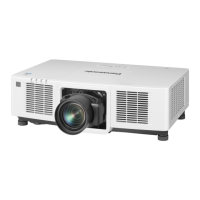
Panasonic PT-MZ13K

Panasonic PT-MZ13K
247 pages
To Next Page IconTo Next Page
Loading...
Thank you for purchasing this Panasonic product.
The Operating Instructions correspond to the rmware’s main version 1.10 and higher.
This manual is common to all the models regardless of sufxes of the Model No.
z
for USA, Canada, EU countries, Korea, Taiwan
LB: Black model LW: White model
z
for India
LBD: Black model
z
for other countries or regions with power cord for 100 V - 120 V
LBX: Black model
LWX: White model
z
for other countries or regions with power cord for 200 V - 240 V
LBE: Black model LWE: White model
Before operating this product, please read the instructions carefully and save this manual
for future use.
Before using this product, be sure to read “Read this rst!” (
x
pages 5 to 16).
DPQP1299ZC/X1
LCD Projector
Commercial Use
Operating Instructions
Functional Manual
ENGLISH
Model No.
PT-MZ16K
PT-MZ13K
PT-MZ10K
The projection lens is sold separately.
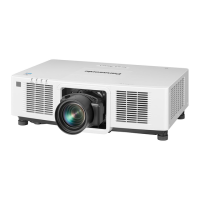
Table of Contents

Questions and Answers:

Panasonic PT-MZ13K Specifications

General IconGeneral
BrandPanasonic
ModelPT-MZ13K
CategoryProjector
LanguageEnglish

Summary

Read This First! - Essential Safety and Setup Information

Power and Electrical Safety Precautions

Covers warnings related to power supply, grounding, and electrical safety measures.

Installation and Usage Safety Guidelines

Important considerations for projector placement, environment, and operation.

Quick Steps for Initial Setup

1. Set Up the Projector

Guides on initial projector setup, including placement and power connection.

3. Connect External Devices

Instructions for connecting the projector to external input sources.

4. Connect the Power Cord

Details on correctly attaching the power cord to the projector and outlet.

5. Switch On the Projector

Procedure for powering on the projector and entering standby mode.

6. Make Initial Settings

Guides through initial configuration screens like focus and language.

7. Select the Input Signal

How to choose the active input source for projection.

8. Adjust the Image

Steps for fine-tuning image position, size, and focus.

Chapter 1 Preparation

Precautions for Use and Installation

Details safety measures, environmental limits, and setup guidelines for the projector.

Chapter 2 Getting Started

Setting Up the Projector

Covers power outlets, installation modes, and mounting considerations.

Attaching and Removing the Projection Lens

Step-by-step instructions for installing and uninstalling the projection lens.

Connecting Devices Overview

General connection principles and specific terminal pin assignments.

Connecting via DIGITAL LINK

Details using DIGITAL LINK for video, audio, and Ethernet transmission.

Chapter 3 Basic Operations

Switching the Projector On and Off

Covers connecting the power cord and powering the unit on and off.

Powering On the Projector

Step-by-step instructions for turning the projector on.

Initial Setup Screens Overview

Guides through initial focus, language, and other setup configurations.

Initial Operation Setting Configuration

Configures operating mode and light output for optimal runtime and brightness.

Initial Installation and Standby Mode Settings

Configures installation orientation and power consumption during standby.

Making Image and Setting Adjustments

Covers focus, projection method, lens calibration, input selection, and image adjustments.

Powering Off the Projector

Step-by-step instructions for safely turning the projector off.

Projecting an Image: Input Signal Selection

Covers selecting input signals and switching between sources.

Adjusting Focus, Zoom, and Lens Shift

Explains how to manually adjust image focus, size, and position.

Performing Lens Calibration

Guides through calibrating the lens for accurate adjustments.

Chapter 4 Settings

Navigating the On-Screen Menu

Details the steps for using the menu system, including sub-menus.

Picture Menu Settings

Covers adjustments for picture mode, contrast, brightness, color, tint, and gamma.

Position Menu Settings

Covers adjustments for image shift, aspect ratio, zoom, clock phase, and geometry.

Advanced Menu Settings

Lists advanced settings for picture enhancement like digital cinema reality and blanking.

Display Option Menu

Lists various display adjustments including color, screen settings, and auto setup.

Projector Setup Menu

Accesses projector configuration settings like ID, projection method, and lens settings.

Operation Setting Configuration

Sets operating method for brightness and runtime, including operating mode and light output.

Security Menu Options

Covers password protection, display settings, and control device limitations.

Network Menu Settings

Configures network settings, including DIGITAL LINK mode, status, and Art-Net.

Chapter 5 Operations

Network Connection Setup

Covers connecting the projector to a network for web control, PJLink, Art-Net, and LAN.

Web Control Functionality

Overview of accessing projector settings, status, and email alerts via web browser.

Accessing Web Control Interface

Steps to access the projector via web browser, including user rights and password management.

Updating the Projector Firmware

Process for updating firmware via LAN, including confirmation and steps.

Performing the Firmware Update

Step-by-step instructions for running the firmware update tool.

Chapter 6 Maintenance

Light SourceTemperatureFilter Indicators

Explains the meaning of indicator lights and provides troubleshooting steps.

Troubleshooting Common Problems

Lists common projector issues and points to check for resolution.

Interpreting Self Test Error Codes

Lists self-test error codes, their details, and corresponding action numbers.

Chapter 7 Appendix

Projector Specifications

Comprehensive list of technical specifications including power, lens, light source, and dimensions.

Related product manuals