Do you have a question about the Panasonic PV-DV202 and is the answer not in the manual?
General information about the product, safety precautions, and declaration of conformity.
Warnings and cautions for safe operation and handling of the camcorder.
FCC compliance statement and conditions for operation.
Comprehensive safety guidelines for operating and maintaining the camcorder.
Guidelines for proper usage environment and care to avoid damage.
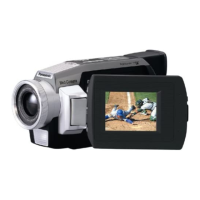
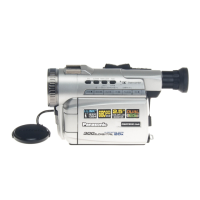
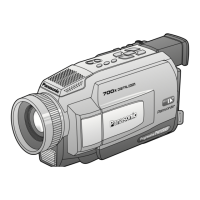
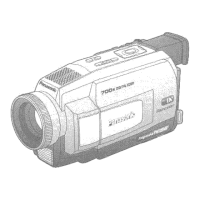
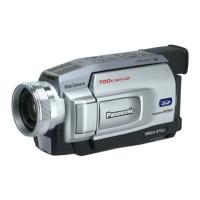
Highlights key feature differences between PV-DV202 and PV-DV402 models.
Lists the contents included in the camcorder package.
Table showing record speed and playback time for different cassette types.
How to use the cassette's record tab to prevent accidental erasure.
Step-by-step guide for inserting and removing cassettes.
Instructions for attaching and adjusting the shoulder strap.
Instructions for adjusting the hand strap.
Instructions for attaching the lens cap strap.
How to use the camcorder's built-in light for illumination.
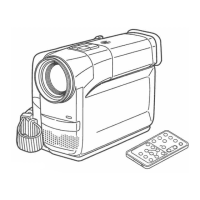
Overview of the remote control's functions and operation.
Step-by-step instructions for replacing the remote control battery.
How to control two camcorders with one remote.
Steps to insert the battery pack into the camcorder.
Quick steps for inserting a cassette tape.
Basic steps for recording video using the camera.
Steps to play back recordings using the LCD monitor.
Instructions for inserting a memory card into the camcorder.
Explanation of the write protection switch on SD cards.
Function of the M-CARD lock switch.
Detailed steps for charging the battery pack using the AC adapter.
Instructions for inserting the battery pack.
Instructions for removing the battery pack.
Cautions and advice for caring for the battery.
Steps for connecting and using the AC adapter.
Guide to setting the camcorder's date and time.
How to access and navigate the camcorder's menu system.
Explains how to adjust settings within the menu.
Basic steps for recording video in camera mode.
Tips for managing battery power during operation.
Crucial warnings about EVF and LCD monitor handling.
How to use the LCD monitor for recording.
Instructions for adjusting display brightness and color settings.
How to capture still images with sound.
Using PhotoShot for higher resolution still images.
How to use the zoom function for close-ups and wide shots.
How the microphone adjusts with zooming.
How to play back the last few seconds of recording.
How to record still pictures with sound.
How to record yourself using the LCD monitor.
Records wide-screen compatible pictures for TVs with S2 terminals.
Improves image quality when shooting subjects with backlighting.
Auto Exposure feature for various scene situations.
For recording fast action scenes with less blur.
For recording subjects in the foreground.
For recording in extremely low light.
For recording subjects under spotlights.
For recording in dazzling conditions like snow.
Records video in total darkness with selectable color images.
Make smoother scene transitions with fade effects.
Displays a still image screen on the main picture.
Adds selected images and titles before recording with WIPE or MIX effects.
Adjusts color balance for optimal results in different lighting conditions.
Automatic focus adjustment over the entire zoom range.
Detailed instructions for using manual focus.
How to use zoom for close-up shots.
Records high-speed motion with improved STILL or SLOW MOTION playback.
Automatic shutter speed adjustment.
How to manually select shutter speeds.
Manually adjusts exposure by controlling the iris.
Reduces sound distortion caused by wind hitting the microphone.
Steps for playing back recordings using the LCD monitor.
How to connect earphones for playback.
How to set the camcorder for repeat playback.
How to adjust the speaker volume.
How to locate blank portions of tape for recording.
Fast visual search through recordings.
How to pause playback and view a still frame.
Monitor playback during fast forward or rewind.
Plays back recordings in slow motion.
Allows searching at various playback speeds.
Advances playback one frame at a time.
Searches for recorded scenes or photos using index marks.
Frame-by-frame search using the jog dial.
Searches for recordings using index marks.
Scans and plays back the first few seconds of each recording.
Captures a succession of still screens at selected intervals.
How to connect the camcorder to a TV for viewing.
Extends magnification beyond normal zoom range up to 700X.
Continued explanation of digital zoom functionality in VCR mode.
Records video or still images in low lighting.
Compensates for unintentional hand or body movement during recording/playback.
Introduces various digital effects for recordings.
Lists and briefly explains different digital effects like MIRROR, STROBE, MOSAIC.
How to replace original audio with new sound.
Setting an automatic dubbing stop point.
Instructions for dubbing tapes to S-VHS or VHS.
How to use the TV to monitor the copying process.
High-quality digital-to-digital copying via i.LINK.
Recording still images to a memory card.
Table showing image resolution and capacity for memory cards.
Important warnings about handling and using memory cards.
Recording still images from tape to a memory card.
How to view images stored on the memory card.
How to delete individual images from the memory card.
How to delete all images from the memory card.
How to format the memory card, erasing all data.
Setting up print order information for memory cards.
System requirements and software for transferring images to a Windows PC.
Instructions for installing software on Windows PCs.
Important notes for using the Movie Messenger system.
Steps to remove installed application software.
Connecting the camcorder to a PC for image transfer.
How to start and operate the Movie Messenger software.
Steps for connecting USB or i.LINK cables.
Steps for disconnecting USB or i.LINK cables.
Transferring motion and still images from DV tape via USB.
Capturing motion images from tape to PC.
Capturing still images from tape to PC.
How to play back captured images using the software.
Features and functions available within the VideoGift screen.
How to use motion images within the VideoGift interface.
How to use still images within the VideoGift interface.
Configuring email software to work with VideoGift.
Sending motion images as email attachments.
Sending still images as email attachments.
Selecting and sending only a part of a motion image.
Editing still images into a slideshow.
Adjusting image size and quality for compression.
Extracting a single frame from a motion image as a still image.
Uploading edited images to the PictureStage website.
Transferring images via i.LINK (DV Interface Cable).
Transferring images from DV tape using USB.
Capturing motion images via i.LINK.
Capturing still images via i.LINK.
Installing the USB driver and accessing the SD drive.
Transferring still images from memory card via USB.
Converting PC JPEG files for the camcorder.
Prerequisites and setup for using the web camera feature.
Requirements for internet connection and software.
Connecting the camcorder to the PC for web camera use.
Setup for Windows Messenger on Windows XP.
Setup for MSN Messenger/NetMeeting on older Windows versions.
System requirements for transferring images to Macintosh.
Transferring images from memory card using the SD drive.
Instructions for installing ArcSoft software on Macintosh.
Instructions for replacing the camcorder's bulb.
Information about compatible memory card types.
Table showing brightness values and color temperature references.
How to clean video heads or when to seek service.
Cautions regarding tape operations and button responsiveness.
Notes on potential darkening of screen corners with accessories.
Error codes and what they indicate for service needs.
Panasonic website for parts, accessories, and service.
Contact information for purchasing accessories.
List of service center locations by state.
Safety precautions in Spanish.
FCC warning statement in Spanish.
Steps to insert the battery in Spanish.
Quick steps for inserting a cassette in Spanish.
Basic steps for recording video in camera mode in Spanish.
Playing back recordings using the LCD monitor in Spanish.
Instructions for inserting memory cards in Spanish.
SD card copy protection switch explanation in Spanish.
Function of the M-CARD lock switch in Spanish.
Options for camera recording settings including functions, zoom, AE, CINEMA, and more.
Options for VCR playback settings including functions, effects, zoom, speed, and dubbing.
Options for memory card recording and playback settings including REC MODE, DISPLAY, DPOF, and VARIABLE.
Displays for battery, tape, date/time, MAGICVU, and manual mode status.
Displays for warnings, tape status, and counter/time code.
Displays for zoom, EIS, backlight, AE, focus, WB, shutter, iris, MIC, light, WIND-CUT, progressive.
Displays for photo recording, playback, image count, and DPOF.
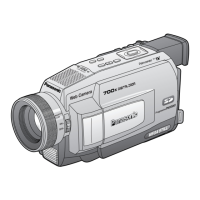
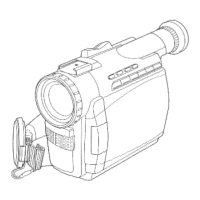
Labels and page references for controls on the front of the camcorder.
Labels and page references for controls on the side of the camcorder.
Labels and page references for controls on the rear of the camcorder.
Labels and page references for controls on the top of the camcorder.
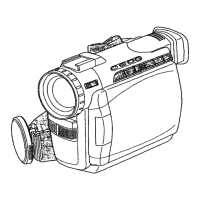
Labels and page references for controls on the back of the camcorder.
Labels and page references for controls on the underside of the camcorder.
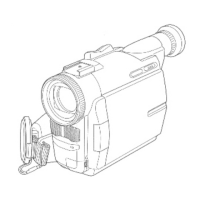
Labels and references for the AC adaptor.
Labels and page references for all remote control buttons.
| Recording Format | MiniDV |
|---|---|
| Optical Zoom | 10x |
| Digital Zoom | 500x |
| Video Format | NTSC |
| Battery | Lithium-ion |
| Image Sensor | 1/4" CCD |
| LCD Screen Size | 2.5-inch |
| Sensor Size | 1/4 inch |
| LCD Screen | 2.5-inch color LCD |
| Viewfinder | Color |
| Interface | IEEE 1394 (FireWire) |