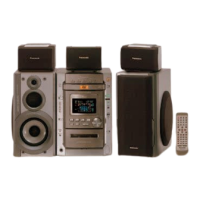
Step 1 Remove 3 screws each both side and 5 screws at rear
panel.
Step 2 Lift up the both sides cabinet ass’y to release the hook
(A). Then pull the cabinet ass’y toward the rear and release the
hook (B) to remove the cabinet ass’y.
NOTE: When installing the cabinet ass’y, take care not to
damage the front cabinet ass’y from hook (B).
• Check the Main P.C.B. and DVD F/E Module (1/2) P.C.B..
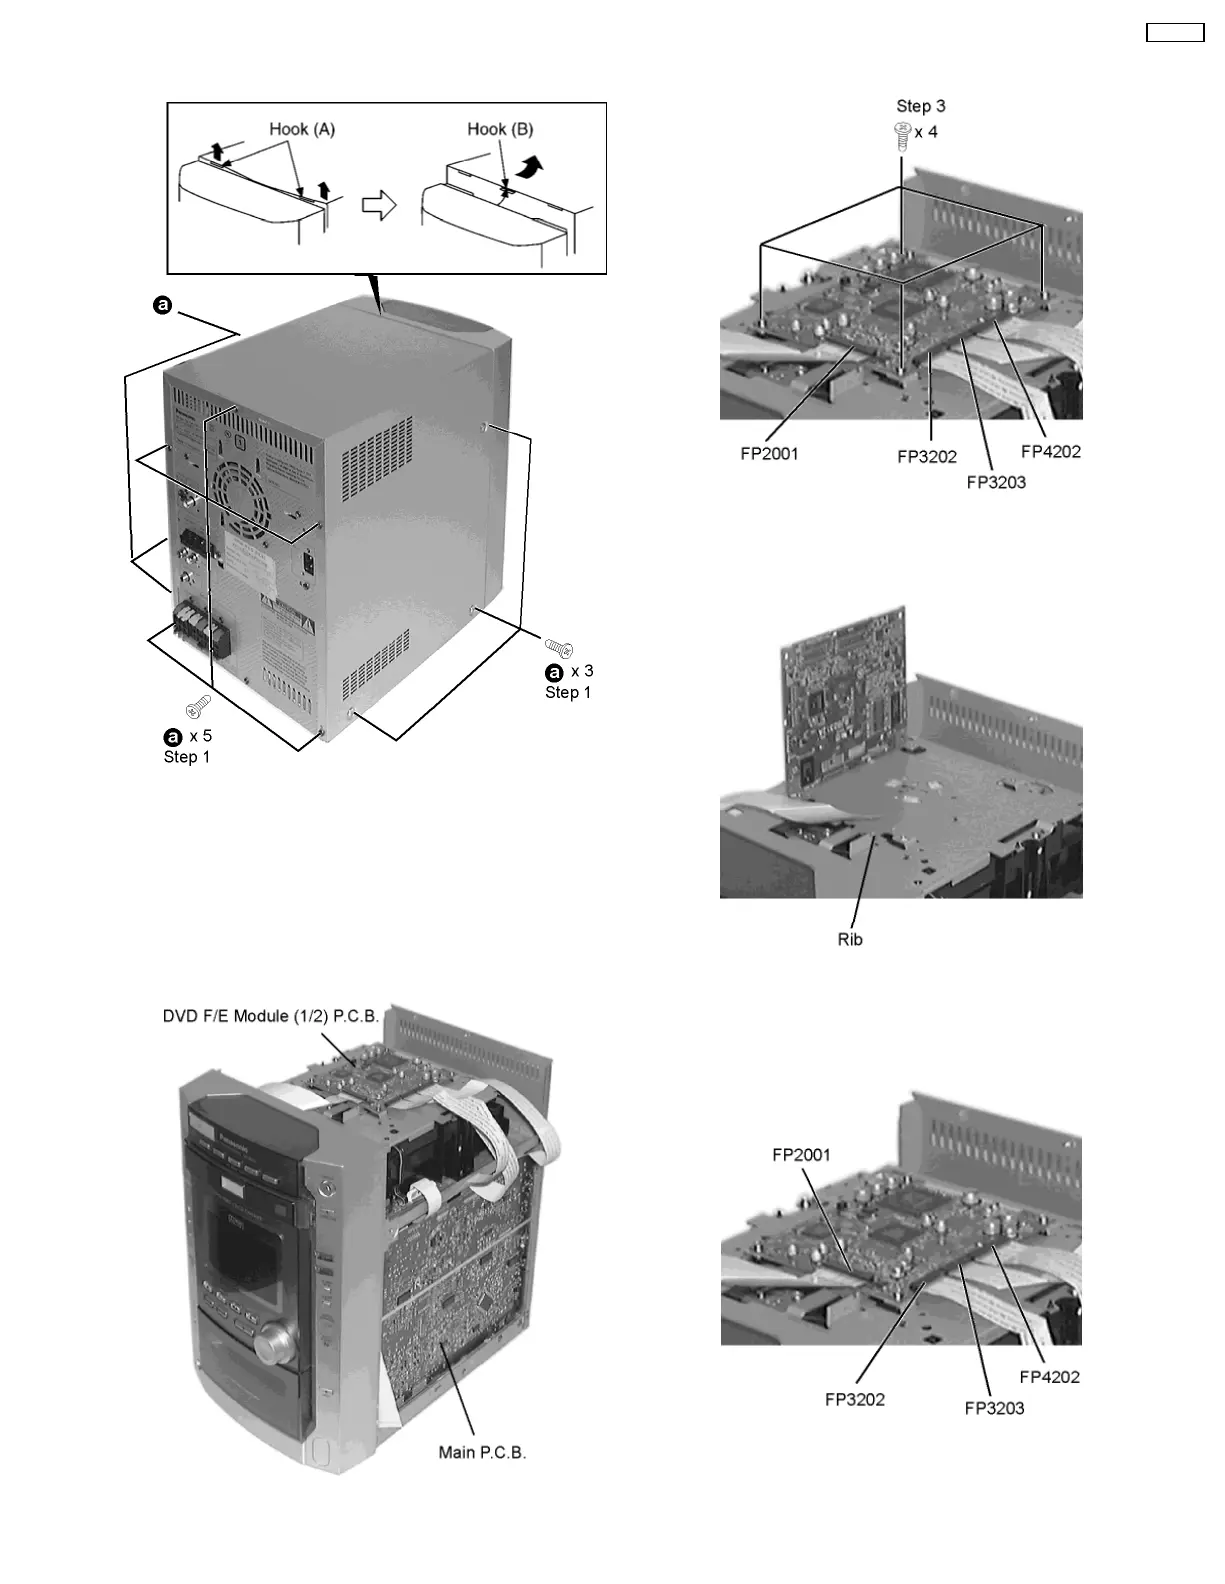
Step 3 Remove 4 screws.
Step 4 Remove 4 connectors.
Step 5 Pull out 4 FFCs.
Step 6 Raise the DVD Module P.C.B..
• Checking the DVD F/E Module (2/2) P.C.B. as shown
below.
Step 7 Disconnect the FFCs to the connector.
Step 8 Lift up DVD F/E Module (2/2) P.C.B. as shown.
8.2. Checking for the Main and DVD F/E Module (1/2) P.C.B.
13
SA-DK10