64
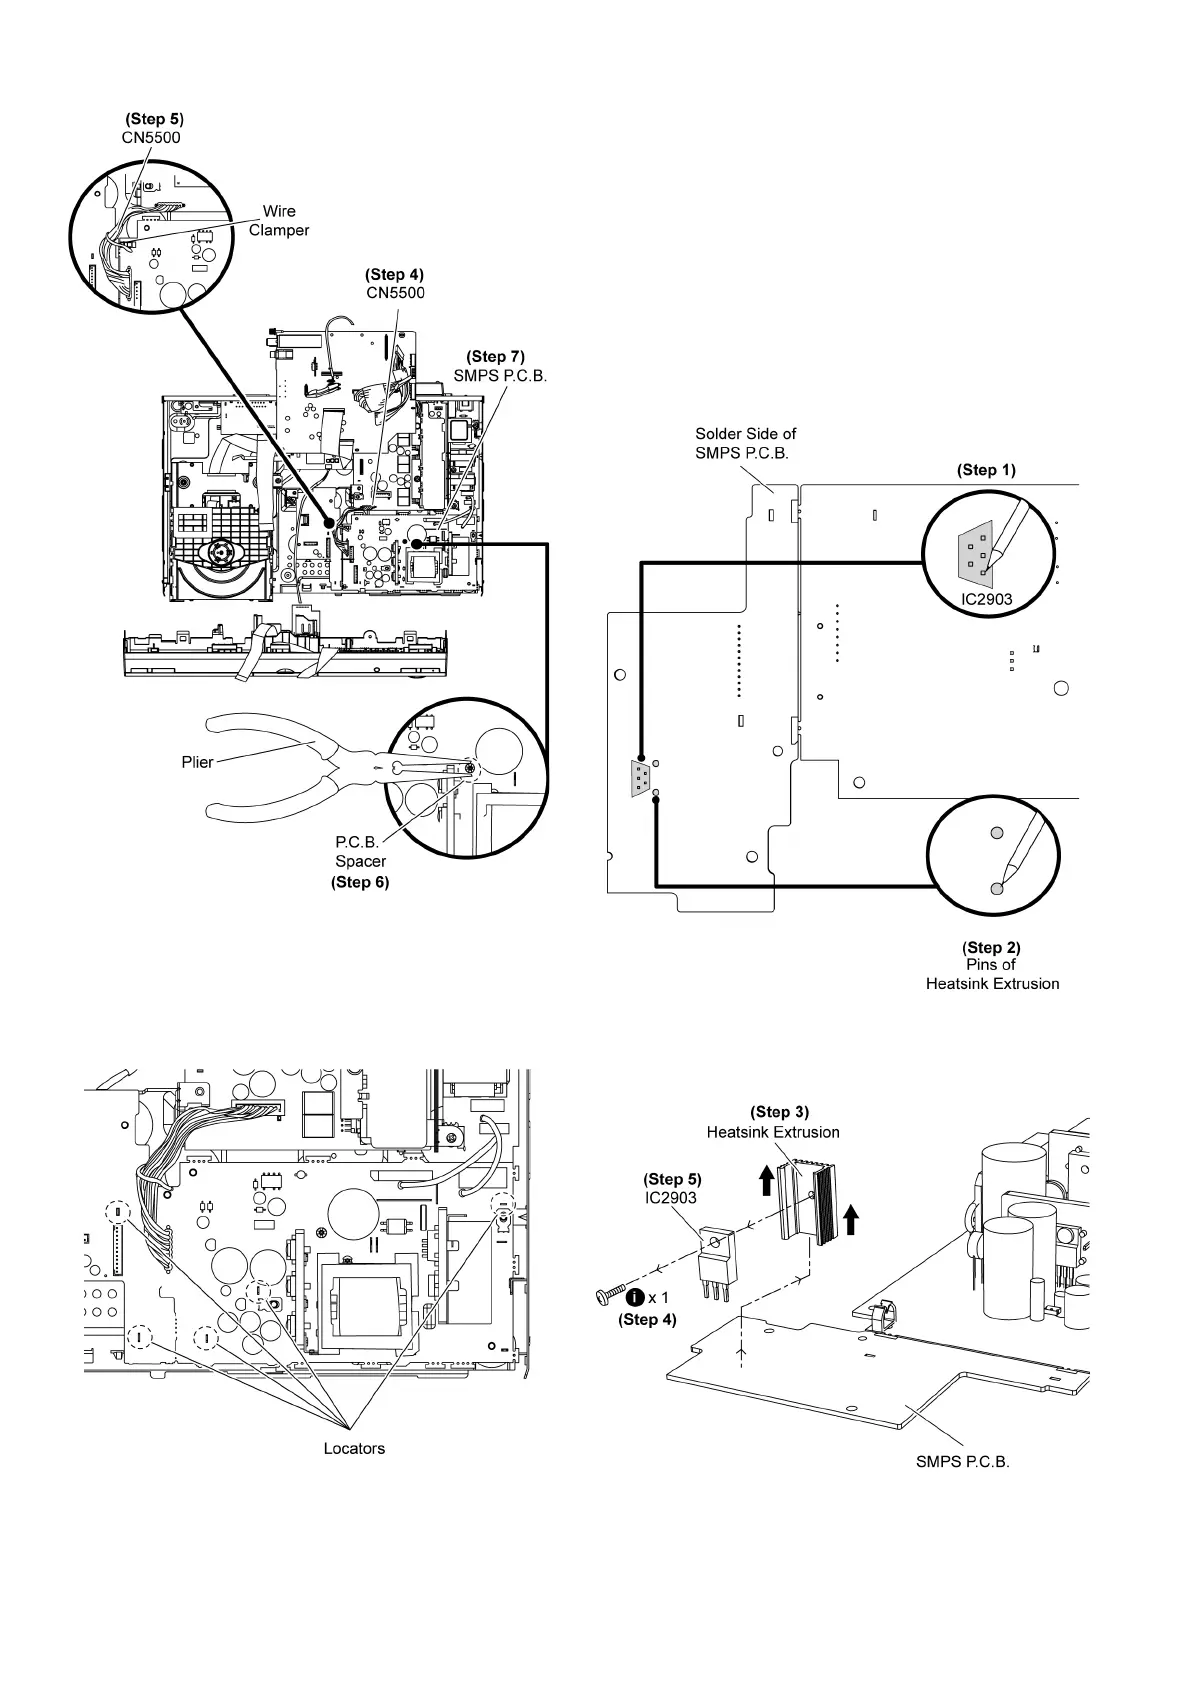
Step 4 Detach 8P cable at the connector (CN5500) on D-Amp
P.C .B .
Step 5 Twist the wire clamper to detach 8P cable at the con-
nector (CN5500) on D-Amp P.C.B.
Step 6 Release P.C.B. Spacer on SMPS P.C.B.
Step 7 Remove SMPS P.C.B.
Special Note: During reassembling procedures, ensure the
P.C.B. is seated properly at the locators.
9.20. Replacement of Switching Reg-
ulator IC (IC2903)
9.20.1. Disassembly of Switching Regula-
tor IC (IC2903)
• Follow (Step 1) to (Step 3) of Item 9.3.
• Follow (Step 1) to (Step 10) of Item 9.6.
• Follow (Step 11) to (Step 13) of Item 9.12.
• Follow (Step 1) to (Step 7) of Item 9.19.
Step 1 Desolder pins of the switching regulator IC (IC2903) on
the solder side of SMPS P.C.B.
Step 2 Desolder pins of the heatsink extrusion.
Step 3 Remove the heatsink extrusion with the IC in the direc-
tion of arrow.
Step 4 Remove 1 screw from the switching regulator IC
 Loading...