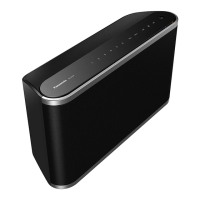
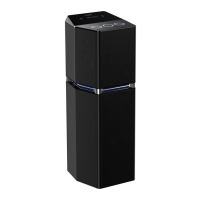
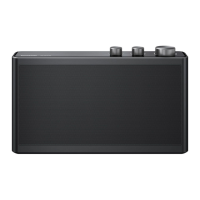
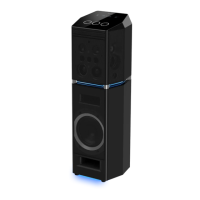
SQT1211
5
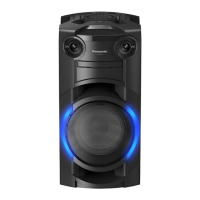
8 Mode indicator (amber)
9 [SC-ALL6]
Rear surround indicator (blue/green)
10 AUX indicator (yellow)
11 Bluetooth
®
indicator (blue)
12 Network indicator (blue/red)
13 Operation indicator (amber)
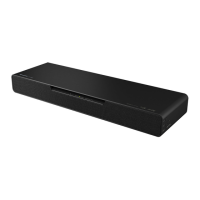
14 LAN terminal
15 AC IN terminal
16 AUX IN terminal
§1 These switches work just by touching the marks. Each
time you touch the switch, there will be a beep sound.
The beep sound can be set to off. (l 19)
§2 Screw holes (used only to place the product on display
at retailers)
Blinks once
≥ The following setting is turned on.
“Network standby” (l 9)
“Bluetooth
®
standby” (l 15)
“Automatic updates” (l 18)
“Operation sound setting” (l 19)
– When the setting is turned off, it blinks twice.
≥ Bluetooth
®
transmission mode is set to Mode 1.
(l 16)
≥ Bluetooth
®
input level is set to Low. (l 16)
≥ AUX input level is set to Normal. (l 16)
Blinks twice
≥ Bluetooth
®
transmission mode is set to Mode 2.
(l 16)
≥ Bluetooth
®
input level is set to Middle. (l 16)
≥ AUX input level is set to High. (l 16)
Blinks thrice
≥ Bluetooth
®
input level is set to High. (l 16)
Blinks
≥ It may blink when the unit turns to standby mode.
– Do not disconnect the AC mains lead. Doing so
may cause malfunction or damage.
Blinks slowly
≥ The unit is during the update process. (l 18)
≥ The mode indicator also blinks when the volume is
changed.
Lights up (green)
≥ The pairing as the left surround speaker is
successful.
Lights up (blue)
≥ The pairing as the right surround speaker is
successful.
Blinks slowly (green)
≥ The unit is waiting for the rear surround connection.
Blinks (green)
≥ The unit is waiting for pairing.
Blinks fast (green)
≥ The unit is ready for pairing as the left speaker.
Blinks fast (blue)
≥ The unit is ready for pairing as the right speaker.
Lights up
≥ AUX is selected as the audio source. (l 16)
Lights up
≥ The pairing as the Bluetooth
®
speaker is successful.
Blinks slowly
≥ The unit is waiting to connect.
Blinks fast
≥ The unit is ready for pairing.
Blinks alternately (blue/red)
≥ The unit is carrying out an internal process.
– Wait for approximately 60 seconds before the
blinking stops.
– Do not disconnect the AC mains lead. Doing so
may cause malfunction or damage.
Lights up (blue)
≥ The unit is connected to the network.
Blinks slowly (blue)
≥ The unit is ready for network setup. (l 7)
Blinks (blue)
≥ The unit is waiting for the WPS connection. (l 9)
Blinks fast (blue)
≥ The unit is waiting for the WPS PIN code
connection. (l 9)
Blinks (red)
≥ The unit is connecting to the network.
– When the network connection cannot be
established, the blinking keeps going. Check the
network connection. (l 7)
≥ The volume cannot be changed during the network
indicator blinking blue.
Blinks once
≥ The unit detects the switch touched.
Blinks twice
≥ The unit detects a valid operation performed by
touching and holding the switch.
Blinks
≥ Automatic standby mode is activated. (l 6)
SC-ALL9&6-SQT1211_mst.book 5 ページ 2016年1月12日 火曜日 午後3時16分