15
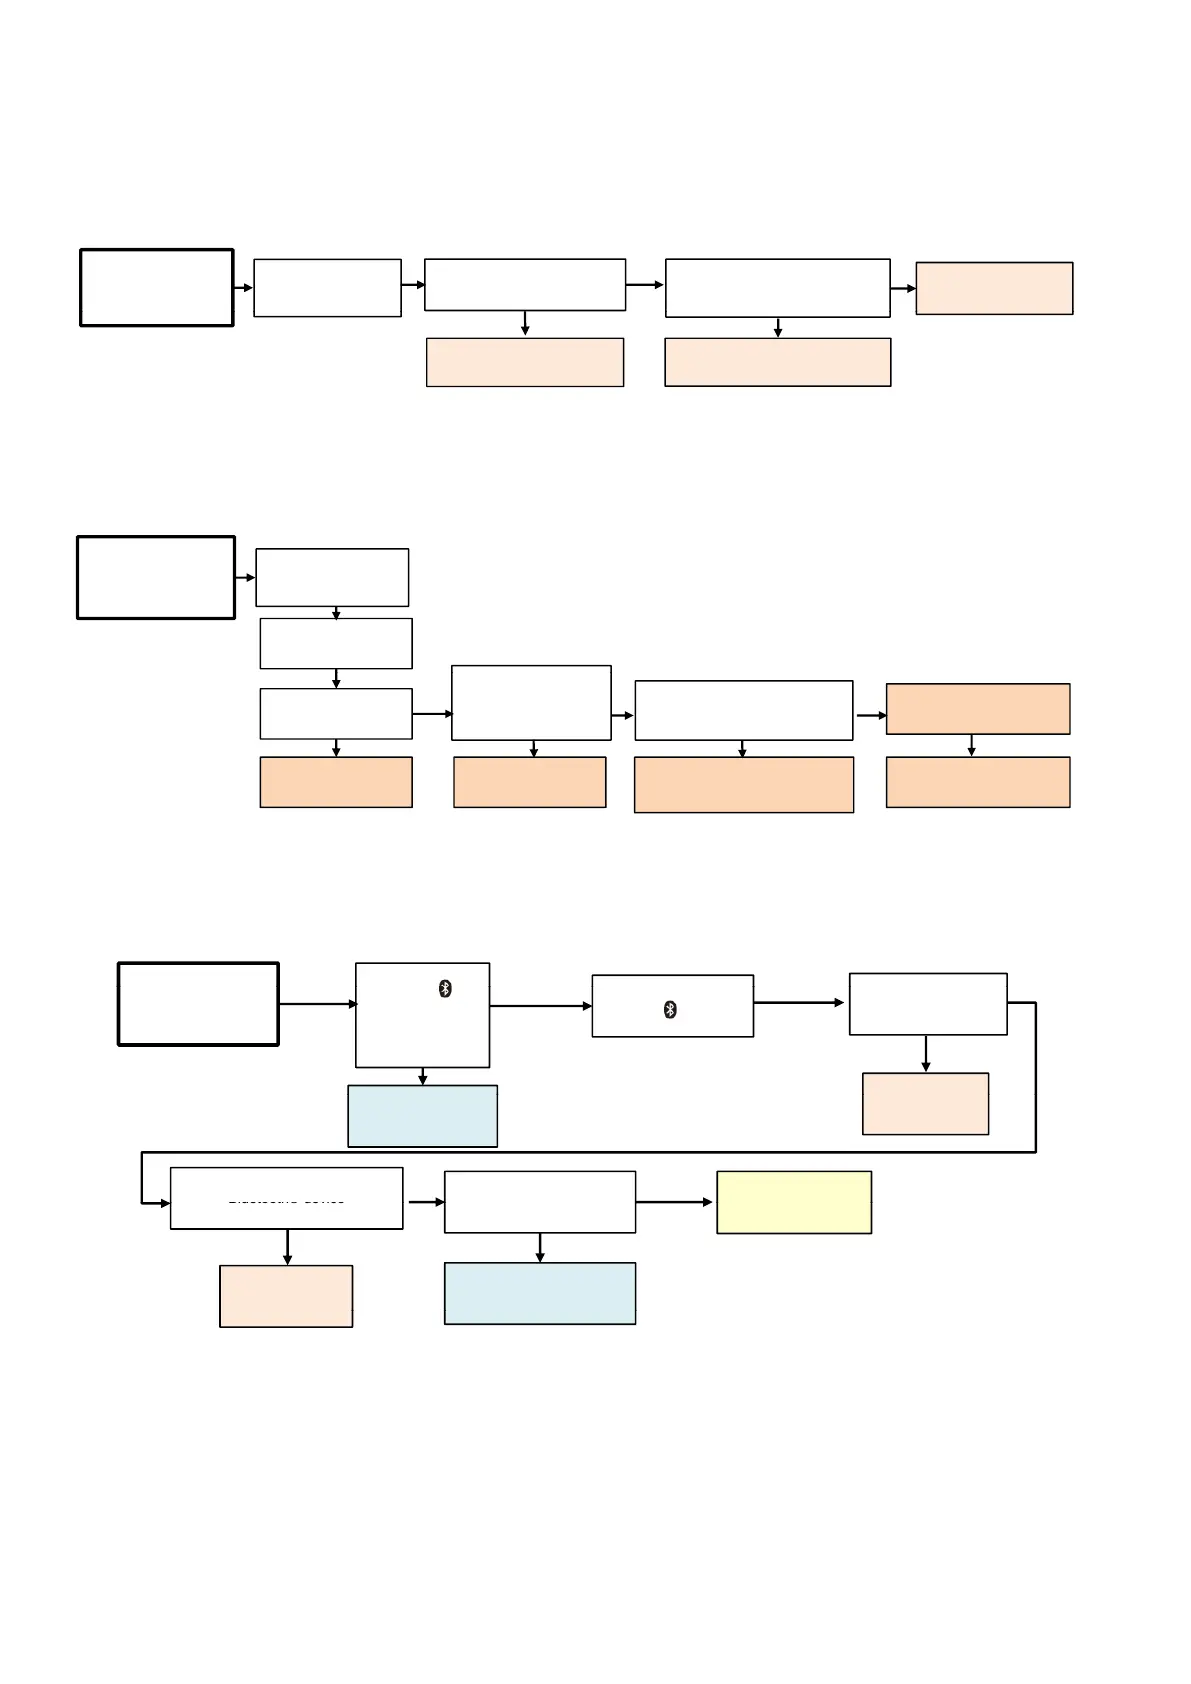
7 Troubleshooting Guide
7.1 Main Unit (SU-HTB488/494/498)
7.1.1 No power
7.1.2. Function indicator LED no light up
7.1.3. Bluetooth® Pairing failure
Press the Power
button on the unit to
turn on the unit.
OK
Check output at 25.4V
[Refer to check point ①]
Check the cable is connected
correctly (Main XP417 to Power
CN3
OK
Change
Main PCB Unit
LED no light up.
Change
Power PCB
NG
NG
Connect correct or change
cable
Function indicator LED no light up
Function indicator LED no light up
e
control.
Connect BD or DVD
device to OPT.
Sound can be heard.
OK
NG
5V At “SYS_5V”
[Refer to check point②]
or 3.3V At “STB_3V3”
[Refer to check point③]
NG
OK
Change LED PCB Unit
Still No Display
Check the FFC cable is connect
correct (Main XP9 to LED XP1)
NG
OK
ange
Main PCB Unit
Connect correct or change
FFC cable
No power
Press the Power
button on the unit to
turn on the unit.
OK
Check output at 25.4V
[Refer to check point ①]
Check the cable is connected
correctly (Main XP417 to Power
CN3
OK
Change
Main PCB Unit
LED no light up.
Change
Power PCB
NG
NG
Connect correct or change
cable
Function indicator LED no light up
Function indicator LED no light up
Press the Power button
Press [OPTICAL]
u
u
the unit.
u
on on
e remo
e
control.
Connect BD or DVD
device to OPT.
Sound can be heard.
OK
NG
5V At “SYS_5V”
[Refer to check point②]
or 3.3V At “STB_3V3”
[Refer to check point③]
NG
OK
Change LED PCB Unit
Still No Display
Check the FFC cable is connect
correct (Main XP9 to LED XP1)
NG
OK
ange
Main PCB Unit
ange
Main PCB Unit
ange
Main PCB Unit
Connect correct or change
FFC cable
Bluetooth® Pairing failure
button on the unit to
turn on the unit.
button on the
unit to select
“BLUETOOTH”.
The bluetooth light is
quick flashing
[ ]
for 4sec. on the unit.
NG
NG
Connection of
OK
OK
Go to
“No Key Function”
Main PCB Unit
(The bluetooth LED is light)
Change
LED PCB Unit
NG
Go to
“No Sound (Bluetooth®)”
NG
No Key Function
Connect the AC
mains lead
3.3 V
at “STB_3V3”
[Refer to check point ③]
OK
Change KEY PCB
Check the FFC cable is
connect correct (Main
XP9 to LED XP1)
OK
Check the cable is
connect correct
(LED&BT XP2 to KEY
XP416)
OK
Change
Main PCB Unit
NG
Change
LED PCB Unit
NG
Connect correct or
change
FFC cable
NG
Connect correct or
change cable
NG
 Loading...