0
Normal
Normalise
Auto Setup
Pos. /Size
V-Pos
0
H-Pos
V-Size
Dot Clock
H-Size
Clock Phase
0
0
0
0
0
0
0
Normal
Normalise
Pos. /Size
V-Pos
H-Pos
0
V-Size
H-Size
Auto Setup
22
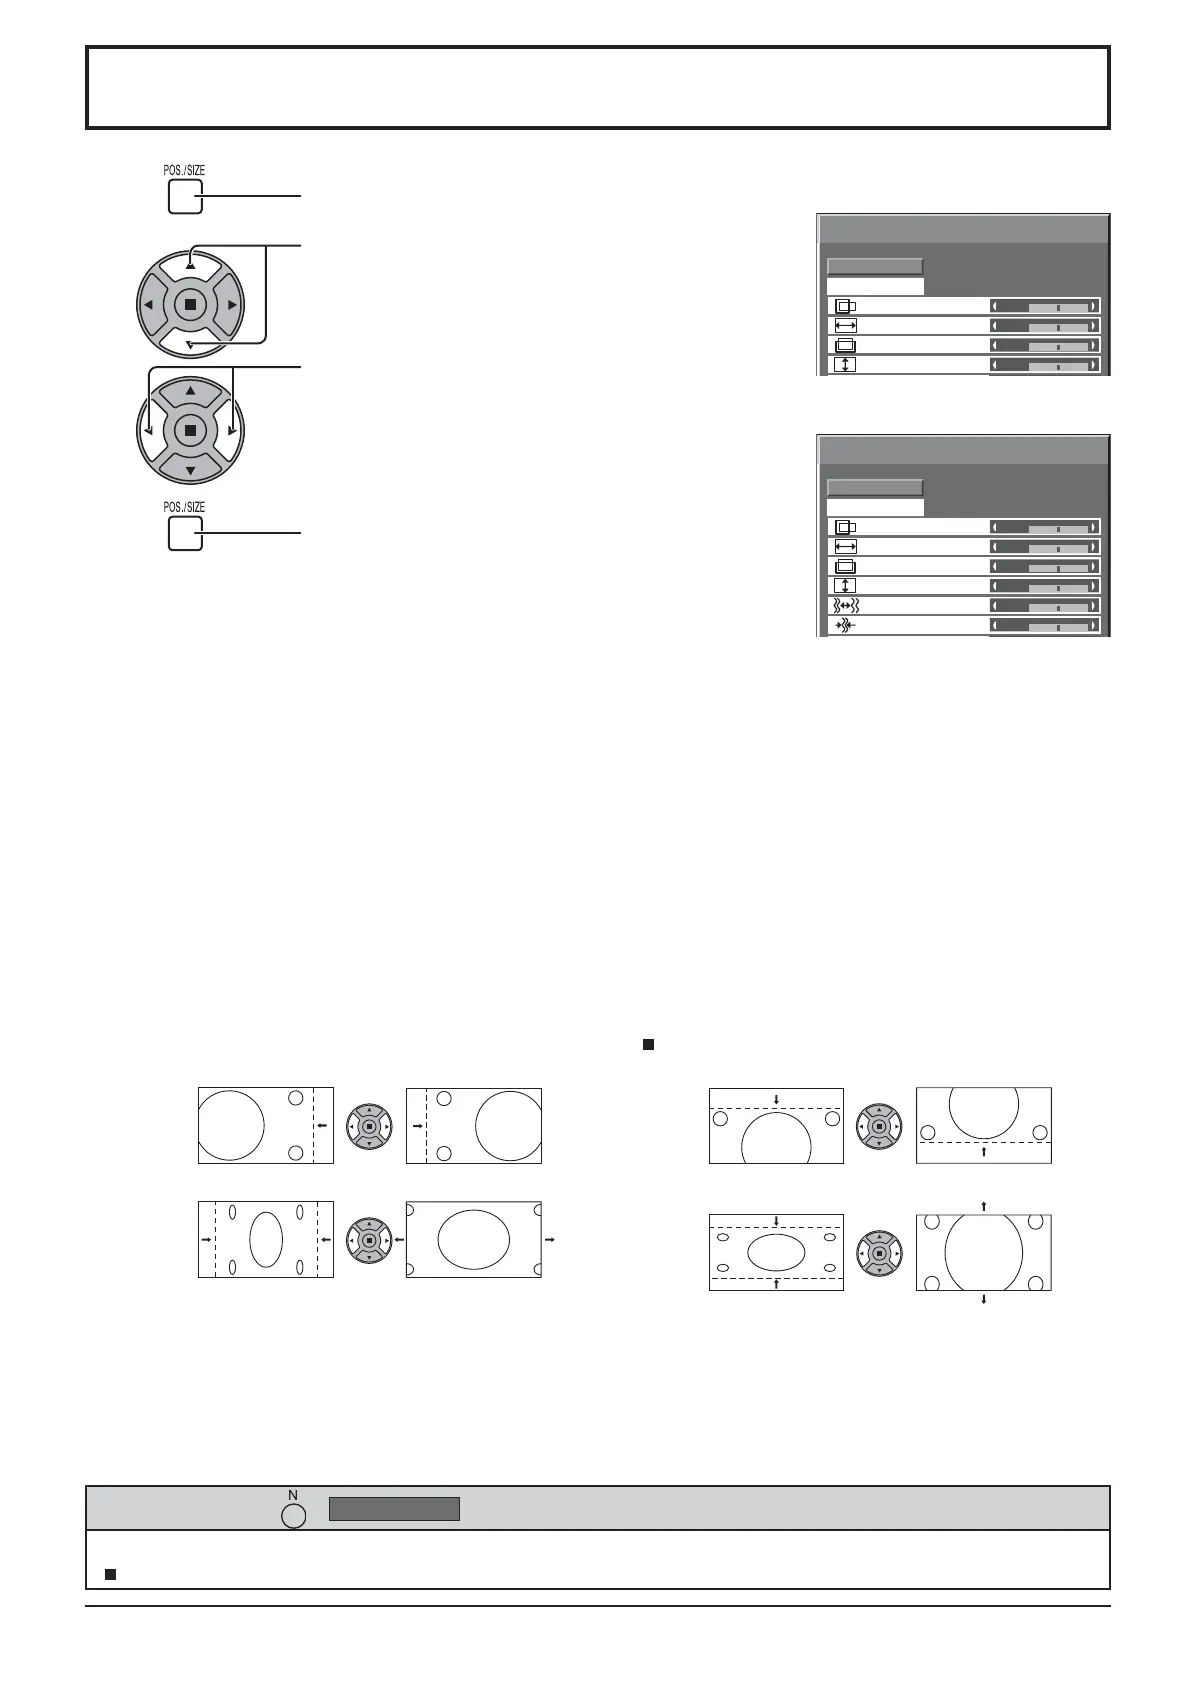
Adjusting Pos. /Size
1
Press to display the Pos. /Size menu.
Press to select the menu to adjust.
Press to adjust the menu.
Press to exit from adjust mode.
3
2
Notes:
• Unadjustable items are grayed out.
Adjustable items differ depending on the input signal and the display mode.
• Adjustment details are memorized separately for different input signal formats (Adjustments for component signals are
memorized for 525 (480) / 60i · 60p, 625 (575) / 50i · 50p, 1125 (1080) / 60i · 50i · 60p · 50p · 24p · 25p · 30p · 24sF,
1250 (1080) / 50i, 750 (720) / 60p · 50p each, and RGB/PC/Digital signals are memorized for each frequency.)
• If a “Cue” or “Rew” signal from a VCR or DVD player is received, the picture position will shift up or down. This picture
position movement cannot be controlled by the Picture Pos./Size function.
• If adjusting the Picture V-Pos/V-Size in Panasonic Auto with 16:9 mode, the adjustment is not memorized. When
exiting the mode, the screen will return to a former adjustment.
4
During “Video (S Video)”, “Digital”,
“SDI” and “HDMI” input signal.
During “Component”, “RGB” and
“PC” input signal.
While the Pos. / Size display is active, if either the N button on the remote control is pressed at any time or the ACTION
( ) button is pressed during “Normalise”, then all adjustment values are returned to the factory settings.
Helpful Hint ( /
Normalise
Normalisation)
Auto Setup
Automatically adjust H-Pos / V-Pos / Clock Phase / Dot Clock and set H-Size / V-Size the standard
value when RGB signal is input.
Notes:
• If the dot clock frequency is 108 MHz or higher, Dot Clock cannot be made.
• If the image is that the edge is hardly gured out or shadowy, that cannot be adjusted automatically.
In such case, press Auto Setup again after changing the image to the clearer one.
• When DVI-D is input, Clock Phase cannot be adjusted automatically.
•
Select Normalise in Pos. /Size and press the ACTION ( ) button when appropriate adjustment cannot be made.
H-Pos Adjust the horizontal position. V-Pos Adjust the vertical position.
H-Size Adjust the horizontal size. V-Size Adjust the vertical size.
Dot Clock (During “Component”, “RGB” and “PC” input signal)
Periodic striped pattern interference (noise) may occur when a striped pattern is displayed. If this happens,
adjust so that any such noise is minimized.
Clock
Phase
(During “Component”, “RGB” and “PC” input signal)
Eliminate the ickering and distortion.



 To Next Page