1
Confi guration of Wireless LAN [USER1] - [USER3]
Select [USER1] – [USER3] for [Wireless LAN]
Wireless LAN
Save
Wireless LAN
Name Change
USER1
DHCP
Off
IP address
192.168.11.100
Subnet mask
255.255.255. 0
Gateway
192.168.11.1
SSID
Set [DHCP]
When [
] is selected, IP address and other settin
s can be set manuall
.
Name Chan
ou can chan
e the user name.
nterin
characters pa
e 1
H
DHCP client function
n
If a DHCP server exists in the network to which the displa
is
onnected, the IP address will automaticall
be acquired
I
a DH
P server does not exist in the network to which the
displa
is connected, additionall
set [IP address], [Subnet mask]
nd [Gatewa
]
IP address
Displa
of IP address and settin
Enter the IP address if DHCP server is not used.
Subnet mas
Displa
in
and settin
the subnet mask
If not usin
a DHCP server, enter the subnet mask.
atewa
Displa
of
atewa
address and settin
Enter the
atewa
address if DHCP server is not used.
[DH
P] is set to [
n], the IP address and other items are not displa
ed.
heck the [Network
tatus] pa
e
or •
the current IP address and other items.
ee pa
e 20
Before usin
the DHCP server, make sure the DHCP server is alread
functionin
•
For details o
IP address, subnet mask, and
atewa
, ask the network administrator.•
wired LAN and wireless LAN cannot be used in the same se
ment
•
Network Settin
Select [Save] and press
utton
ave the current network settin
s
efault settin
s of [M-DIRECT
The
ollowin
settin
s as [M-DIRE
T] in the [Wireless LAN] are set be
ore the Displa
leaves the
actor
.
IP address 1
2.1
.11.1
ubnet mask 2
.2
.2
.
SSI
-DIRE
T + The last 4 di
its o
the Displa
ID
Channe
e
The same strin
as the SSID
Wireless Network
Standb
ff
for TH-80LFB70U, TH-80LFB70W
Wireless WEB Control
f
The authentication method is WPA2-PSK, and the encr
ption method is AES. Both methods are fi xed
•
hen
ou need to chan
e initial con
uration o
[M-DIRE
T], please contact
our network administrator
•
ake sure the initial Ke
is chan
ed
or sa
et
.•
s the DHCP server is alread
functionin
, select [
N] before connectin
a computer.•
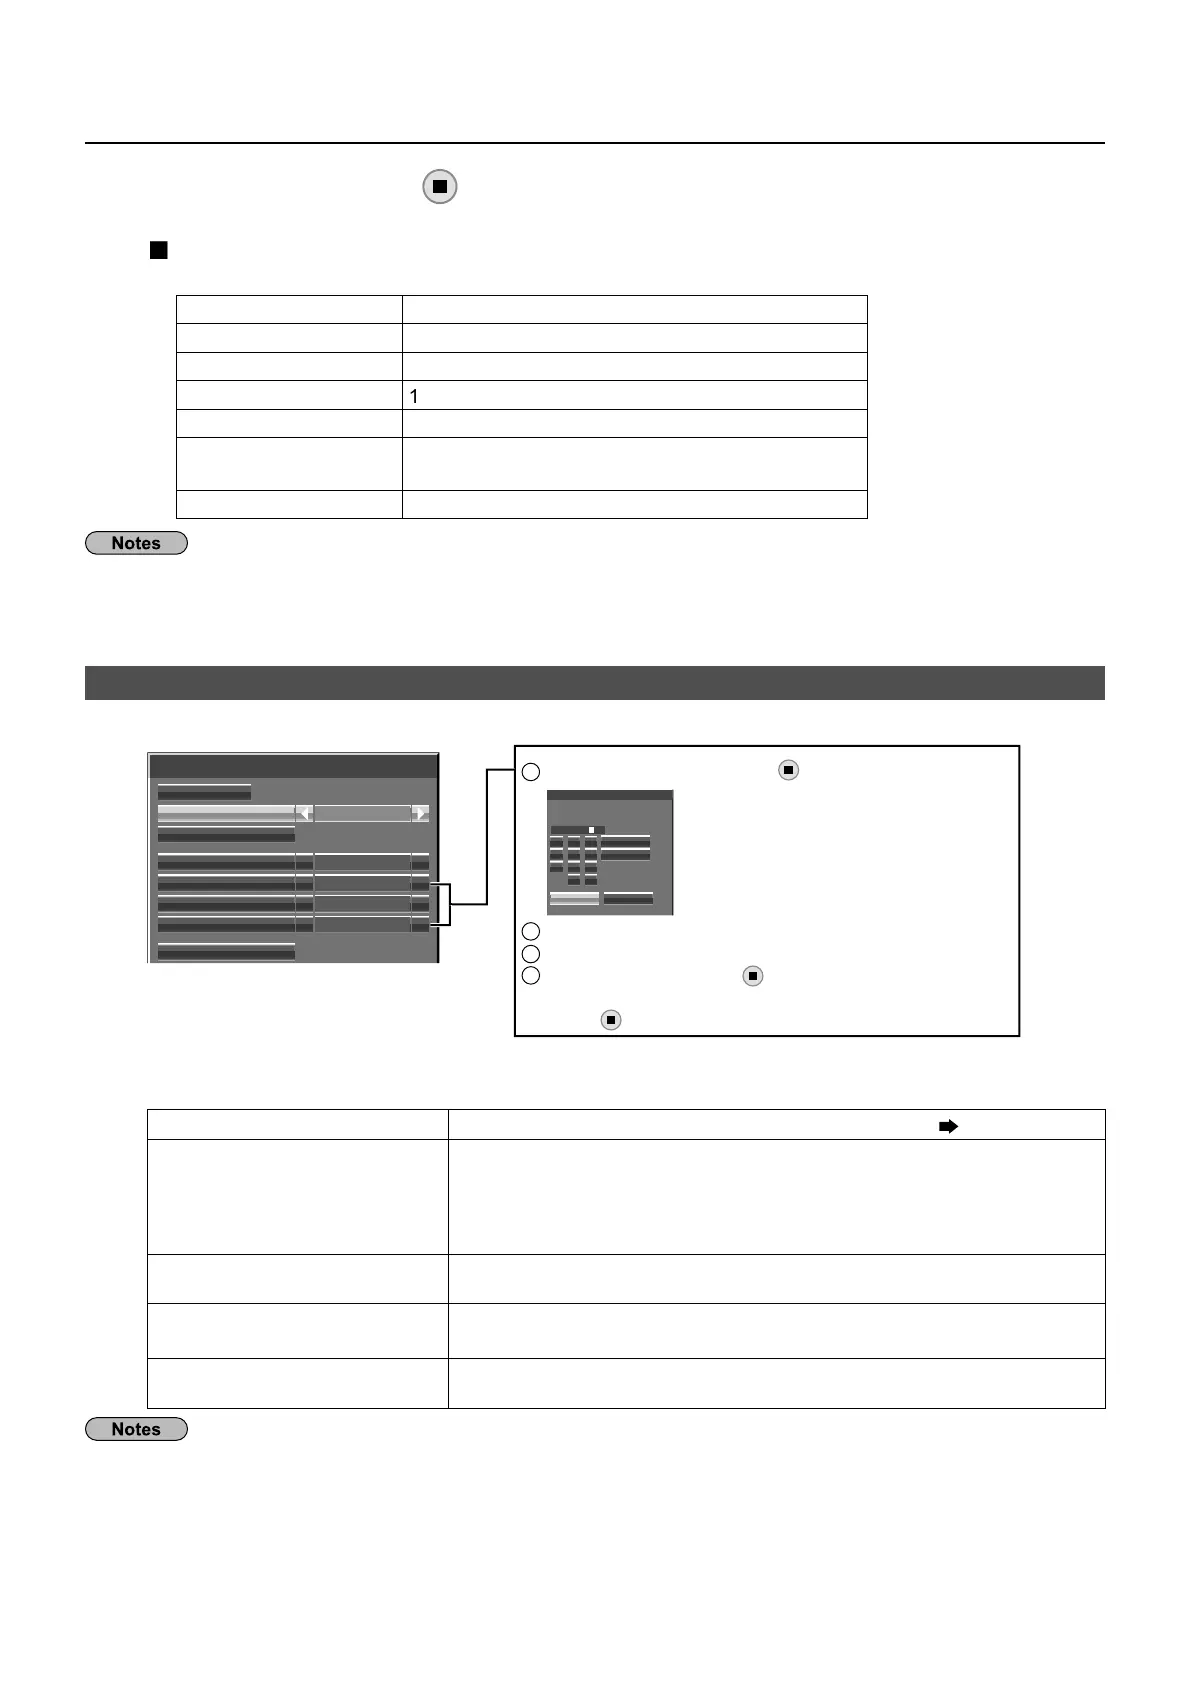
1
Select the item and
ress
tt
n.
IP address
Ok Cancel
All delete
Delete
1 2 3
4 5 6
7 8 9
0 .
000.192.168.11
2
Delete the current numbers.
[Delete] or [All delete]
3
Enter numbers and dots using numeric keypad on the screen.
4
Select [
k] and press
tt
n.
To cancel changing the address, select [Cancel] and
tt
n.
 Loading...