1-6
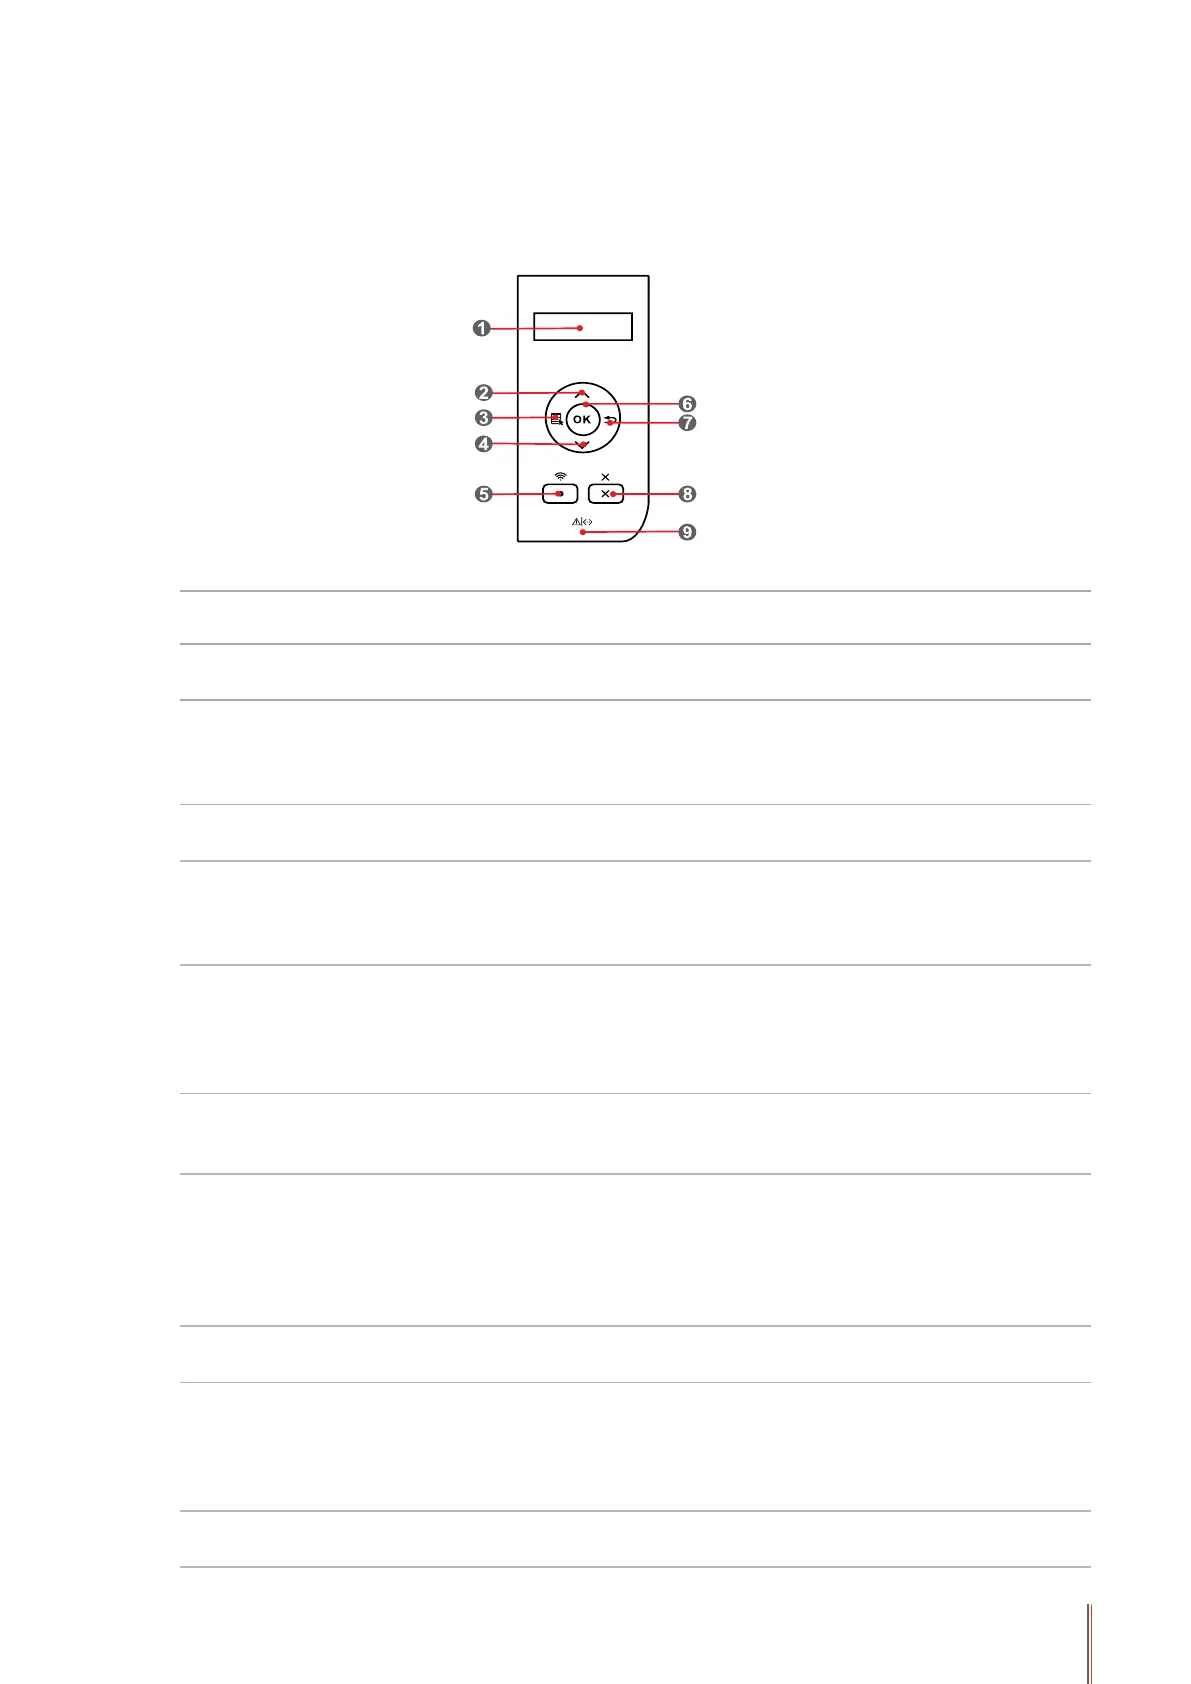
1.4. Control Panel
1. Layout and Functions of Control Panel
The layout of the printer control panel is shown below:
No. Name Functions
1 LCD Display
The display provides information about the printer and can be
used for setting up the Product Settings.
2 UP
Press this button to browse through each menu and its
options.
For menu items need to input, change the numeric value by
cycle accumulating.
3 Menu
Open the main menu of the control panel to conduct the menu
setting.
4 Down
Press this button to browse through each menu and its
options.
For menu items need to input, move the position of the cursor,
e.g., IP address input.
5
Wi-Fi/Conguration
Report
This button can enable the Wi-Fi feature and indicate the Wi-Fi
connection status (only applicable to Wi-Fi model).
For non-Wi-Fi model, this button will be used to print the
"Printer Information Page" and the "Network Conguration
Report".
6 OK
• Press this button to save the settings.
• Open the submenu on the display of the control panel.
• Select the menu item.
7 Back
Back Arrow Button: use this button to perform the following
operations:
• Exit the control panel menu.
• Scroll back to the previous menu in the list in the submenu.
• Return to the previous menu; if already at the top menu,
return to the Ready interface.
8 Cancel
Press this button to cancel the operation.
Cancel the current printing operation if there is any.
9 Status Indicator
This light indicates the ready, alarm and other statuses of the
printer.
Green light: Normal.
Orange light: Alarm or cartridge toner level is low.
Red light: Error.
10 Power Indicator
Green for starting up, working, and sleeping; while staying on
indicates the power supply is ready