8
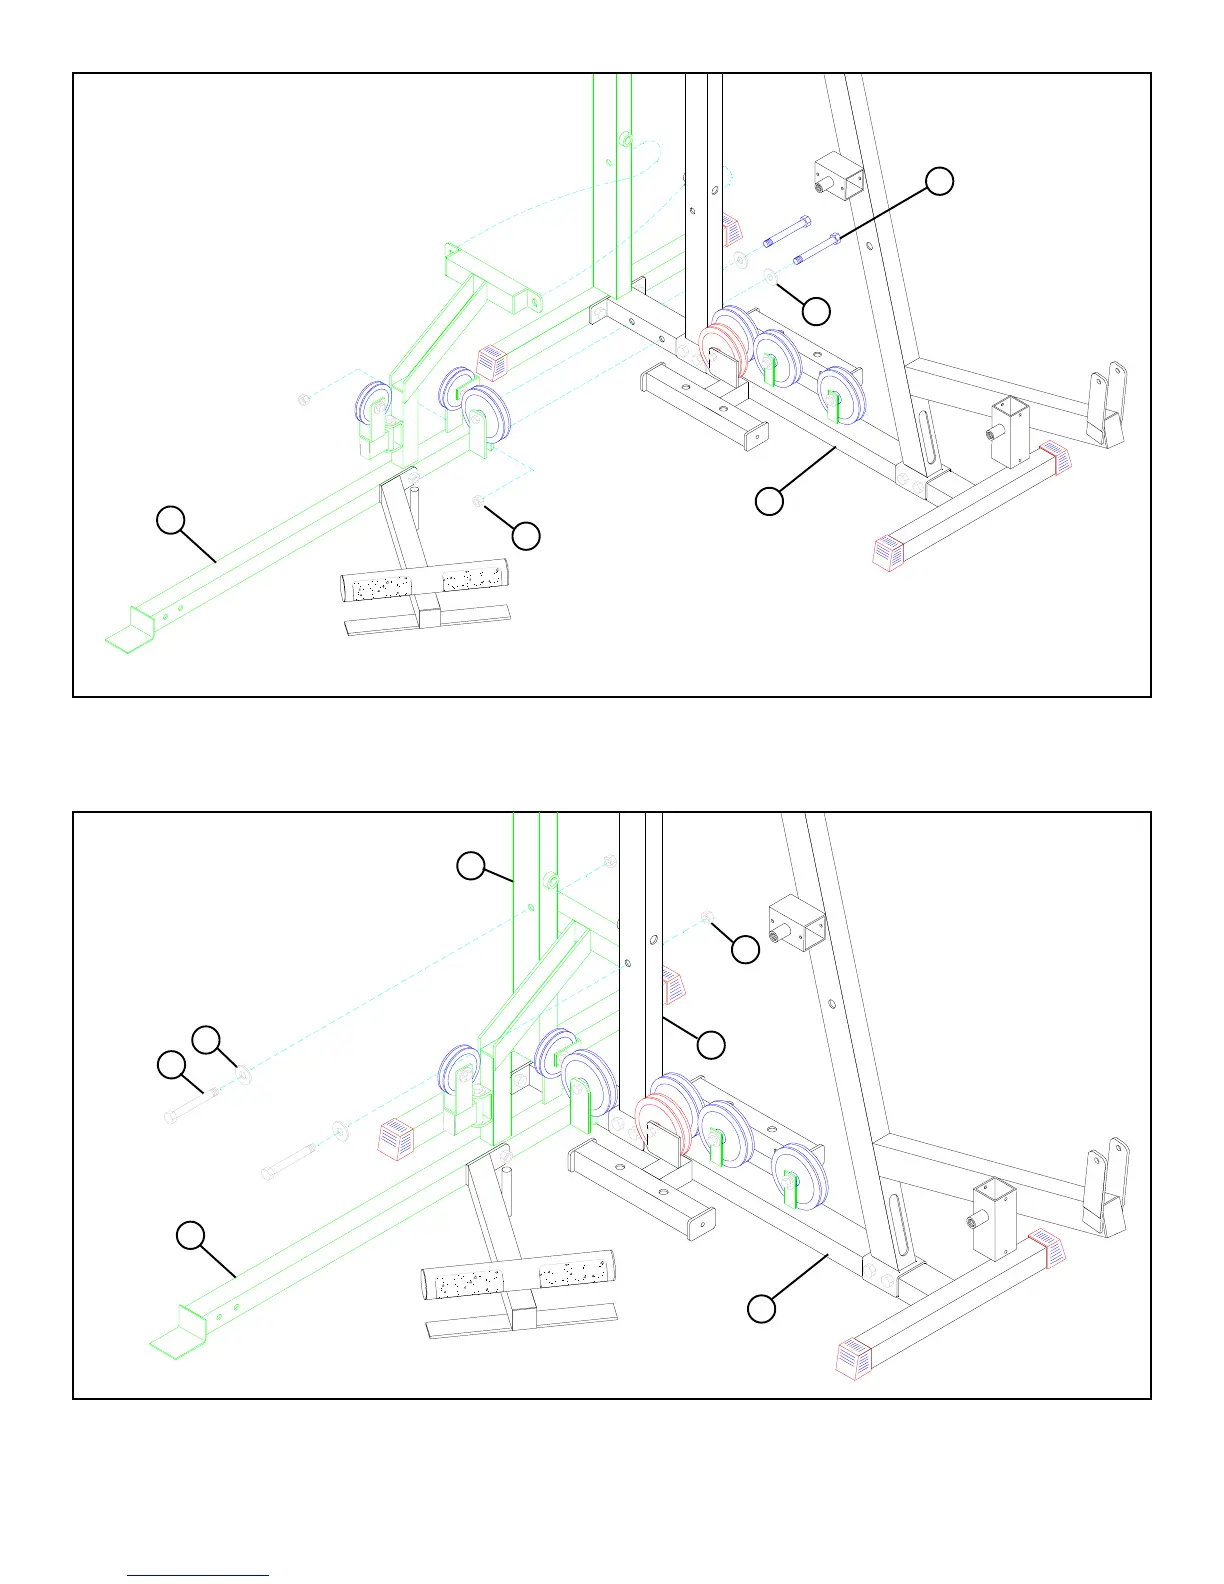
FIGURE 5
STEP 5
• LOOSELY assemble the PRESS BASE (18) to the BASE (1) using two 1/2 X 4” BOLTS (88), two 1/2” WASHERS (93), and two
1/2” LOCK NUTS (94). See FIGURE 5.
FIGURE 6
STEP 6
• LOOSELY assemble the PRESS BASE (18) to the REAR (4) & MIDDLE UPRIGHTS (8) using two 1/2 X 3” BOLTS (87), two
1/2” WASHERS (93), and two 1/2” LOCK NUTS (94). See FIGURE 6.
88 1/2 X 4”
18
1
94
93
1
1/2 X 3” 87
18
94
93
8
4



 To Next Page